
Configure Azure AD as SAML IDP
This topic describes how to configure Azure AD (Active Directory) as a SAML identity provider.
Before you begin
| Pre-requisite | Description |
|---|---|
| Create Your Azure Account | If you don't already have an Azure account, you should create one to proceed with the SAML configuration. Visit https://azure.microsoft.com/en-us/free/ to sign up for a free account. Make sure your account has sufficient privileges to perform the SAML configuration. |
| Set Up Your Enterprise Application | Do the following to set up an enterprise application in Azure with the
necessary configuration.
|
| Associate Users and Groups | For the SAML setup to work, you have to associate at least one user and one
group with the enterprise application. This is important for the authentication
process.
|
About this task
- Create a SAML App in Azure (performed by your skilled IT Azure Expert).
- Configure Azure Metadata XML in Proficy Authentication. (performed by the Application Administrator.)
See also, Troubleshooting.
Procedure
-
Download the SAML Metadata file
-
Navigate to and download the UAA
saml-sp.xmlmetadata file.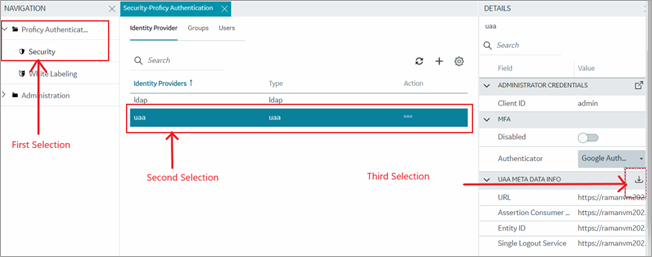 The metadata file is downloaded to your browser's Download section.
-
Navigate to and download the UAA
-
Upload the saml-sp.xml File to Azure AD
-
After logging in, select Azure Active Directory.
Tip: You can find it under recent services, or by using the search option.
Under recent services: 
Run a search using the search bar: 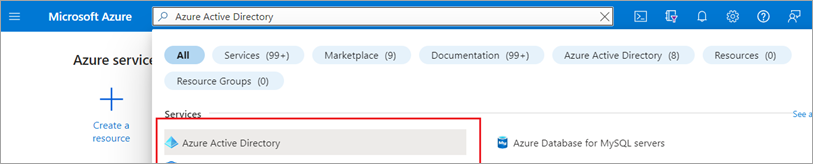
-
Under Azure Active Directory, locate the enterprise application to which you
want to establish a SAML connection.
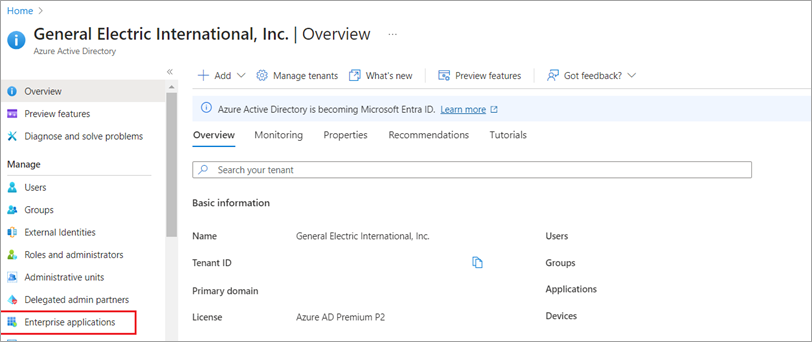 Tip: You can locate the application from recent searches, or running a search.
Searching application: 
If needed, request your IT Azure Expert team to create a new application from here: 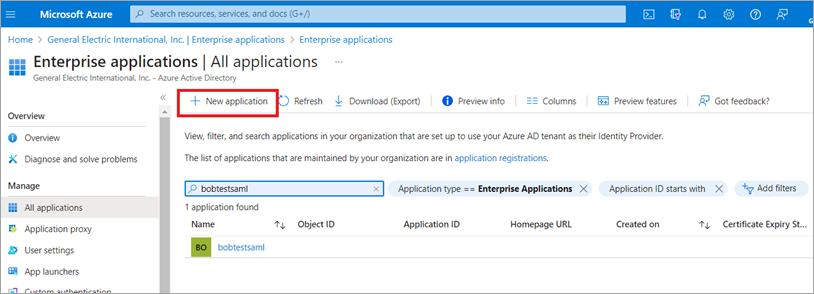
-
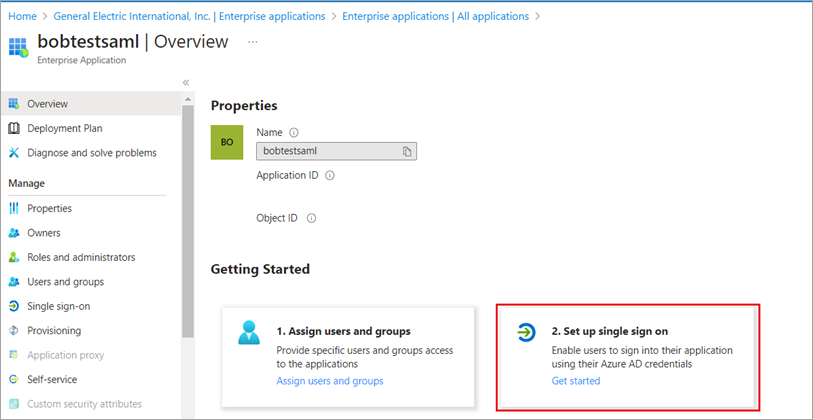
Open the enterprise application and select Set up single sign
on.
-
Select Upload metadata file and upload the
saml-sp.xmlfile we downloaded in the earlier step.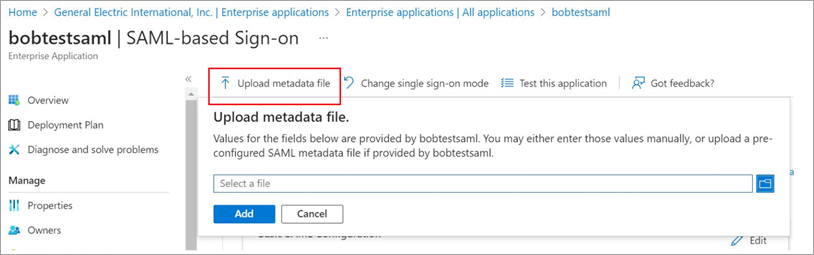
-
After the file is uploaded successfully, Azure displays the information from
the
saml-sp.xmlfile.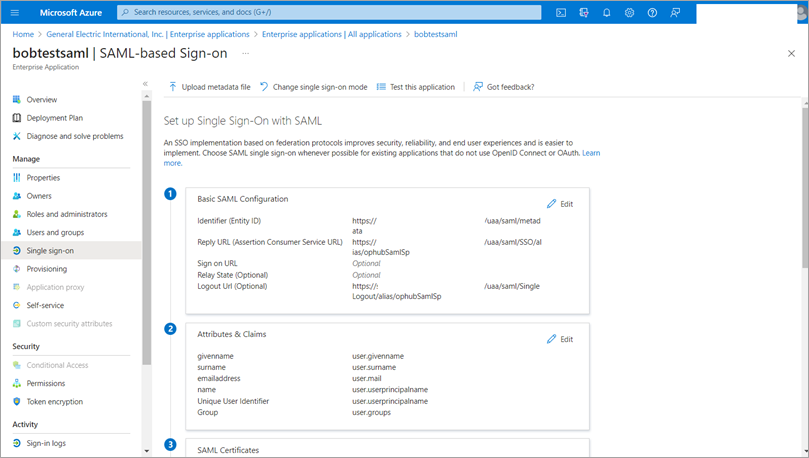
-
After logging in, select Azure Active Directory.
-
Perform User and Group Attribute Mapping in Azure
-
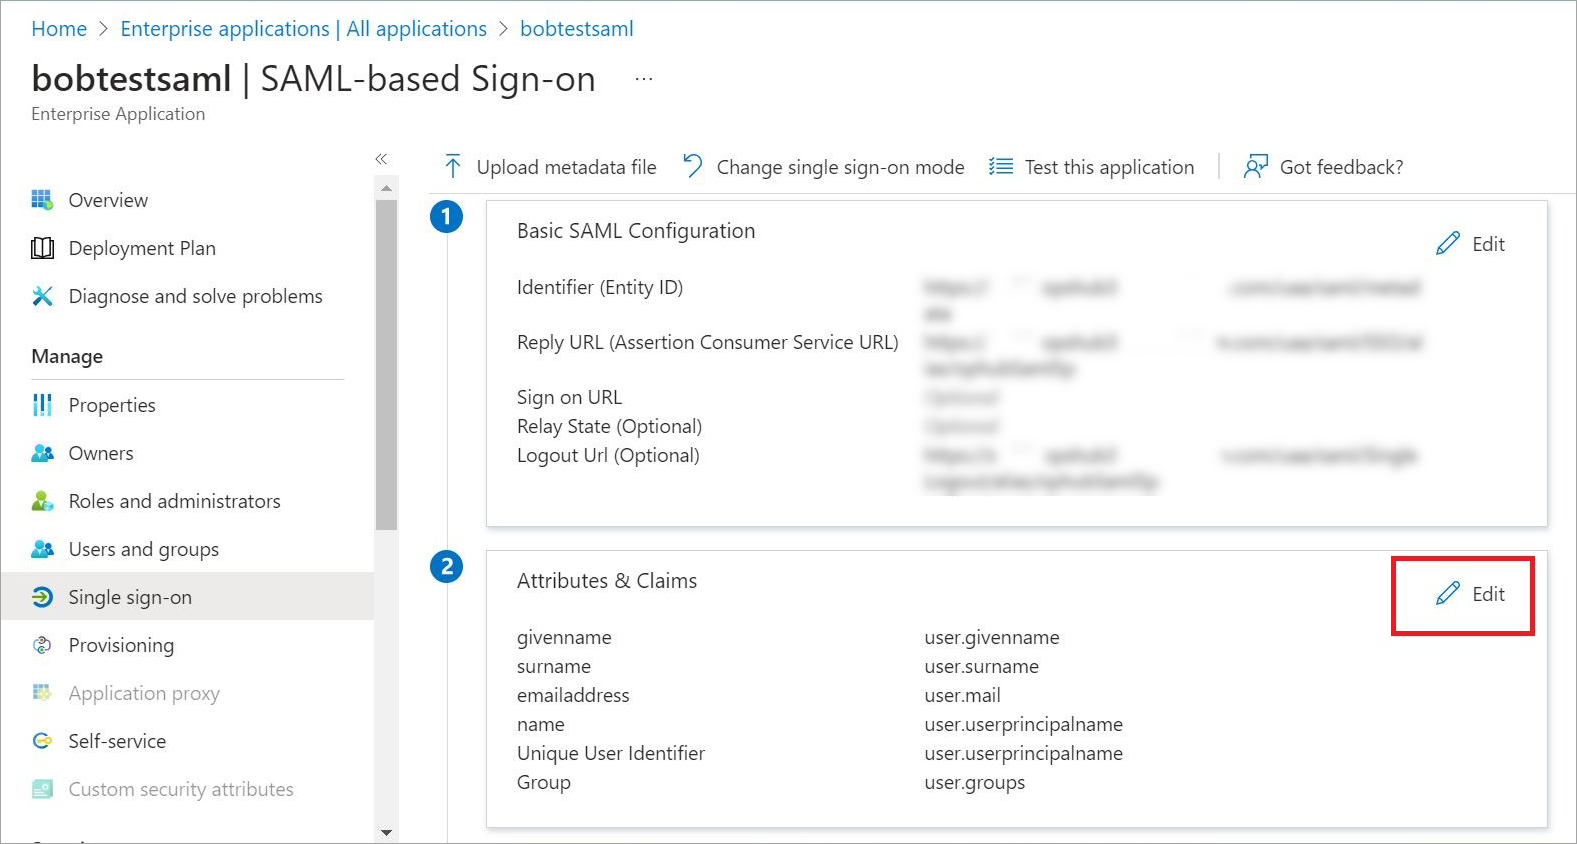
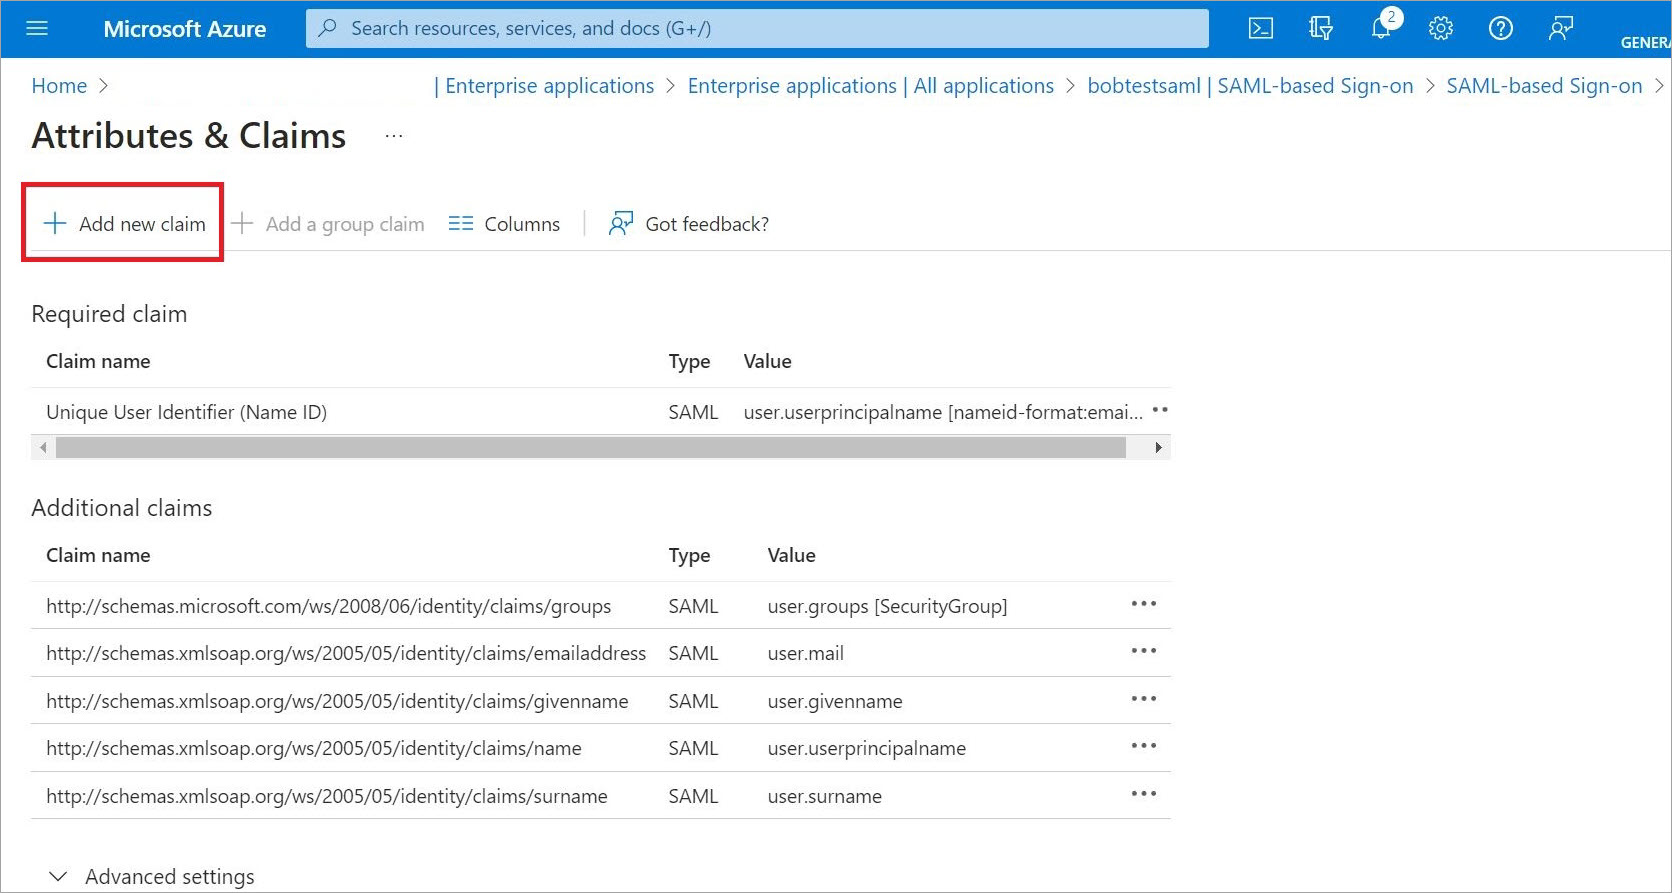
In the enterprise application, under User Attributes &
Claims section, select Edit.
-
Select Add new claim.
-
Enter claim details, and save the information.
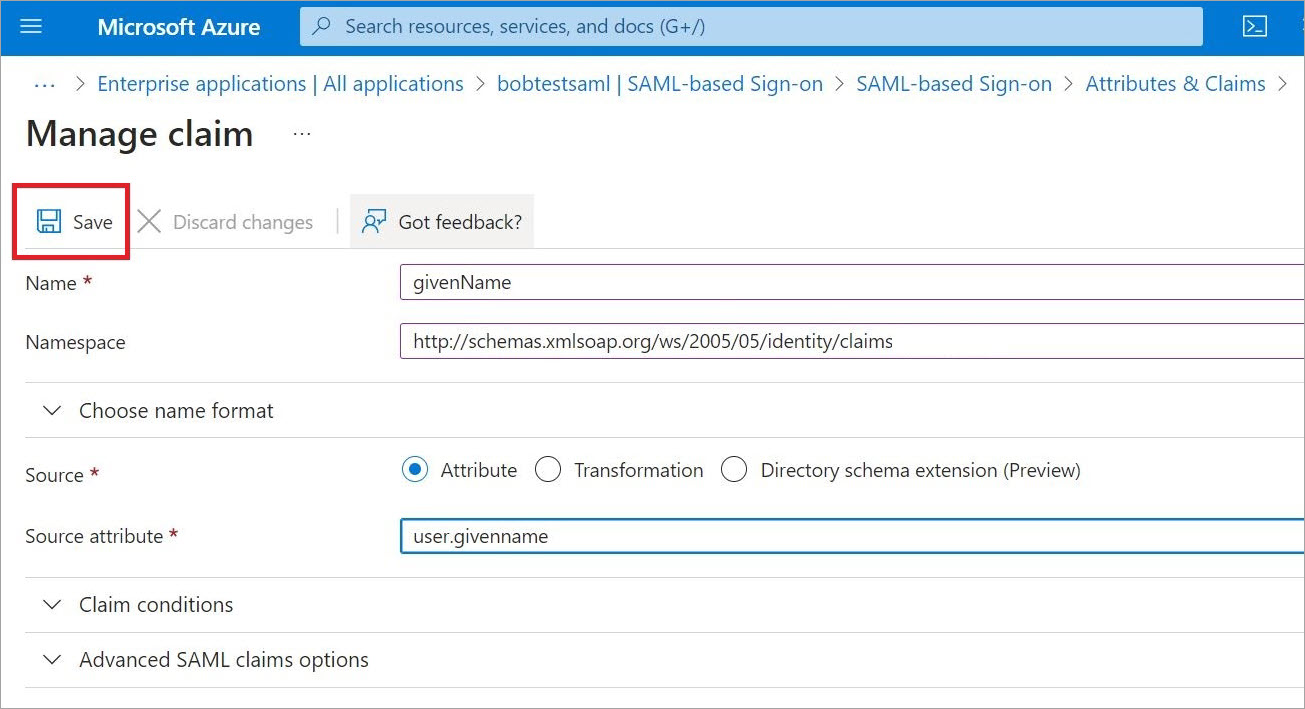 Note: Make a note of the Namespace value. This value will be used later while setting up SAML Connection in Proficy Authentication.
 -
To set up group claims, select Add a group
claim.
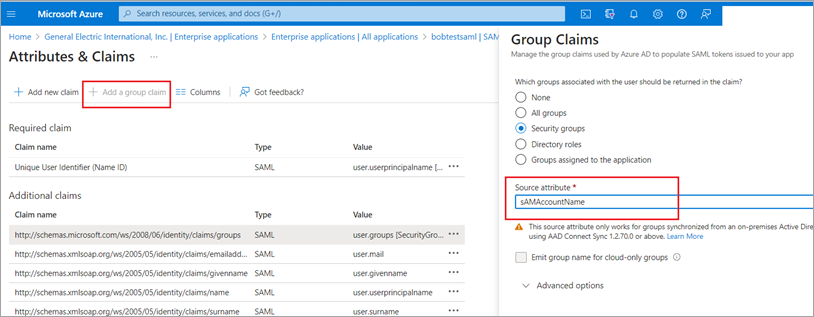 You can choose to provide Advanced options for the group claim as shown in the following screen shot.
For example, string type is selected as
MESbecause we want to cast our groups to start with MES, You can select as per your choice. After updating the group claim, Attribute & Claims screen should look like as shown in the following screen shot. The highlighted claim name needs to be same while creating SAML Connection in Proficy Authentication.
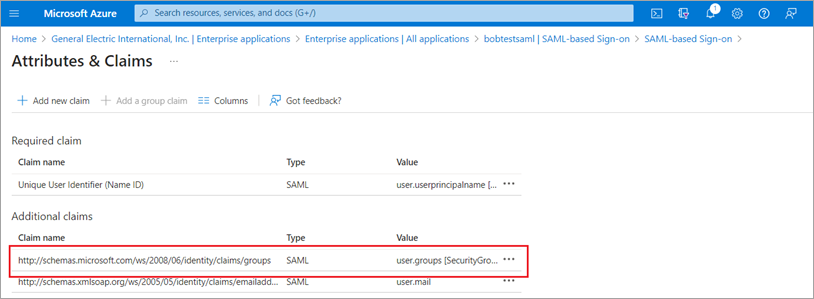
-
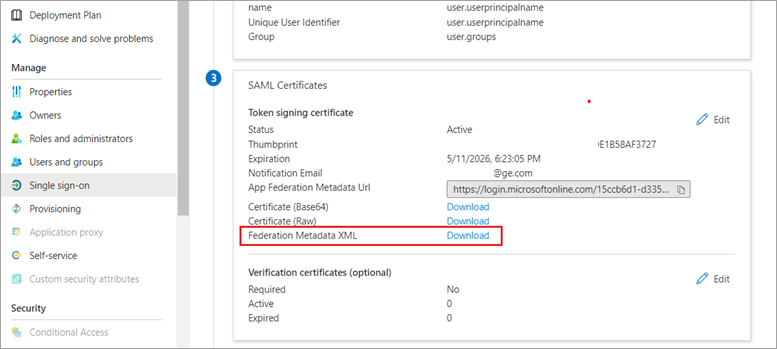
Under the SAML Signing Certificate section, download the
Federation Metadata XML file.
We shall upload this file later when creating a SAML Connection from Proficy Authentication.
-
In the enterprise application, under User Attributes &
Claims section, select Edit.
-
Create SAML Connection in Proficy Authentication
-
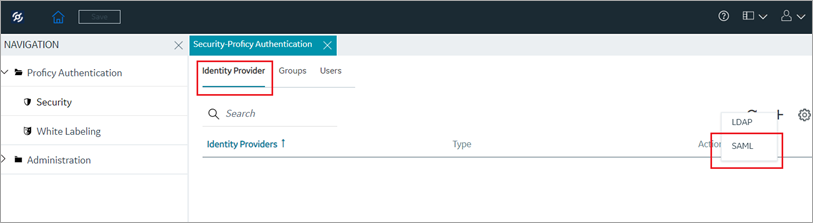
Select
 , then select
SAML.
, then select
SAML.
-
In the SAML Identity Provider pop-up screen, enter
details.
Field Name Description Upload XML File Upload the Federation XML downloaded from Azure. Refer to this step. Name Name of the SAML application. You can provide any name. Attribute Name Enter the Group Name mapping. Refer to this screen shot. Name ID From drop down, select format:unspecified.Enable SAML Link Select the check box. 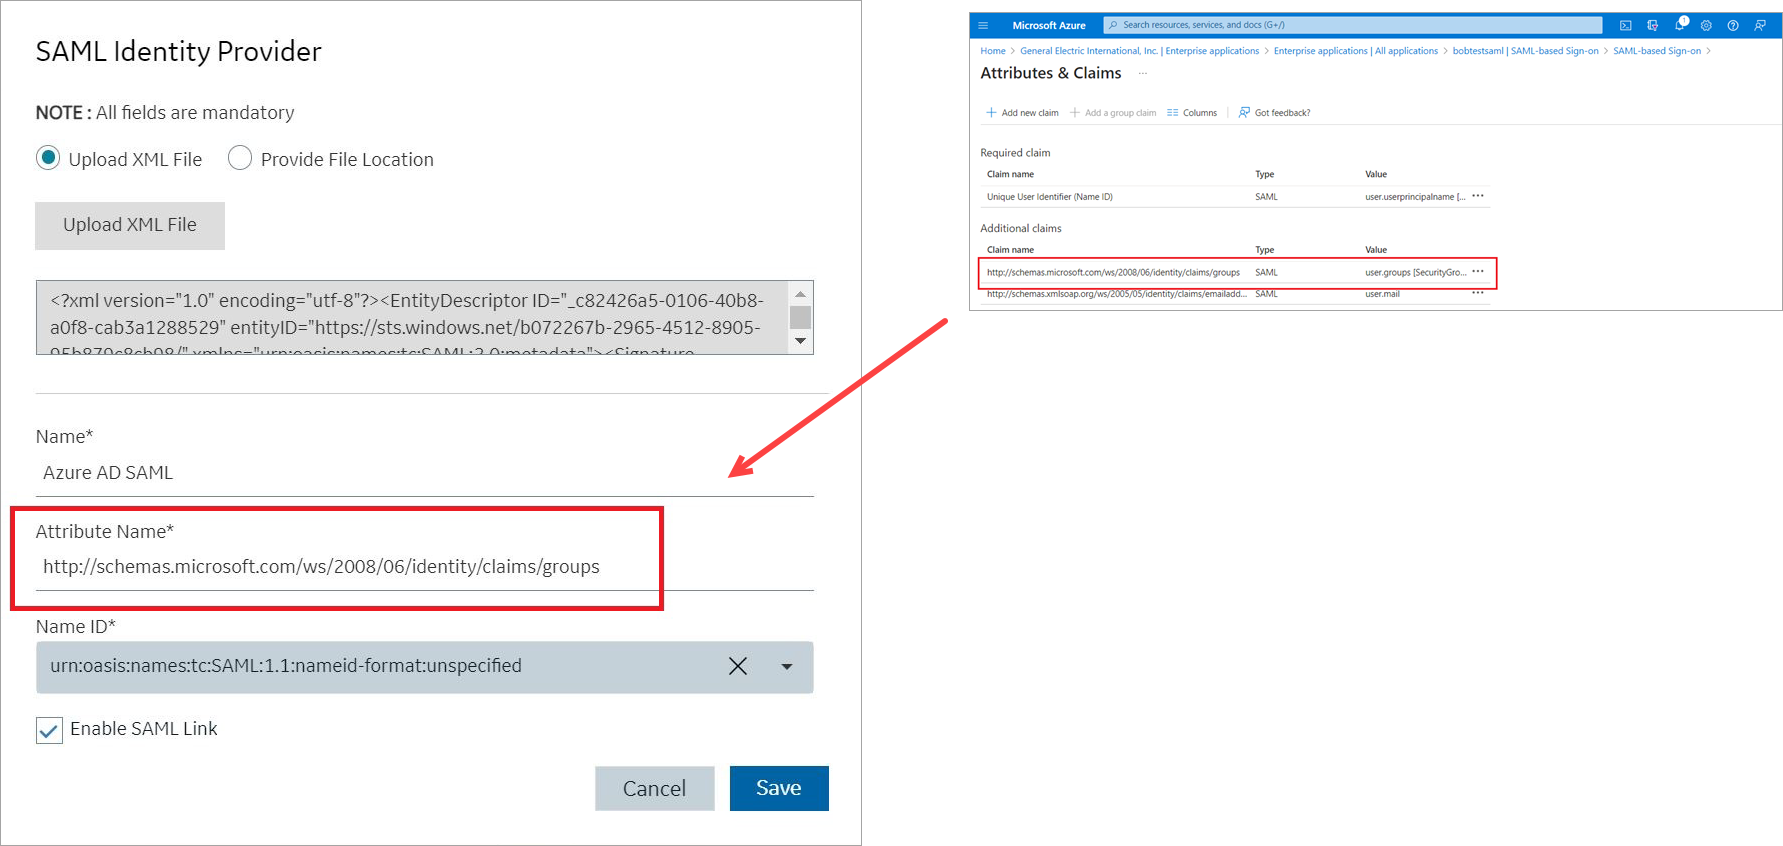 After successful SAML connection, the application screen should look something like this:
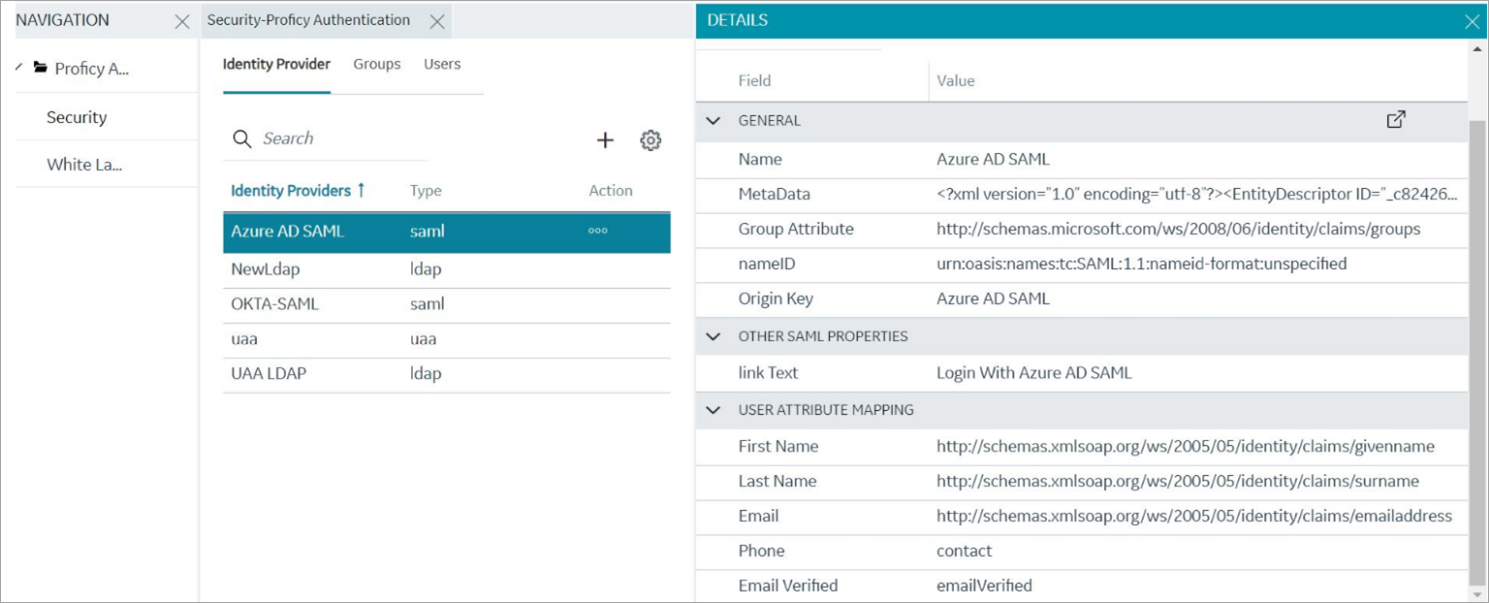 Important: You must perform User Attribute Mapping, which involves taking values from the Azure Attributes & Claims page and linking them to the Details section of the established SAML Connection in Proficy Authentication. Refer to the example screen shots below.
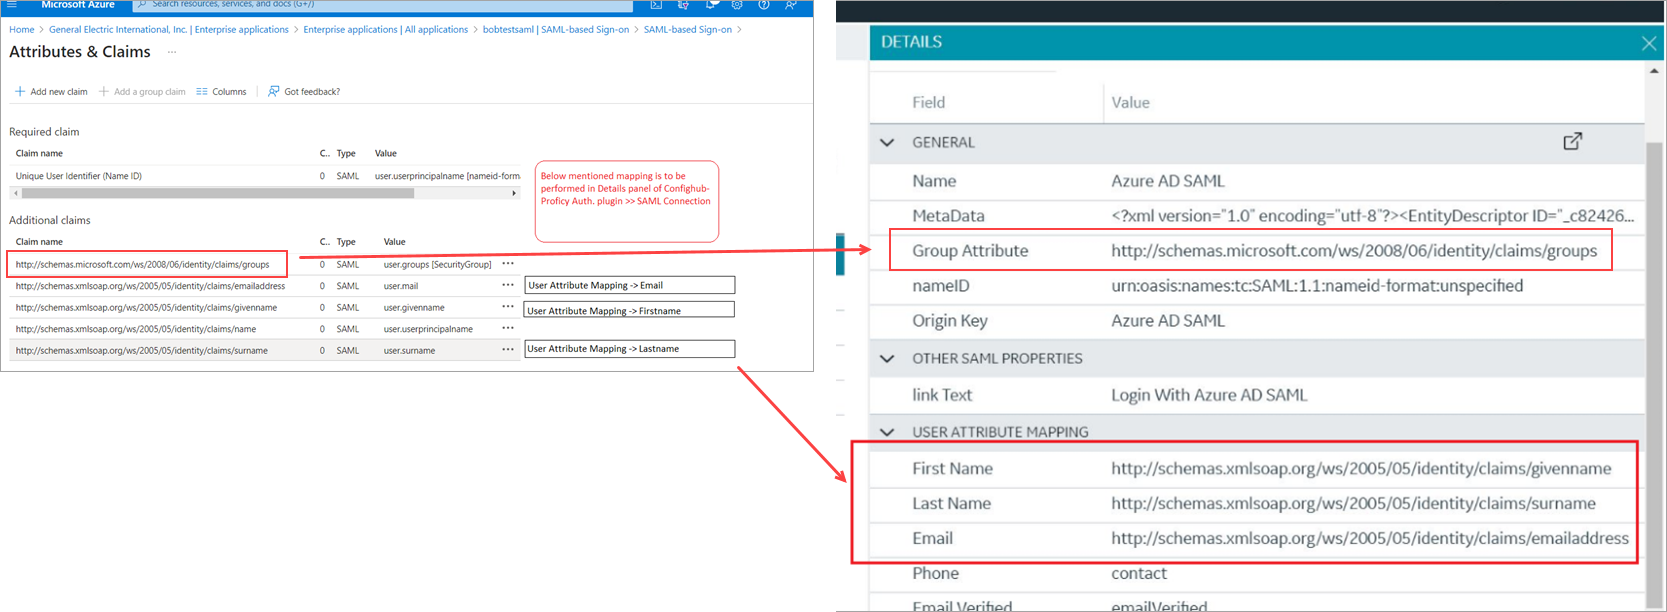
-
Select
-
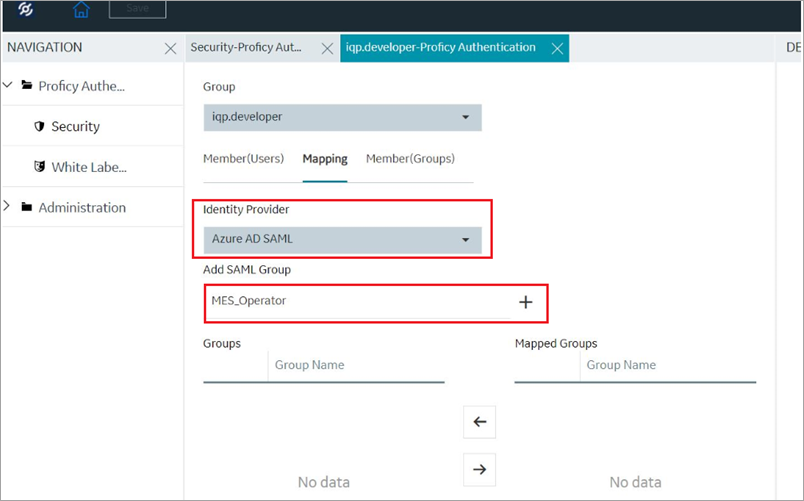
Adding and Mapping UAA and SAML Groups
-
To create SAML groups, enter the valid SAML group name in the Add
SAML Group field and select the plus icon.
-
Select
 to move the selected items from
Groups to Mapped Groups.
to move the selected items from
Groups to Mapped Groups.
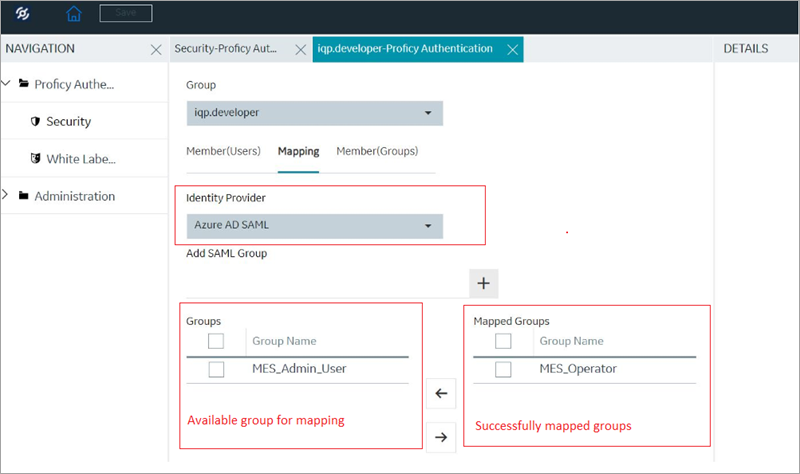
If the mapped SAML groups are valid, then all their users become a member of the Proficy Authentication group selected in step 5(b).
-
To create SAML groups, enter the valid SAML group name in the Add
SAML Group field and select the plus icon.
-
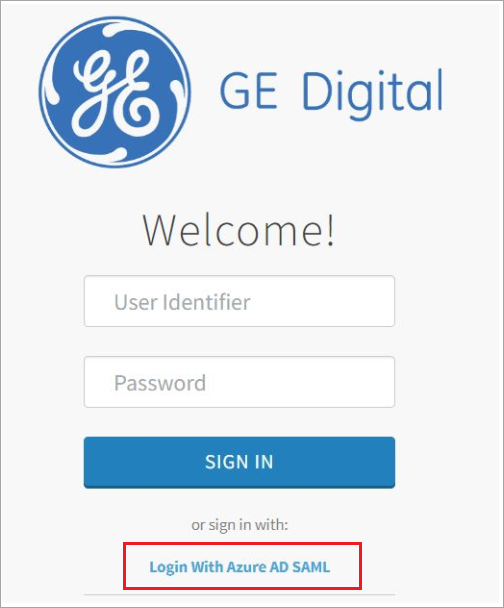
Test SAML Authentication
-
Select Sign In With Azure.
-
Select Sign In With Azure.
Troubleshooting SAML-Related Issues
Addressing Login Issues With Azure:
In Azure portal, you can access the logs to verify successful logins. This will help
establish a baseline for successful authentication. Whenever login access is denied,
closely review the login attempts in the logs.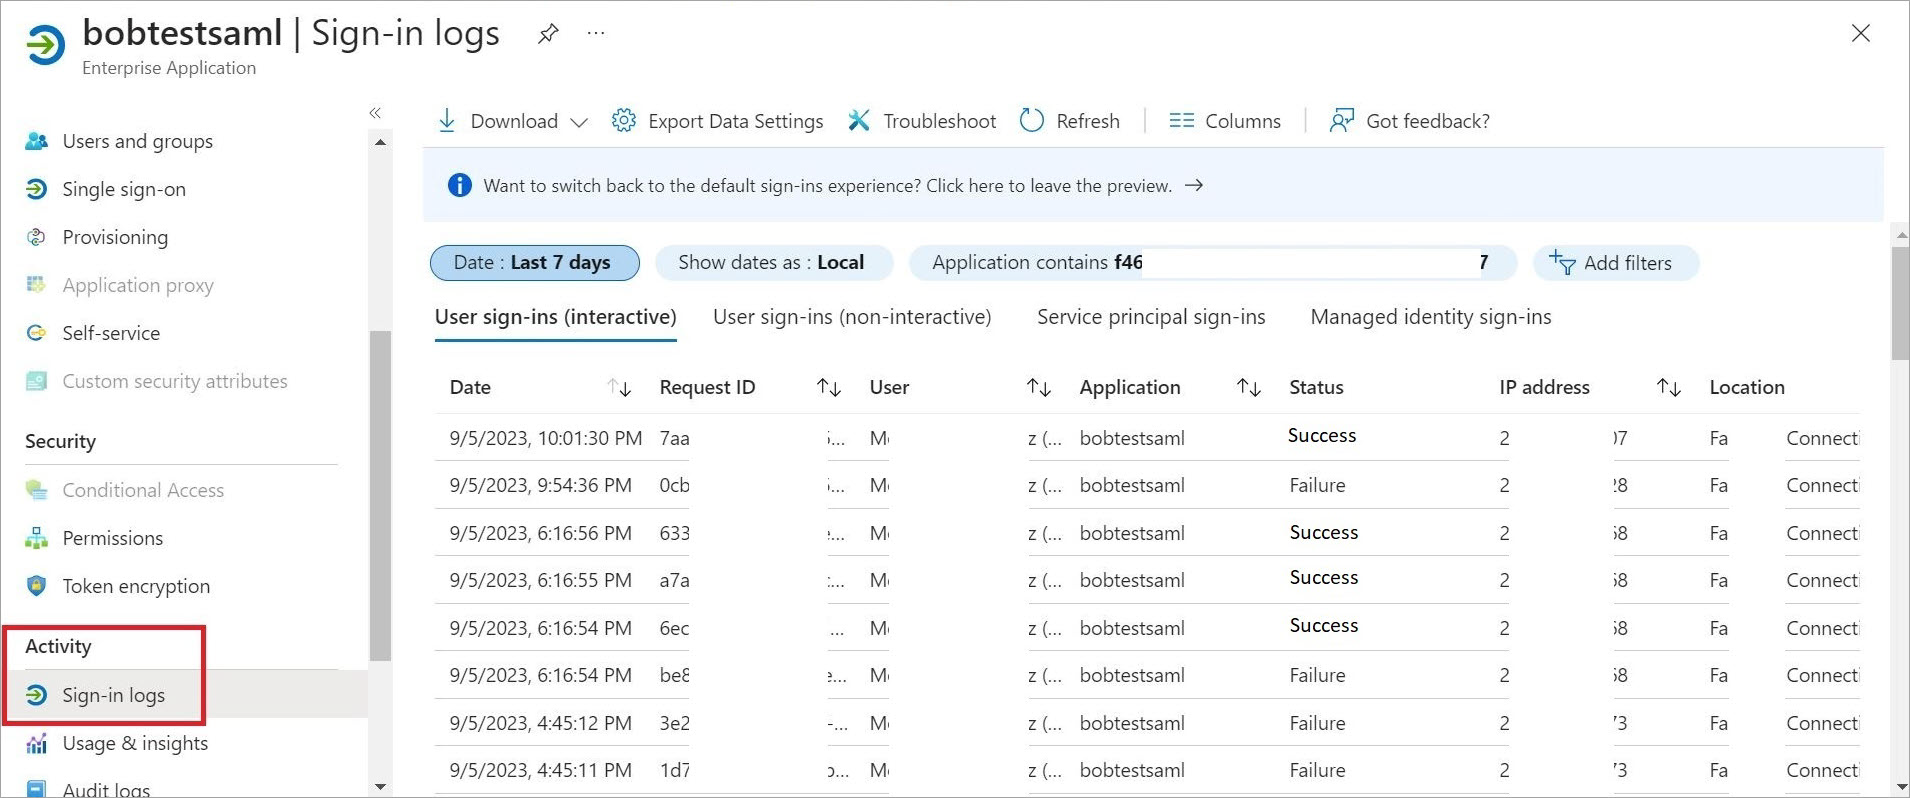
Addressing Login Issues Without Azure:
You can use the SAML-tracer extension for Chrome to diagnose and resolve SAML-related problems in Operations Hub. Follow these steps:
- Install SAML-tracer: Add the SAML-tracer extension to your Chrome browser.
- Access SAML-tracer: Open SAML-tracer from your browser extensions.
- Reproduce the Issue: Log in to Operations Hub as you normally would to reproduce the SSO login issue.
- Inspect SAML Messages: In SAML-tracer, look for
POSTmessages.- Select the specific POST message related to the SSO login attempt.
- Next select the Summary tab for detailed information about the SAML attributes exchanged.
- Review the SAML attribute names and values exchanged during the SSO attempt, and compare them against the expected values.
- If you notice that the SAML group attribute names are incorrect (refer to
screen shot), this could be the cause of the login issue.
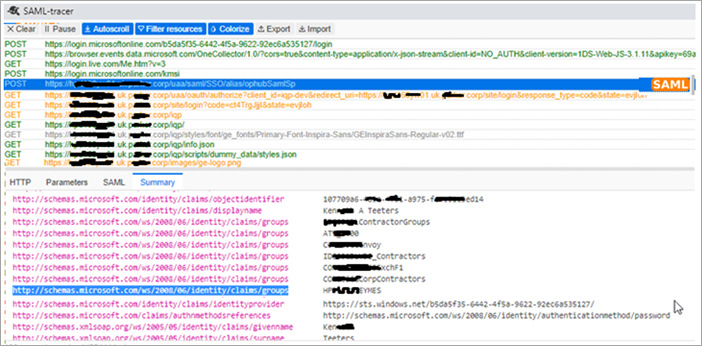
- Replace the incorrect attribute names with the correct ones to fix the login issue.
Retrieving Azure Login Screen:
In case you encounter a situation where the Azure login screen does not appear, then do
the following to address this issue:
- Check your SAML Azure configuration. Verify the group attribute name and the corresponding group name. Any mismatch in attribute names can lead to access issues.
- Clear your browser cache and login again.