
Enable SAML
This topic describes how to configure SAML identity providers for Proficy Authentication.
You should enable SAML prior to adding SAML IDP accounts in Proficy Authentication. To enable SAML, you will need to download the Proficy Authentication service provider's metadata file.
- Visit
https://enter FQDN of the machine where Proficy
                        Authentication is installed/uaa/saml/metadata
to download thesaml-sp.xmlfile. - To configure any SAML identity provider, gather information from the downloaded
saml-sp.xmlfile. - Generate a metadata XML file from the configured identity providers, and use the file to add a SAML IDP account in Proficy Authentication.
Refer to the following examples on how to set up SAML identity providers for Proficy Authentication:
SAML Configuration Flow
The following diagram is a visual representation of the key components involved in the SAML configuration flow.
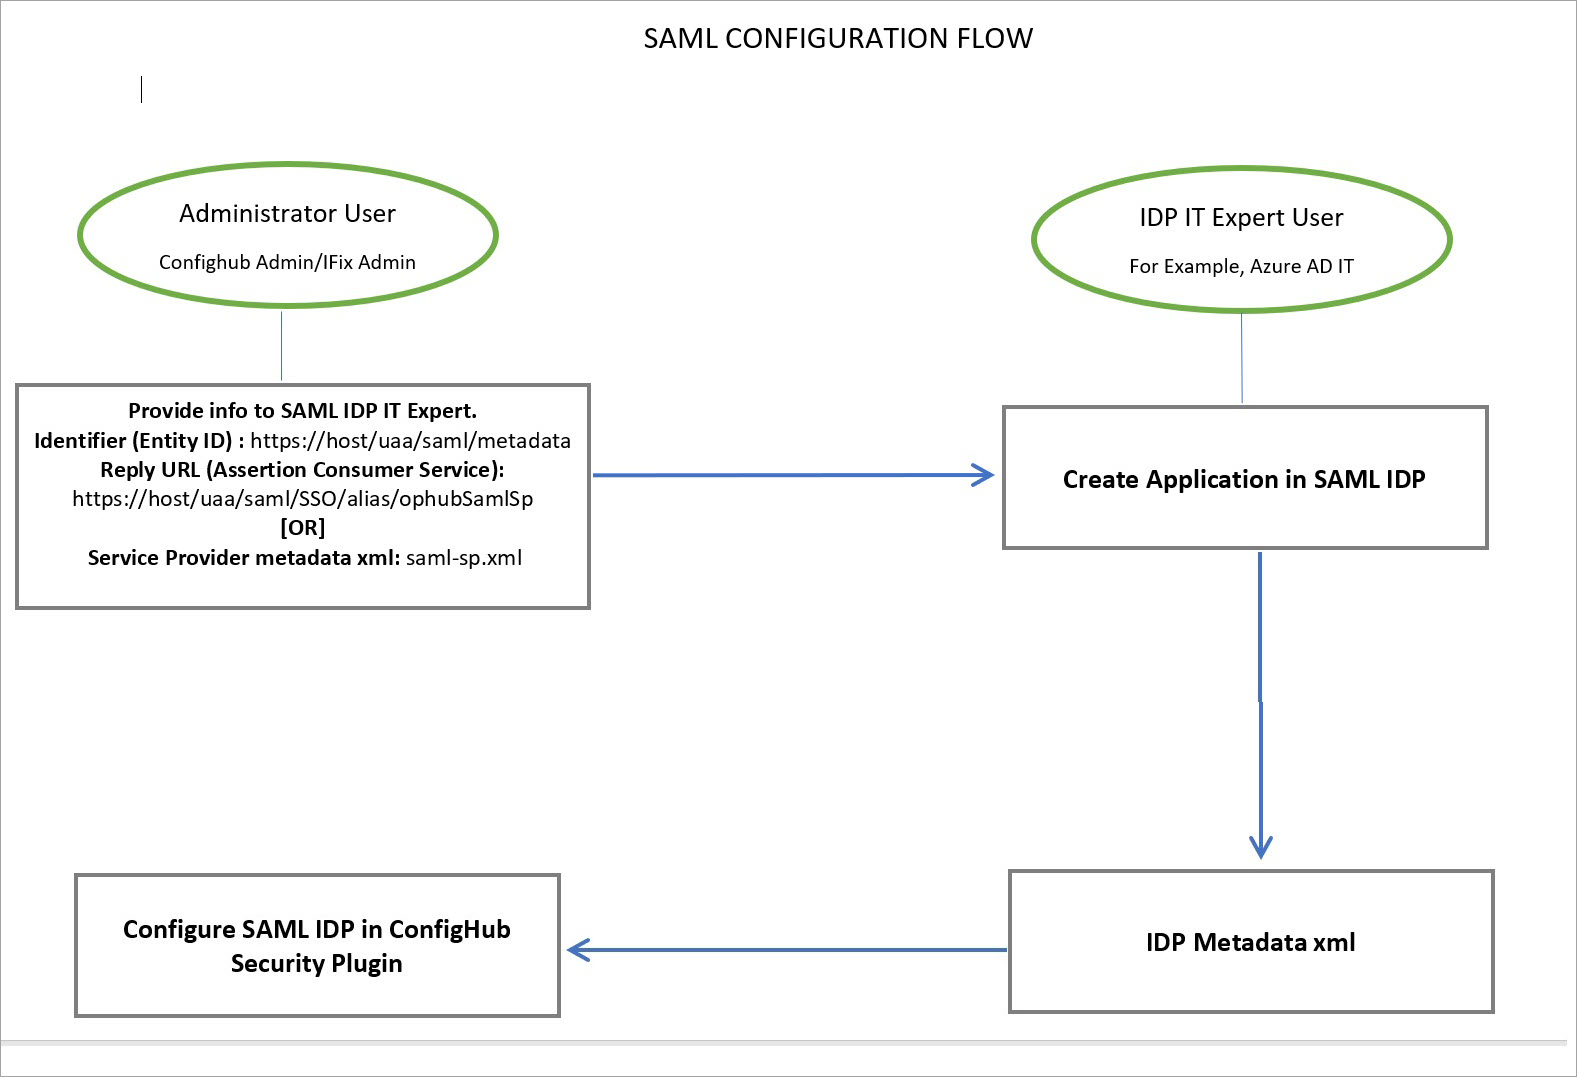
In the SAML configuration flow, Proficy Authentication Service acts as a SAML Identity Provider (IDP). You must configure Proficy Authentication Service as an IDP by providing it with the necessary SAML metadata and settings.
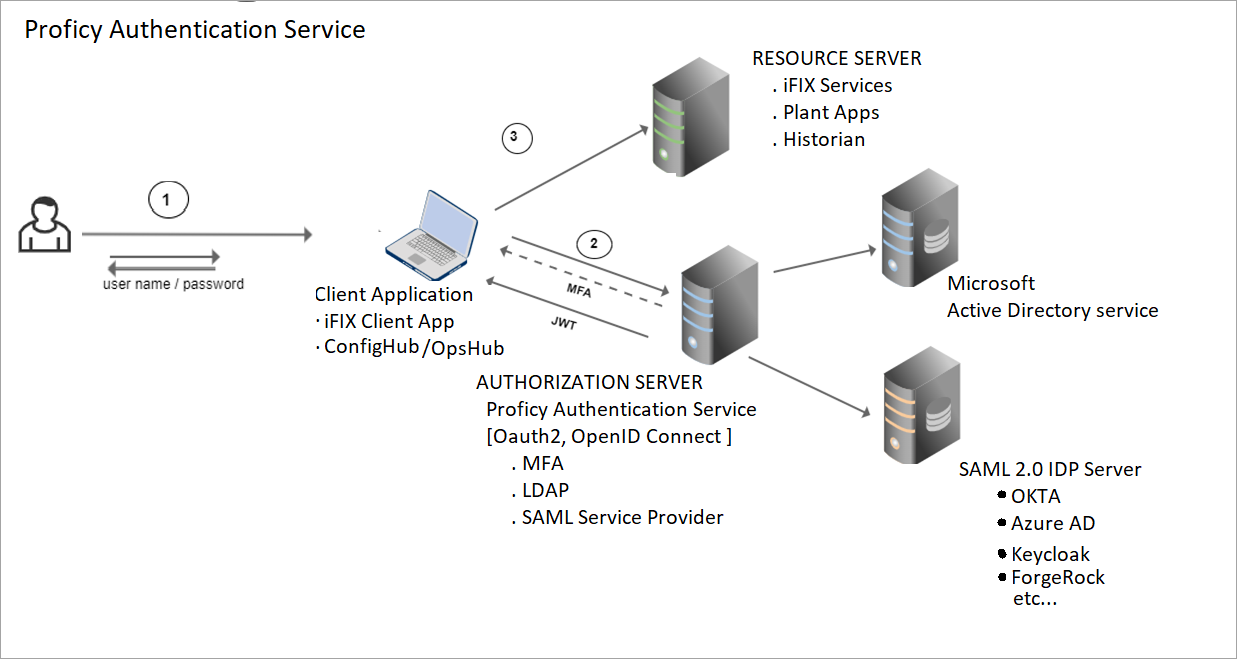
- Users provide their credentials, which includes a user name and password.
- When users attempt to access a protected application, they are redirected to the
Proficy Authentication Service for authentication.
Proficy Authentication Service generates a SAML authentication request and sends it to the user's browser. This request is sent to the configured IdP endpoint.
- If users are successfully authenticated, they gain access without the need to log in separately.