Global Preferences
Access TM Admin Preferences
Procedure
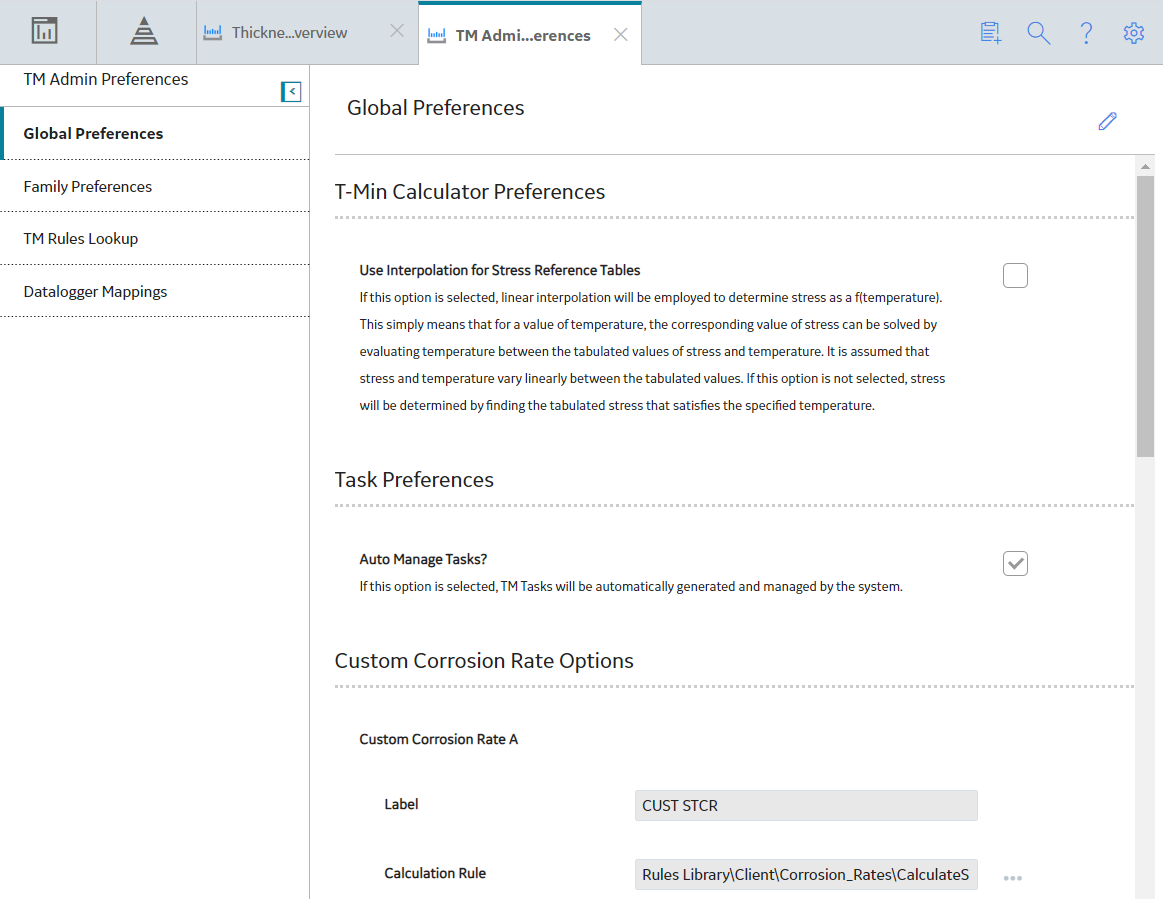
The following information appears in the page:
- Global Preferences: Lets you configure settings that apply throughout Thickness Monitoring. This section appears by default.
- Family Preferences: Lets you configure settings for the Equipment or TML Group families, or any other family that you use to store equipment or component data.
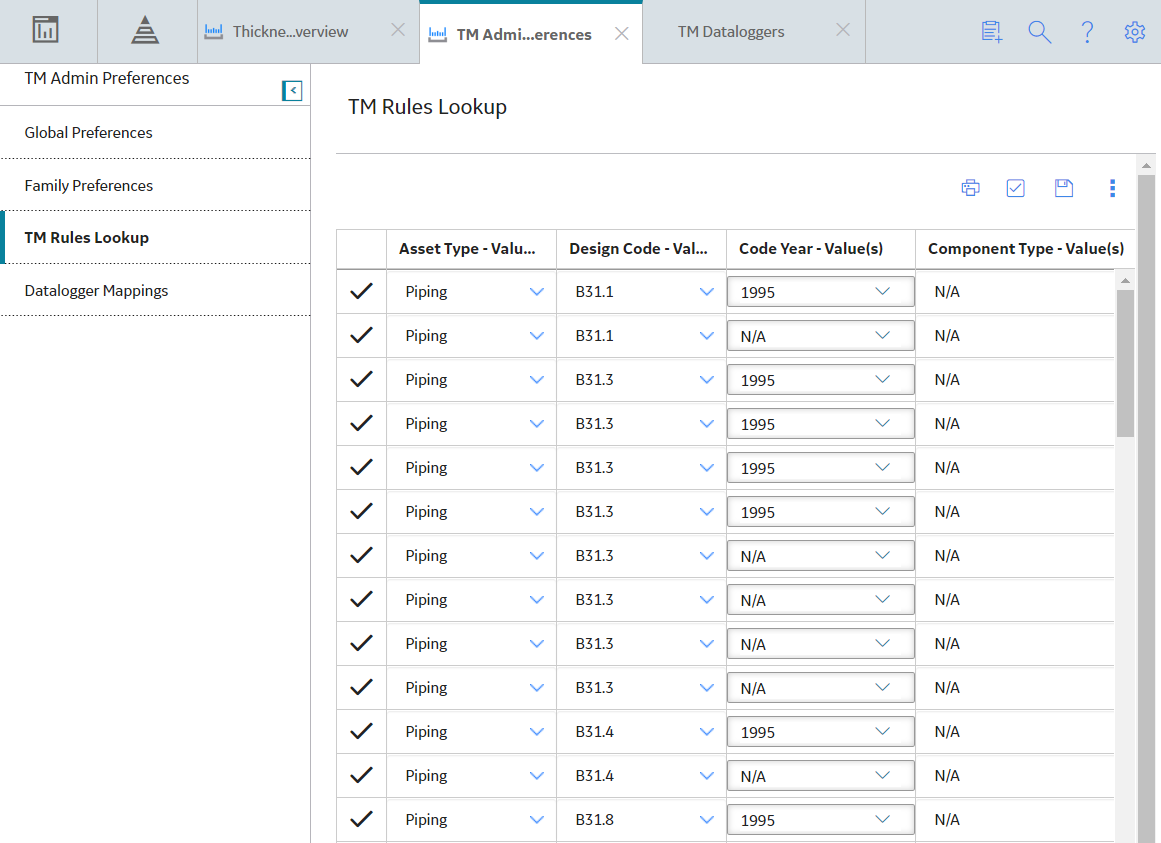
- TM Rules Lookup: Lets you view and modify the reference table values as needed.
- Datalogger Mappings: Lets you define the family field mappings for devices used to take measurements.
 .
.Enable Interpolation
Before You Begin
Multiple records with varying temperatures and stress values may exist for a given combination of Material Specification, Material Grade, and Design Code values. So, after a match is found on Material Specification, Material Grade, and Design Code, Thickness Monitoring (TM) evaluates Design Temperature.
If the Design Temperature in the TML is an exact match to a temperature value in a Piping Stress or PV Stress record, TM will simply use the corresponding Allowable Stress value. For example, consider a TML that contains the following values:
- Material Specification = SA-216
- Material Grade = B
- Design Code = ASME B31.3
- Design Temperature = 100
Now, consider a Piping Stress record that contains the following values:
- Material Specification = SA-216
- Material Grade = B
- Design Code = ASME B31.3
- Design Temperature = 100
- Allowable Stress = 20000
In this case, the values in the TML are an exact match to the values in the Piping Stress record. Therefore, TM will use the Allowable Stress value of 20000 to calculate Maximum Allowable Working Pressure and T-Min.
Thickness Monitoring uses reference tables to look up the Allowable Stress values for performing T-Min calculations and for calculating Maximum Allowable Working Pressure. You have two choices regarding how the stress reference tables will be used to determine Allowable Stress when an exact match cannot be found:
- You can specify that the lowest temperature in the established range should be used.
- You can specify that Thickness Monitoring should use linear interpolation to determine the Allowable Stress.
By default, interpolation is disabled.
Procedure
Interpolation Examples
Interpolation is Enabled
If TM cannot find an exact match in the Piping Stress or PV Stress reference table, and the Application Settings specify that interpolation should be used, TM will calculate the interpolated Allowable Stress value using the temperature and stress values that make up a range that includes the TML Design Temperature.
For example, consider a Piping Stress reference table that contains the following two records.
| Record #1 | Record #2 | |
|---|---|---|
| Material Specification | SA-403 | SA-403 |
| Material Grade | WP316 | WP316 |
| Design Code | ASME B31.3 | ASME B31.3 |
| Design Temperature | 100 | 200 |
| Allowable Stress | 20000 | 18000 |
Now, consider a TML that contains the following values:
- Material Specification = SA-403
- Material Grade = WP316
- Design Code = ASME B31.3
- Design Temperature = 150
The TML Design Temperature falls within the range established by the two Piping Stress records in the table. Linear interpolation assumes that stress varies linearly as a function of temperature within the defined range. Using this assumption, the Allowable Stress at 150 degrees can be calculated using the following formula:
Sx = S1 - (T1 - Tx) / (T1 - T2) * (S1 - S2)
Where:
- Sx = Allowable Stress for the TML
- S1 = Allowable Stress at Lower Boundary
- S2 = Allowable Stress at Upper Boundary
- T1 = Temperature at Lower Boundary
- Tx = Temperature defined for TML
- T2 = Temperature at Upper Boundary
Given the values from our example, we calculate Sx as:
Sx = 20000 - ((100 - 150) / (100 - 200) * (20000 - 18000))
So:
Sx = 19000
This interpolated Allowable Stress value will then be used to populate the Allowable Stress field in the TML.
Interpolation is Disabled
If TM cannot find an exact match in the Piping Stress or PV Stress reference table, and the Application Settings specify that interpolation should not be used, TM will use an Allowable Stress value that corresponds to the lowest temperature value in the temperature range that includes the TML Design Temperature.
For example, consider a Piping Stress reference table that contains the following two records.
| Record #1 | Record #2 | |
|---|---|---|
| Material Specification | SA-403 | SA-403 |
| Material Grade | WP316 | WP316 |
| Design Code | ASME B31.3 | ASME B31.3 |
| Design Temperature | 100 | 200 |
| Allowable Stress | 20000 | 18000 |
Now, consider a TML that contains the following values:
- Material Specification = SA-403
- Material Grade = WP316
- Design Code = ASME B31.3
- Design Temperature = 150
In this case, the Design Temperature in the TML is not an exact match to a Piping Stress record. The TML Design Temperature, however, does fall within the temperature range established by the two Piping Stress records in the table. So, in this case, TM will use the record that contains the most conservative (i.e., lowest) Allowable Stress value. Therefore, in this case, an Allowable Stress value of 18,000 will be used in the TML.
Auto Manage Tasks
Before You Begin
Thickness Monitoring Tasks will be created automatically when you create Corrosion Analysis Settings for an asset or TML Group, or a record that stores equipment or component data for a Corrosion Analysis. GE Digital APM provides an option that allows Thickness Monitoring Tasks to be updated automatically when you make changes to a Thickness Measurement Location (TML) record.
The Auto Manage Tasks setting is disabled by default.
Procedure
Results
When the Auto Manage Tasks setting is enabled, the following fields in Thickness Monitoring Task records will be updated when you make changes to a TML. The following list is not comprehensive.
-
Last Date: The value in the Last Date field is populated with the most recent measurement date that is associated with the first TML referenced in the NID TMLs field in the associated Asset Corrosion Analysis record.
For example, if the NID TMLs field contained the Entity Keys of the following TMLs in the following order, the most recent measurement date (the value in the Measurement Taken Date field in the linked Thickness Measurement records) associated with TML 03 would be used to populate the Last Date field in the Thickness Monitoring Task record:
- TML 03
- TML 14
- TML 01
-
Desired Interval: The value in the Desired Interval field is populated with the difference, in days, between the values in the Next Date and Last Date fields in the Thickness Monitoring Task record.
For example, if the value in the Next Date field is 9/5/2017 and the value in the Last Date field is 3/6/2015, the Desired Interval field would be populated with the value 914.
Use Minimum Measurement Interval for Corrosion Rates
Before You Begin
This option enables you to determine which Thickness Measurements are used for calculating (either Short Term or Long Term Corrosion Rates) based on a defined interval provided. Once enabled, you can define either a global minimum interval for measurements or you may also provide site-specific minimum intervals.
The Use Minimum Measurement Interval for Corrosion Rates setting is disabled by default.
About This Task
Procedure
Results
When this setting is enabled, and the TML Corrosion Analyses are calculated, if the Short Term and Long Term options are enabled in the TML’s Corrosion Analysis Settings, the minimum measurement intervals provided are used to determine the corrosion rate calculations.
For example, if the Use Minimum Measurement Interval for Corrosion Rates option is enabled and the default 12-month interval is saved for all the sites, consider the following two scenarios:
Short Term
The following measurements are captured on a TML:
- 1.24 IN – 4/15/2008
- 1.22 IN – 10/26/2015
- 1.18 IN – 2/18/2017
- 1.15 IN – 10/15/2017
When the Short Term corrosion rate is calculated for this TML, the calculation identifies the Last Measurement as the one on 10/15/2017 and the Near Measurement as the one on 2/18/2017. However, when the setting is enabled and the interval between the two measurements is not at least 12 months, the calculation moves to the next closest measurement for evaluation. The next measurement occurred is on 10/26/2015 and is valid for the measurement interval criteria. This measurement is then used as the Near Measurement when calculating the Short Term Corrosion Rate value. If the calculation needs to skip a measurement, the Short Term Based on Minimum Measurement Interval field on the TML Corrosion Analysis is set to true.
Long Term
The following measurements are captured on a TML:
- 1.18 IN – 2/18/2017
- 1.15 IN – 10/15/2017
When the Long Term corrosion rate is calculated for this TML, the calculation identifies the Last Measurement as the one on 10/15/2017 and the Base Measurement as the one on 2/18/2017. However, when the setting is enabled and the interval between the two measurements is not at least 12 months, the calculation determines there is no valid Long Term Corrosion Rate, and the value is set to null. Also, the Long Term Based on Minimum Measurement Interval field on the TML Corrosion Analysis is set to true.
What To Do Next
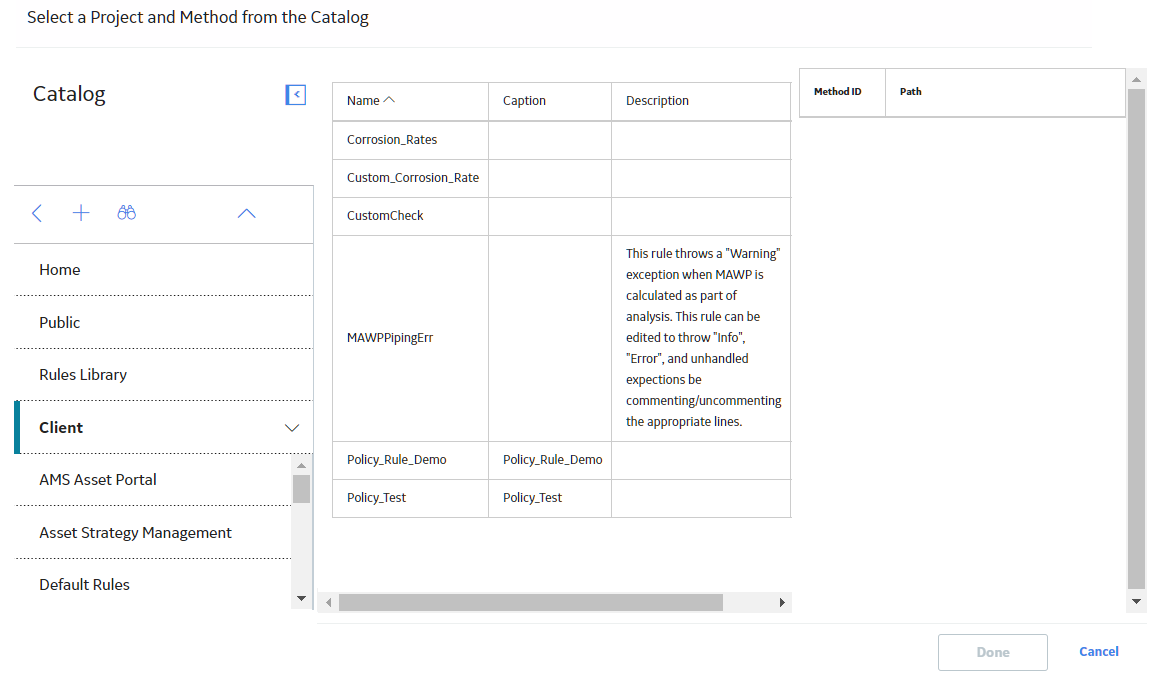
Define Custom Corrosion Rates
Before You Begin
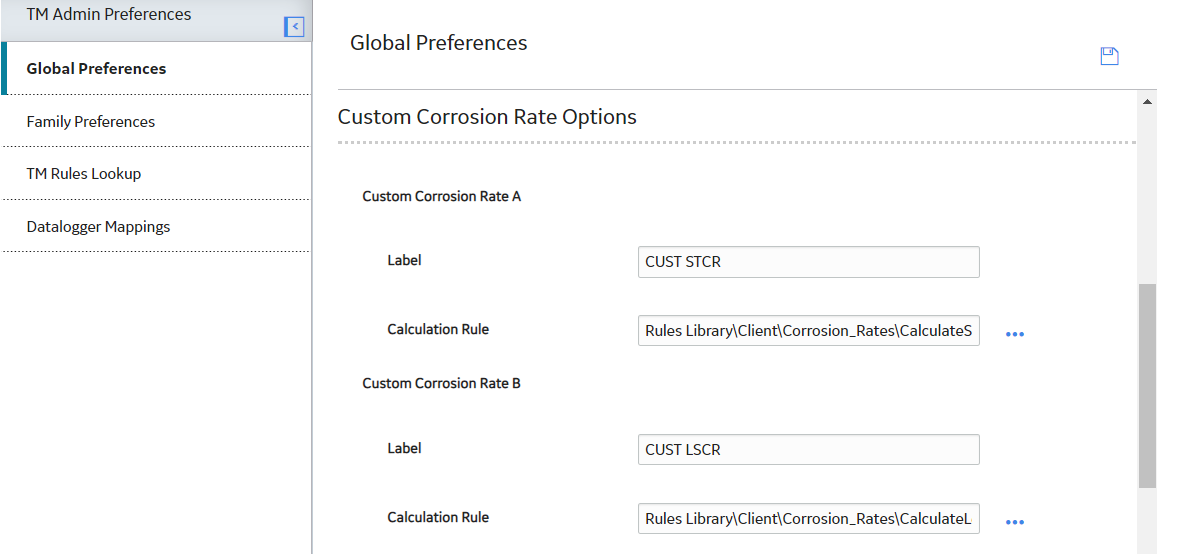
Thickness Monitoring includes several baseline TML-level corrosion rates that you can choose to calculate for TML Corrosion Analyses. In addition to using these baseline corrosion rates, you can define custom corrosion rate calculations to use within Thickness Monitoring. Using the options on the Global Preferences workspace, you can define up to two custom calculations.
Before you can enable the use of custom corrosion rates, you must first create rules that define those corrosion rates. This documentation assumes that the necessary rules have already been defined.
Procedure
Define Readings Preferences
Procedure
Configure Nominal T-Min Lookup
Before You Begin
Nominal T-Min is a value that represents the minimum thickness of a pipe based upon accepted industry standards. The Nominal T-Min value takes into account various design specifications and determines the minimum thickness associated with that criteria. The Nominal T-Min value is retrieved using values from Thickness Measurement Location records and records in the Piping Nominal T-Min reference table. Using the Nominal T-Min Preferences section, you can configure which fields you want to use for retrieving the Nominal T-Min value for Thickness Measurement Location records that are linked to Equipment or TML Group records that represent pipes, or records that store equipment or component data for pipes.
In the Nominal T-Min Preferences section, under the Fields for Nominal T-Min Lookup heading is a list of all these fields that exist in the Piping Nominal T-Min family.
Each field in the Piping Nominal T-Min family corresponds to a field in the Thickness Measurement Location family. By selecting a field in the Fields for Nominal T-Min Lookup list, you are indicating that you want to use that field for looking up Nominal T-Min values. This means that values in the associated fields in Thickness Measurement Location records will be compared to values in the Piping Nominal T-Min reference table and that a Nominal T-Min value will be returned only if a match is found. Any field that is not selected in the Fields for Nominal T-Min Lookup list will not be used for looking up the Nominal T-Min value. In other words, values in those fields of Thickness Measurement Location records are not required to match values in corresponding field in the Piping Nominal T-Min reference table.
Procedure
Define Measurement Preferences
Before You Begin
If you enable this option and create Measurement Not Taken records and then later disable this option, any Measurement Not Taken records that you created will be ignored in the Corrosion Analysis (i.e., all calculations will be performed as if the Measurement Not Taken records did not exist).
Procedure
Map Common Measurement Data Fields
Before You Begin
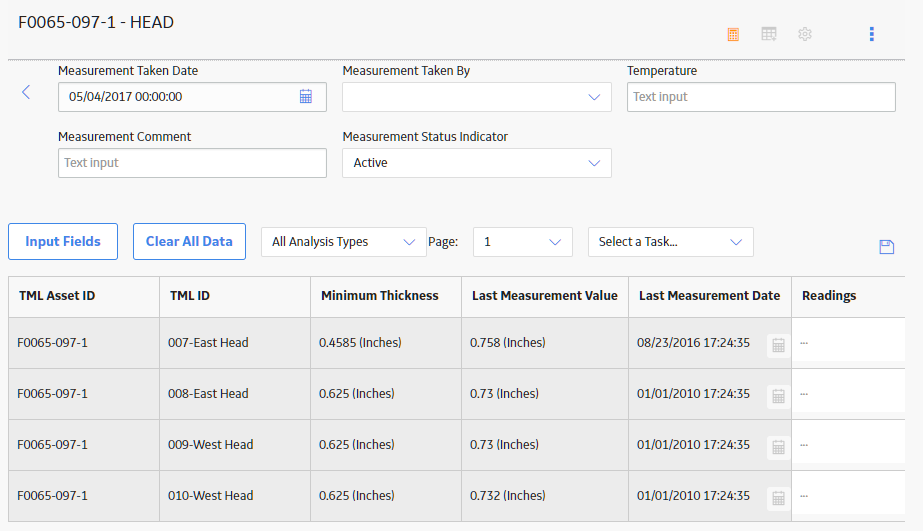
When you make changes to the Common Measurement Data Field Mappings section, the new fields you map will be made available on the Measurement Data Entry workspace, in the common measurement data section. By default, Measurement Comment and Measurement Status Indicator fields are available to map. Additionally, any custom fields you create for the Thickness Measurement family will appear in the list of available fields.
For example, if you select the Measurement Comment and Measurement Status Indicator fields to be mapped to the common measurement data section, the following screenshot illustrates how they will appear on the Measurement Data Entry workspace.
Procedure
Modify the High Loss Value
Procedure
Results
- When you create or update a Thickness Measurement, if the percentage of decrease in the measurement value from the previous measurement is greater than or equal to the new High Loss value, then, in the Analysis Overview workspace, in the TMLs section,
 appears in the row containing the TML. This, however, happens only if the TML does not meet the criteria for the categories Below T-Min or Overdue.
Define Pipe Rotation Preferences
About This Task
Procedure
Define Wall Ratio Preferences
About This Task
Procedure
Manage Thickness Monitoring Rules Lookup Records
Before You Begin
Thickness Monitoring Rules Lookup records create a reference table of values that are used by GE Digital APM Thickness Monitoring for performing certain calculations. Like all reference table records, Thickness Monitoring Rules Lookup records can be viewed most easily in the Bulk Data Form or through a query. For your convenience, the TM Administrative Tasks page contains a link that allows you to open Thickness Monitoring Rules Lookup records in the Bulk Data Form, where you can view and modify the reference table values as needed.
 .
. .
. 
 .
.

 .
.