Piping Rotation and Flip
About Piping Rotation and Flip
Piping Rotation and Flip is a feature of the Thickness Monitoring (TM) module in GE Digital APM that allows you to record actions related to rotation or flip of piping components. It enables you to make accurate assessments of the remaining life after rotating or flipping components.
The internal surfaces of piping components in a piping circuit are prone to severe erosion due to the abrasive nature of the fluid flowing through them at high velocities. These damage mechanisms cause localized erosion within the component. Therefore, the erosion rate at certain regions are higher than the others. Typically, erosion rates are higher at the bottom surfaces in the interior of straight spools and the internal surfaces in the outside of elbows.
Rotations or flips are an essential part of the maintenance activity carried out on piping assets. This allows you to take advantage of the positions with higher thickness, where erosion has occurred to a lesser extent, thereby prolonging the life of the component.
About Piping Asset Hierarchy
Piping assets can be organized into a hierarchy. The hierarchy and an example of a piping asset in the hierarchy is illustrated in the diagram below.
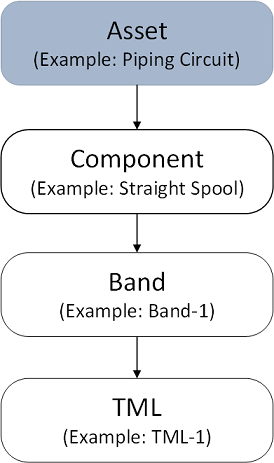
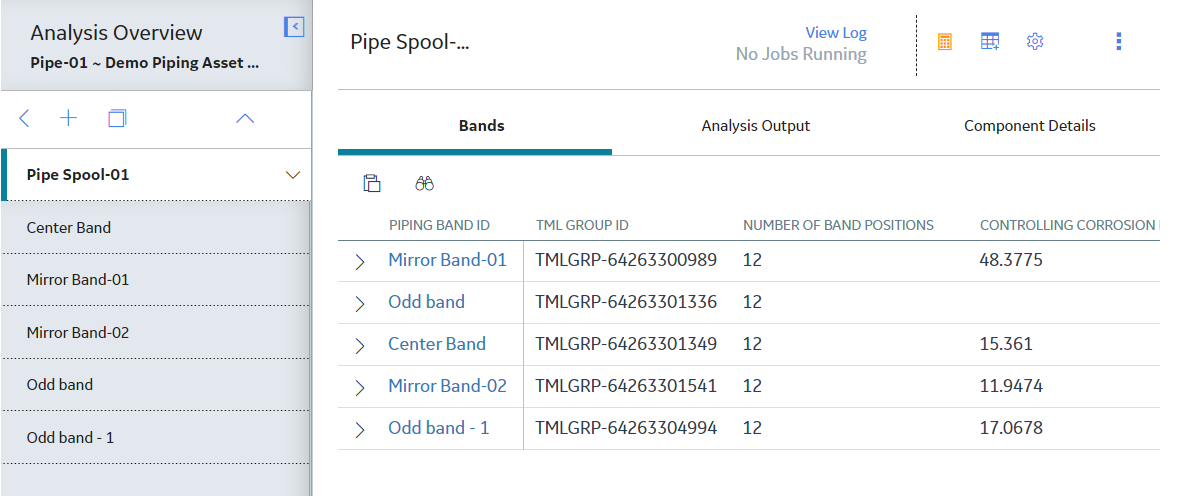
A piping asset can be a piping circuit, and a piping component can be a straight spool or an elbow. A piping component can consist of several bands positioned at various locations on its surface. A band is a path along the circumference or length of a piping component that contains equally spaced TMLs. These TMLs are located at specific positions on the band.
Types of Piping Components
Piping assets are made up of a number of interconnected components. These components can be classified into straight spools and elbows.
Straight spools are segments that form a part of straight sections of a piping circuit. Straight spools can be rotated or flipped.
Elbows are curved sections of a piping circuit that are used to change the direction of fluid flow. Elbows can only be flipped. When flipped, the erosion pattern at the bands changes and is dependent on the position of the bands relative to the flow. Both bent and mitered elbows are supported by GE Digital APM.
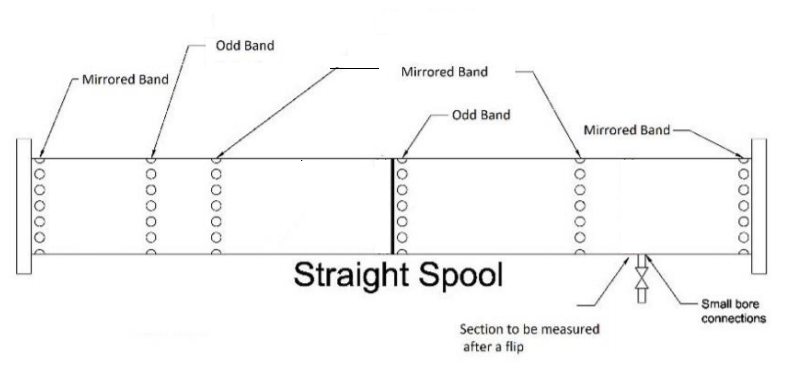
Types of Bands
The bands on a piping component can be classified into the following types:
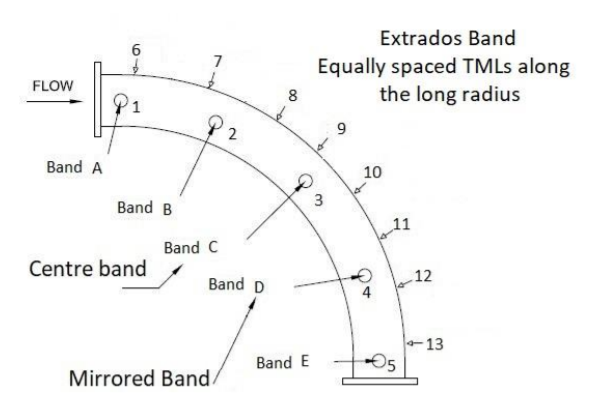
Center band: A center band is a band that is located at the center of a piping component. Center bands can exist on elbows and straight spools.
Mirrored band: A mirrored band is a band on a piping component that has another symmetrically opposite band relative to the center point. Mirrored bands can exist on elbows and straight spools.
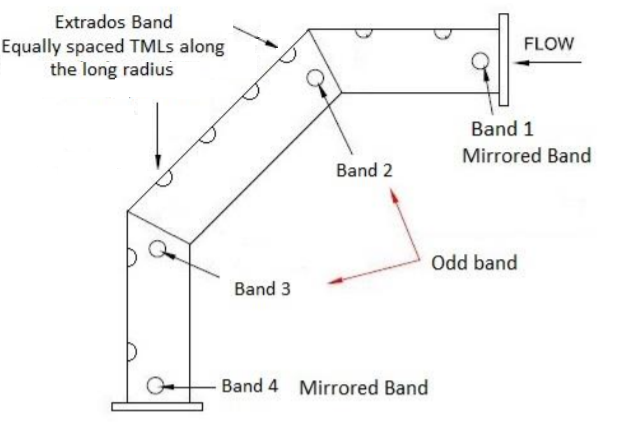
Odd band: An odd band is a band that is located on a piping component at specific critical positions such as near the inlet or weld. Odd bands can exist on elbows and straight spools.
Extrados band: An extrados band is a band where the TMLs are distributed along the long radius or outer curve of an elbow. Such bands exist only on elbows.
About Positions
Positions are fixed points occupied by TMLs on a band, that can be considered as references for rotation of a piping component. The number of positions on a band correspond to the number of TMLs on the band. There can be multiple configurations for the number of positions. The number of positions supported by GE Digital APM are 4, 12, and 24. The following widgets are available for representing bands containing 4, 12, and 24 TMLs.

For example, in a piping component, if each band contains 4 TMLs, you can select a configuration of 4 positions. In this configuration, 4 equally spaced reference points (that is 3, 6, 9, and 12) are available along which the component can be rotated. The reference point for rotation is the Top Center. In this example, position 12 is the Top Center.
When a piping component is flipped, the positions of TMLs change based on a fixed pattern. For more information, refer to the Flipping of Straight Spool section of the documentation.
About Rotation of Straight Spools
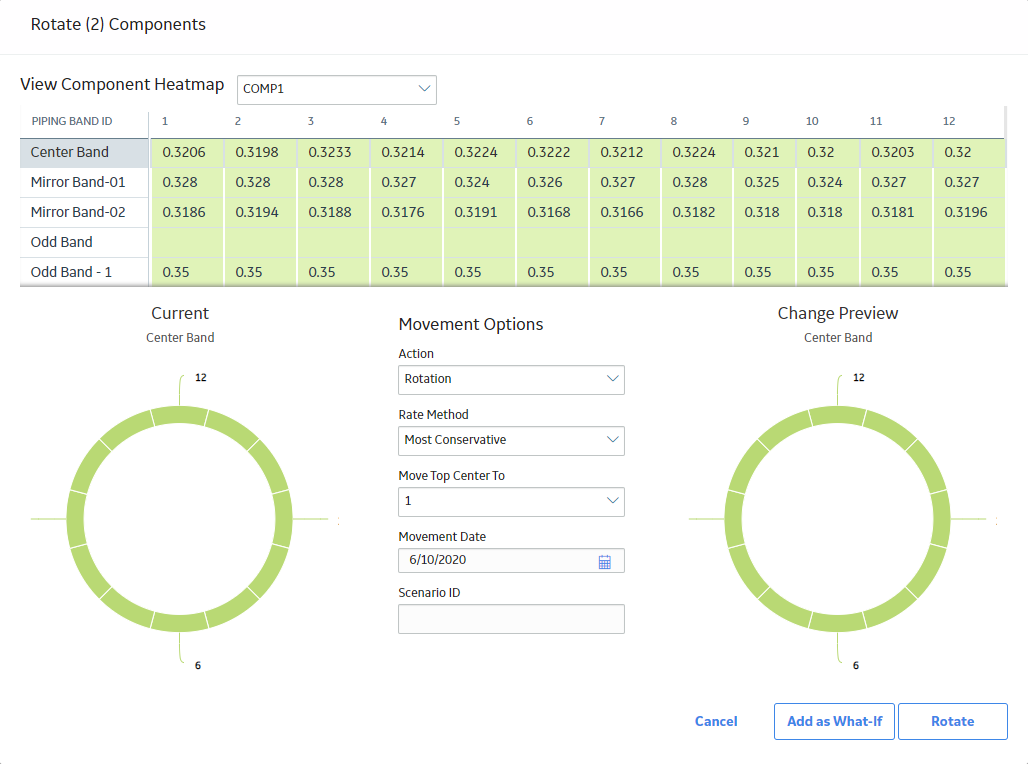
Rotations are necessary to extend the life of a straight spool. When the spool is rotated, the TMLs located on the band will move from one position to another. However, the location of the bands on the spool does not change.
The following example shows the change in positions of TMLs on a band containing 12 TMLs, when the spool is rotated by 90 degrees clockwise. Hence, the TML colored orange that was at clock position 6 is now moved to clock position 9. We can say that the Top Center is moved to position 3.
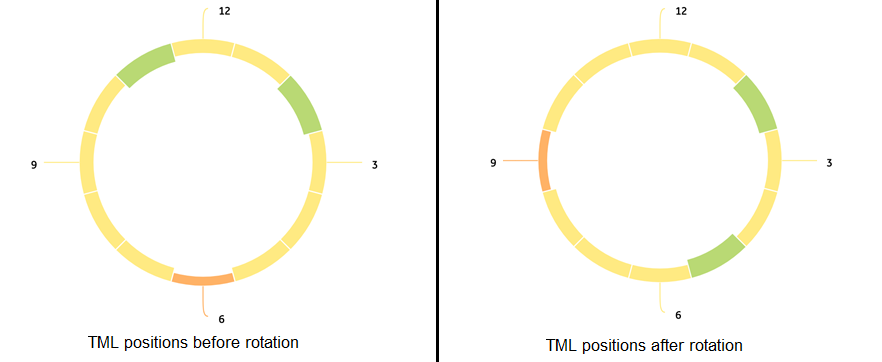
After a spool is rotated, the corrosion analysis for each TML within the bands is re-calculated based on the corrosion rate at the new position. This results in an updated remaining life for the component.
About Flipping of Straight Spools
- For a center band, the TMLs do not move to a new location along the length of the spool, but the positions of the TMLs on the band change according to a fixed pattern.
- For mirrored bands, the TMLs move to a new location along the length of the spool. The TMLs in each mirrored band move to the band that is located symmetrically opposite to it relative to the center. The positions of the TMLs on mirrored bands change according to a fixed pattern.
- For an odd band, the TMLs move to a location where no bands exist, and the material from that location moves to this band. Because existing thickness measurements for this band are not available, the band is renewed. The previous measurements are inactivated, and new measurements should be taken.
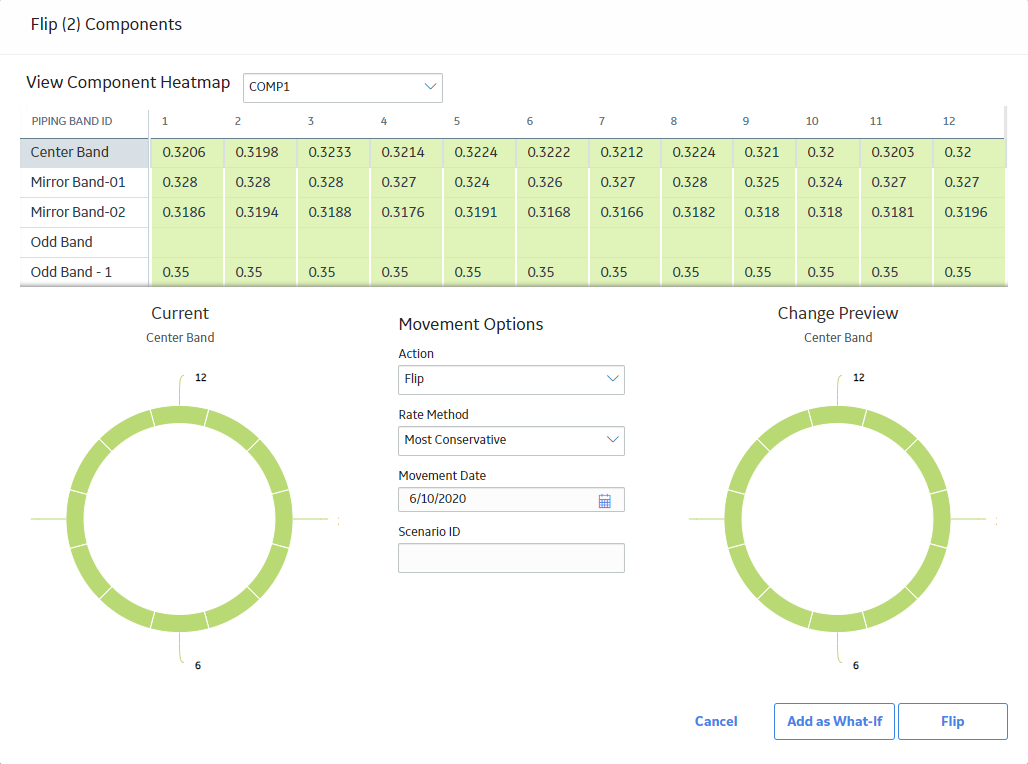
The flip for a horizontal straight spool is done in a vertical plane, and the band positions are viewed from the inlet of the straight spool. The following example shows the change in positions of TMLs on a band containing 12 TMLs, when the spool is flipped. The TMLs at positions 3 and 9 remain at the same positions, whereas the TMLs at positions 12 and 6 exchange positions. Similarly, other TMLs exchange positions based on a definite pattern.
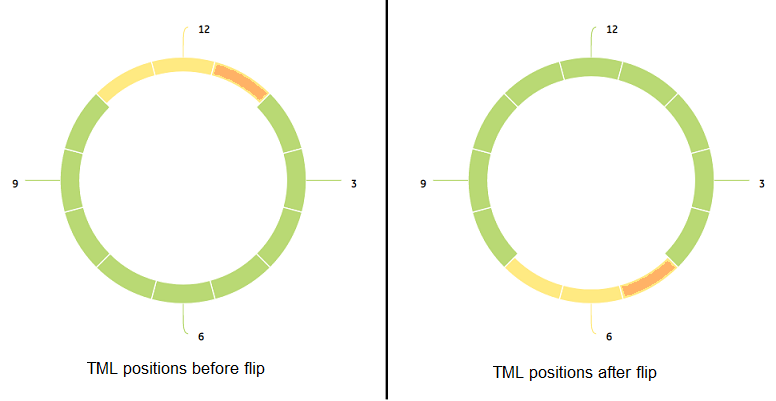
The following tables contain the band positions for center and mirrored bands before and after a flip.
| Band position before flip | 12 | 3 | 6 | 9 |
| Band position after flip | 6 | 3 | 12 | 9 |
| Band position before flip | 12 | 1 | 2 | 3 | 4 | 5 | 6 | 7 | 8 | 9 | 10 | 11 |
| Band position after flip | 6 | 5 | 4 | 3 | 2 | 1 | 12 | 11 | 10 | 9 | 8 | 7 |
| Band position before flip | 24 | 1 | 2 | 3 | 4 | 5 | 6 | 7 | 8 | 9 | 10 | 11 | 12 | 13 | 14 | 15 | 16 | 17 | 18 | 19 | 20 | 21 | 22 | 23 |
| Band position after flip | 12 | 11 | 10 | 9 | 8 | 7 | 6 | 5 | 4 | 3 | 2 | 1 | 24 | 23 | 22 | 21 | 20 | 19 | 18 | 17 | 16 | 15 | 14 | 13 |
After a spool is flipped, the corrosion analysis for each TML within the bands is re-calculated based on the corrosion rate at the new position. This results in an updated remaining life for the component.
About Flipping of Elbows
When an elbow is flipped, the location of bands do not change. The behavior of each type of band after a flip is similar to that of straight spools. For an extrados band, the TMLs on the band will move to a mirrored location within the band along the length of the elbow.
The top view of a horizontal bent elbow containing a center band, four mirrored bands, and an odd band is illustrated in the following image.
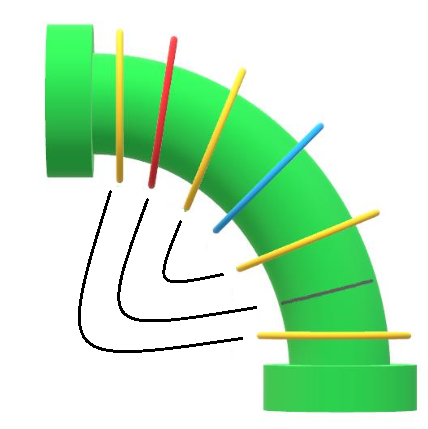
The bands colored yellow are mirrored bands, and the band colored blue is the center band. The band colored red is an odd band. When the elbow is flipped, the TMLs on the odd band move to a different location on the elbow, where a band did not previously exist.
The change in positions of TMLs within center and mirrored bands when an elbow is flipped follows a similar pattern as that of a straight spool.
The following example shows the change in positions of TMLs on a band containing 12 TMLs, when the elbow is flipped.

The following table illustrates the band positions for center and mirrored bands before and after a flip for an elbow with 12 band positions.
| Band position before flip | 12 | 1 | 2 | 3 | 4 | 5 | 6 | 7 | 8 | 9 | 10 | 11 |
| Band position after flip | 6 | 5 | 4 | 3 | 2 | 1 | 12 | 11 | 10 | 9 | 8 | 7 |
The top view of a horizontal bent elbow showing an extrados band is illustrated in the image below.
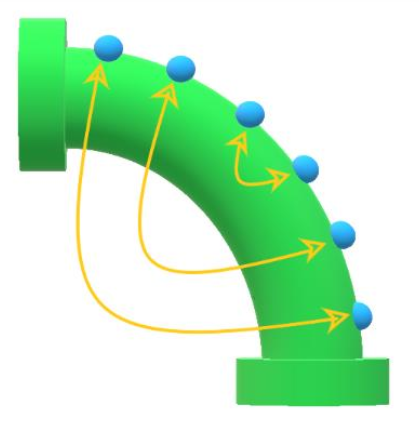
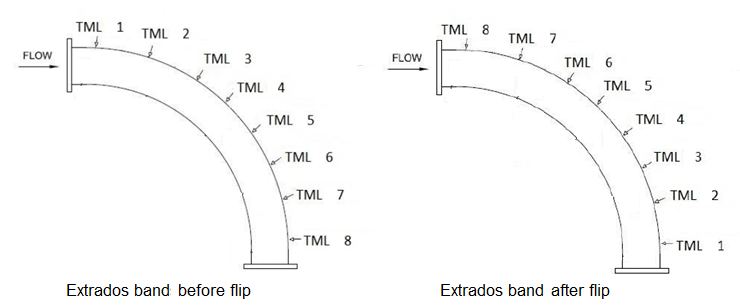
After an elbow is flipped, the corrosion analysis for each TML within the bands is re-calculated based on the corrosion rate at the new position. This results in an updated remaining life for the component.
About Undo Movement
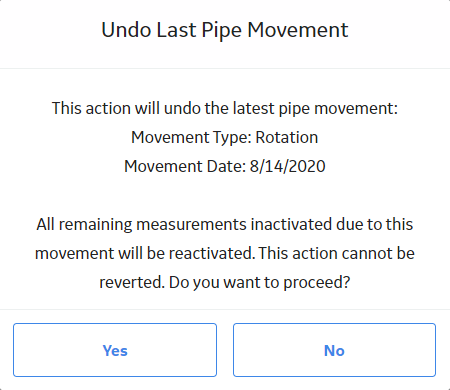
The GE Digital APM system allows you to revert the last performed rotation or flip on a piping component. After an undo movement operation is performed, the nominal measurements that were calculated for each TML as a result of the movement are deleted, and the previous measurements are activated. If measurements were added after performing the movement, you must delete those measurements before you perform an undo movement. In addition, after performing the undo movement, in the Pipe Rotation Event inspection datasheet for the Asset, the Reverted flag is set to true.
About Calculation of Nominal Measurement
- The last measurement value for the TML.
- The corrosion rate at the current position of the TML within the band prior to the rotation or flip.
- The time that has passed between the last measurement date and the selected movement date.
The estimated nominal thickness value for a TML on the day of movement is calculated using the following formula.
Nominal Measurement = (Last Measurement Value) – (Corrosion Rate x (No of Days) / 365.25)
Calculation of estimated thickness for a TML on a specified day of movement
Suppose, the last recorded thickness value for a TML is 0.793 inch for a measurement taken on May 1st, 2015, and the corrosion rate at the current position of the TML is 0.0134018 inch per year. If the component is rotated on May 1st, 2020, the estimated thickness for the TML on this day is calculated as follows:
The number of days elapsed since the last measurement for this case is 1827 days.
Estimated Thickness on May 1st, 2020 = 0.793 – (0.0134018 x 1827 / 365.25) = 0.72596 inch
About Corrosion Rate Methods
The corrosion rate that will be considered when calculating the corrosion analysis for the TMLs is based on the Rate Method that you specify. The Rates Methods are classified into the following types:
Least Squares: The Least Squares Corrosion Rate is the rate of corrosion as determined using the least squares linear regression method, which is a mathematical method of finding the best-fit line for a set of data points by minimizing the squares of the offsets. For more information, refer to the section Least Squares Corrosion Rate (LSCR) of the documentation.
Long Term: The Long Term Corrosion Rate is a calculation that indicates the rate of corrosion over the full length of time for which measurements have been recorded. The LTCR will be calculated for a given TML if the analysis settings for the related Asset, Component, or band specify that LTCR should be used. For more information, refer to the section Long Term Corrosion Rate (LTCR) of the documentation.
Short Term: The Short Term Corrosion Rate is the rate of corrosion as determined by the most recently recorded values. The STCR will be calculated for a given Thickness Measurement Location record only if the Analysis Settings for the related asset specify that STCR should be used and there are two more Thickness Measurements for the Thickness Measurement Location record. For more information, refer to the section Short Term Corrosion Rate (STCR) of the documentation.
Minimum Corrosion Rate: The Minimum Corrosion Rate is the value specified in the Minimum Corrosion Rate box in the TML Corrosion Rate section of the Corrosion Analysis Settings workspace.
Most Conservative: The Most Conservative Corrosion Rate is the maximum value among the values obtained from all the corrosion rate methods configured in the Corrosion Analysis Settings for the component including the Minimum Corrosion Rate value.
About Heat Maps
A heat map is a graphical representation of the alert levels of TMLs on a band using color codes. For more information on how alert levels are calculated, refer to the section about alert levels. You can customize the alert levels 0, 1, and 2 by modifying the values of Alert Level 1 Max and Alert Level 2 Max in the Define Wall Ratio Preferences section of the TM Admin Preferences page.
| Alert Level Name | Color Code |
|---|---|
| Alert Level 0 |  Green Green |
| Alert Level 1 |  Yellow Yellow |
| Alert Level 2 |  Orange Orange |
| Alert Level 3 |  Red Red |
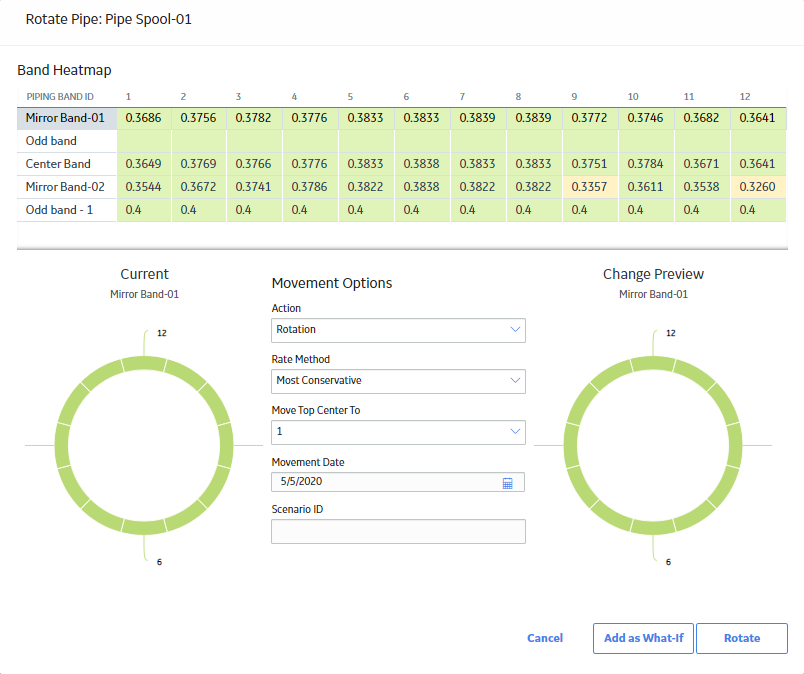
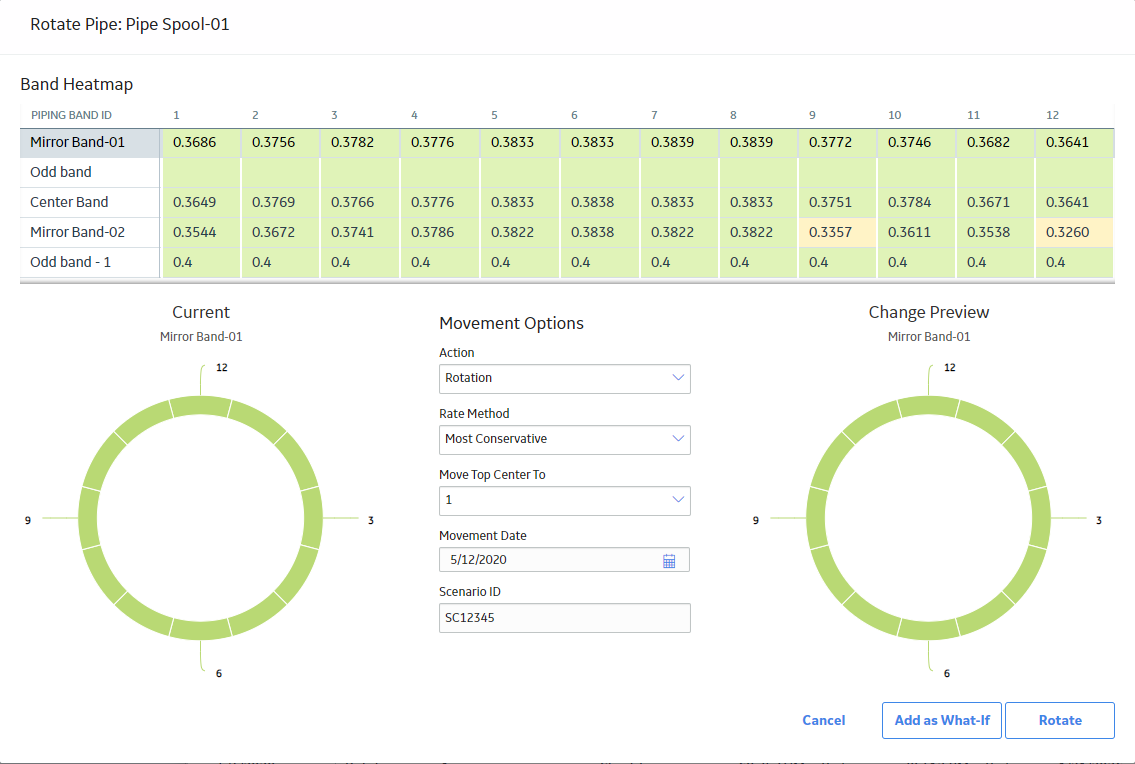
The usage of heat maps is best understood from the following example.
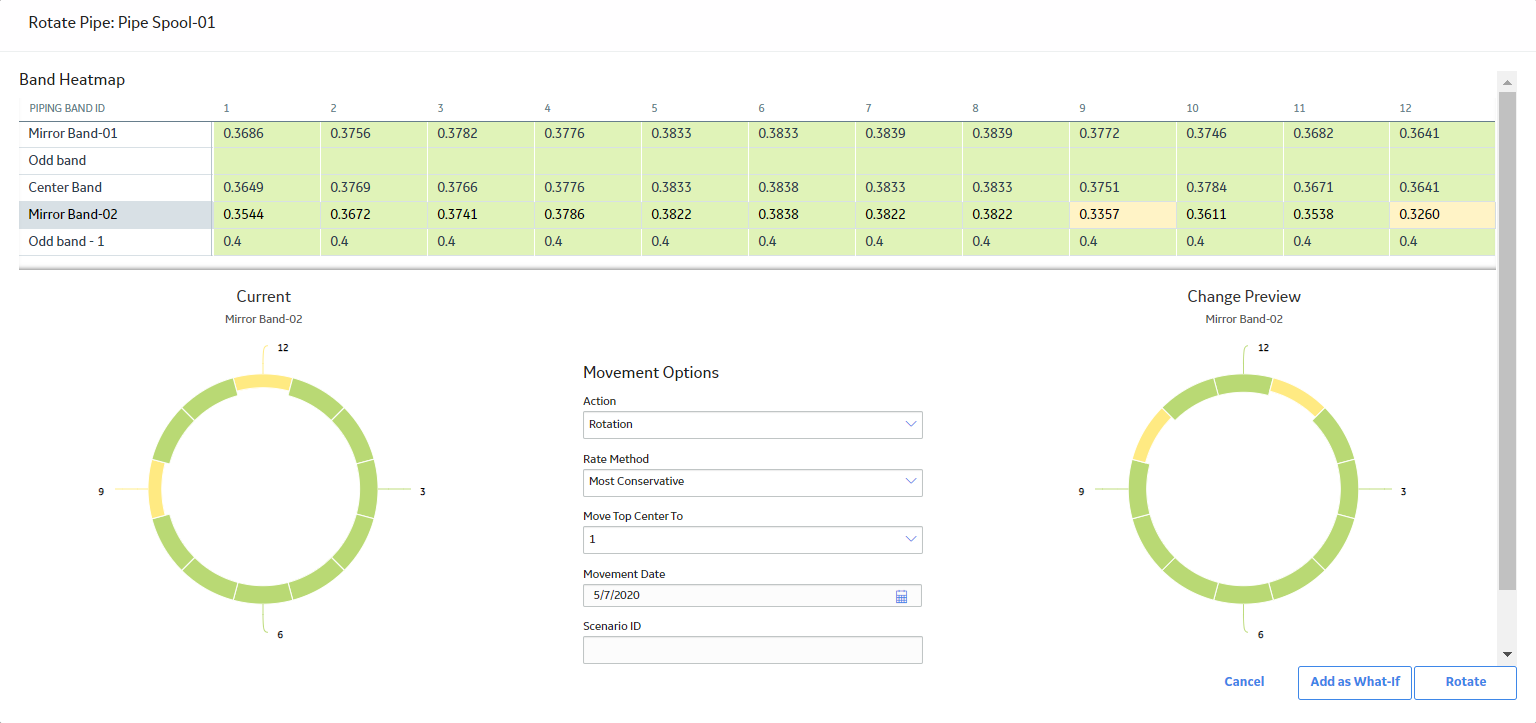
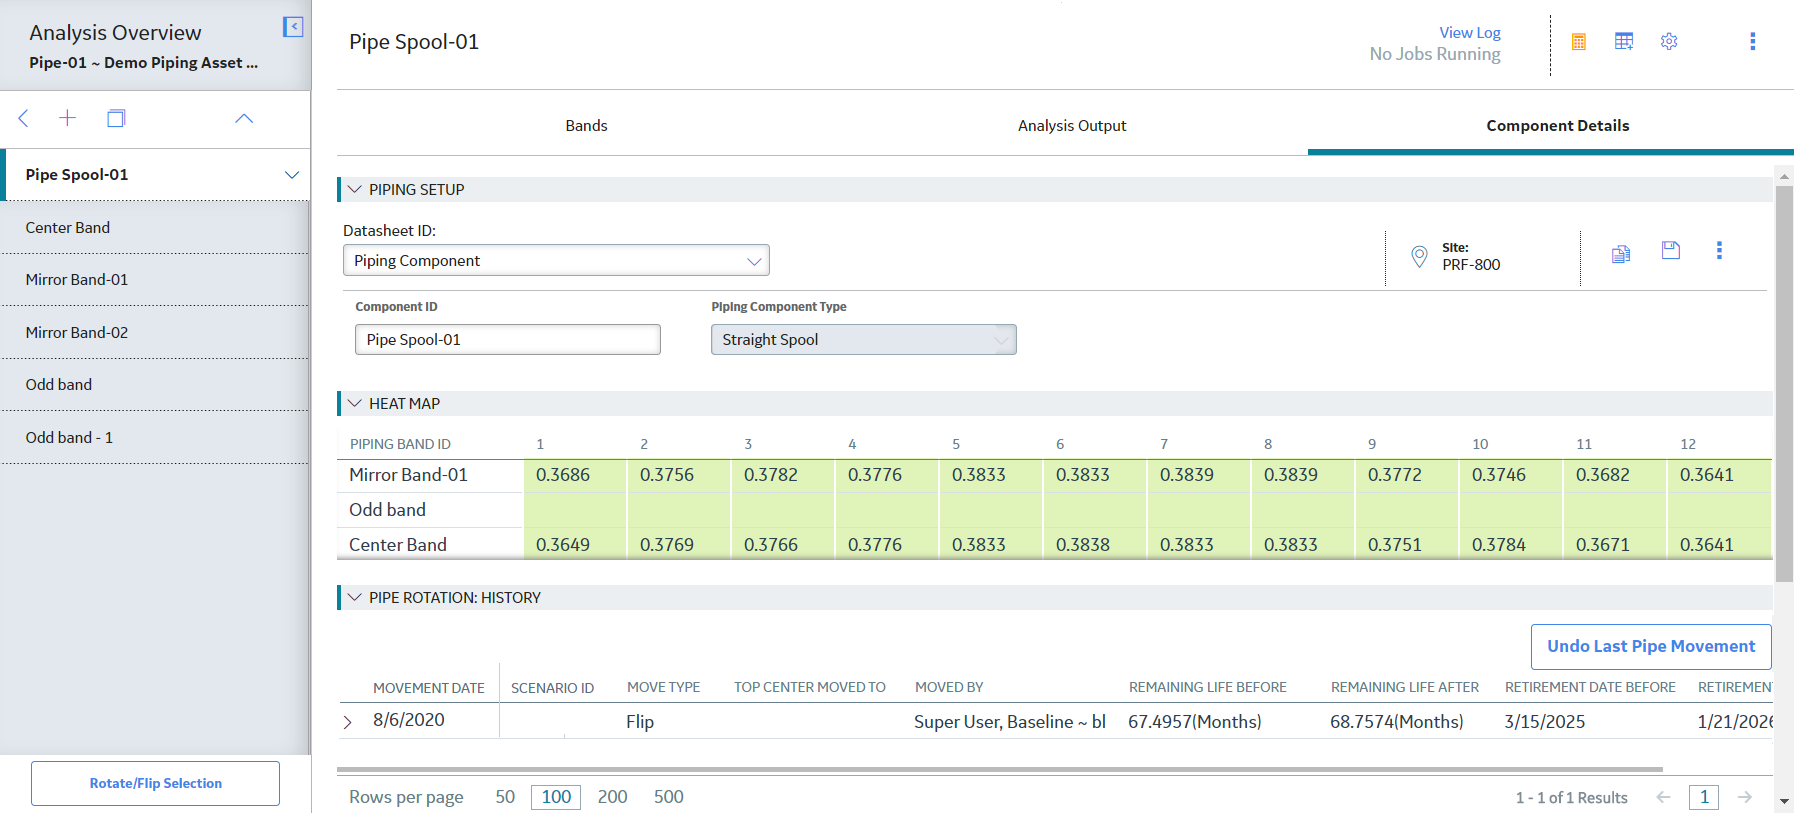
The Band Heatmap section contains the heat maps for each band on the Pipe Spool-01 component. Since the Mirror Band-02 band is selected, the heat map for that band appears in the widgets that display the positions of each TML before and after the rotation or flip.
About Alert Levels
Alert levels are used to monitor the wall thickness of a TML and are an indicator of TML health. TM makes use of two parameters called Alert Level 1 Max and Alert Level 2 Max for calculating alert levels. These values are used to determine the Alert Levels for Band Trends graphs and for Heat Maps and Pipe Rotation widgets.
Alert Levels for Band Trends Graphs
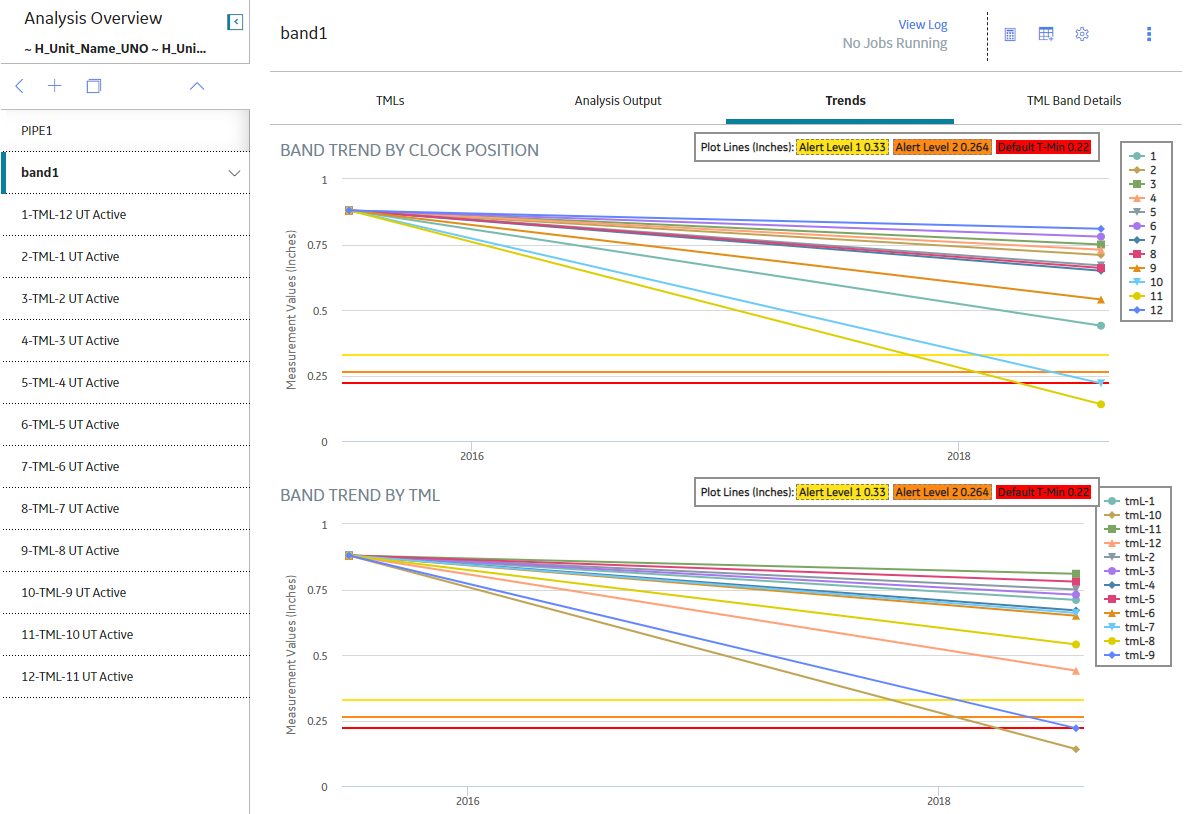
The T-Min value is used to calculate the Alert Level Ranges in Band Trends graphs for piping bands.
Alert Level 1 is calculated as follows:
A1 = (T-Min) x (Alert Level 1 Max).
Alert Level 2 is calculated as follows:
A2 = (T-Min) x (Alert Level 2 Max).
| Alert Level Name | Value | Color Code |
|---|---|---|
| Alert Level 1 | A1 | Yellow |
| Alert Level 2 | A2 | Orange |
| Default T-Min | T-Min | Red |
Alert Levels for Heat Maps and Piping Rotation Widgets
The Alert Levels for Heat Maps and Piping Rotation widgets are based on the wall ratio. Wall ratio (WR) is defined as the ratio of the last measurement value of a TML and the minimum thickness (T-Min) value. It is calculated as follows:
WR = (Last Measurement Value) / T-Min
| Alert Level Name | Range | Color Code |
|---|---|---|
| Alert Level 0 | WR > (Alert Level 1 Max) |  Green Green |
| Alert Level 1 | (Alert Level 1 Max) ≥ WR > (Alert Level 2 Max) |  Yellow Yellow |
| Alert Level 2 | (Alert Level 2 Max) ≥ WR > 1 |  Orange Orange |
| Alert Level 3 | WR ≤ 1 |  Red Red |
Simple Example of an Alert Level Calculation for Heat Maps and Piping Rotation Widgets
Let us assume that the value for Alert Level 2 Max is set to 2.5 and the value for Alert Level 1 Max is set to 3.5
Suppose, the last measurement value for a TML is 0.326 inch and the minimum thickness value is 0.1 inch. The wall ratio (WR) is calculated as 0.326 / 0.1 = 3.26
Since the calculated wall ratio falls between the Alert Level 2 Max and the Alert Level 1 Max values, the TML is assigned Alert Level 1 and the color code for the TML in the heat map is Yellow.
Create Corrosion Analysis Settings for a Piping Asset
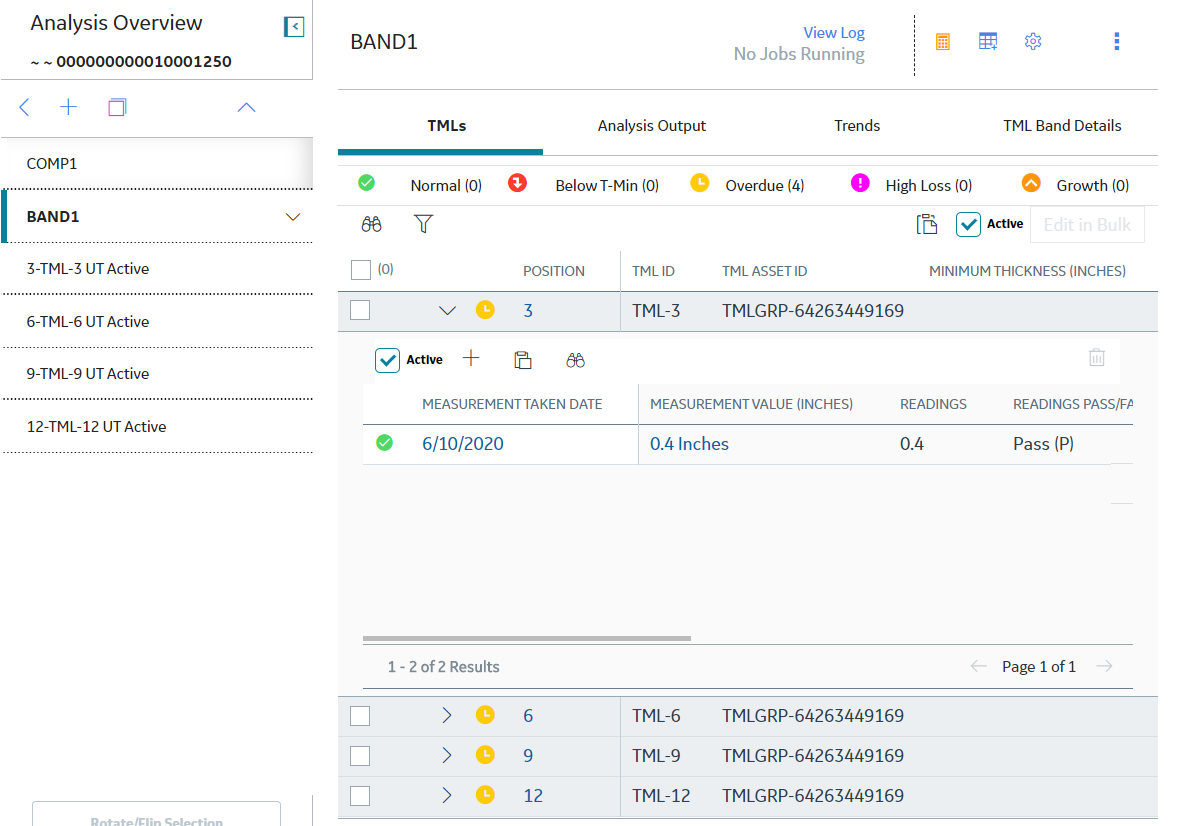
Before an asset can be accessed via the Thickness Monitoring Overview page, you must create Corrosion Analysis Settings for that asset.
Before You Begin
Procedure
Create a Component
Before You Begin
About This Task
Procedure
Results
- The created component is linked to the piping asset.
- If an Asset has more than one TML Analysis Type or Inspection Type, all analysis types are copied to the created component.
What To Do Next
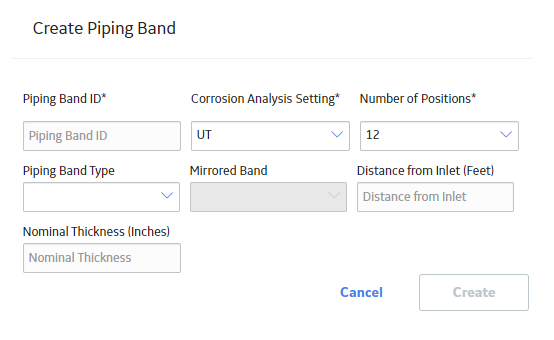
Create a Band
Before You Begin
About This Task
Procedure
Results
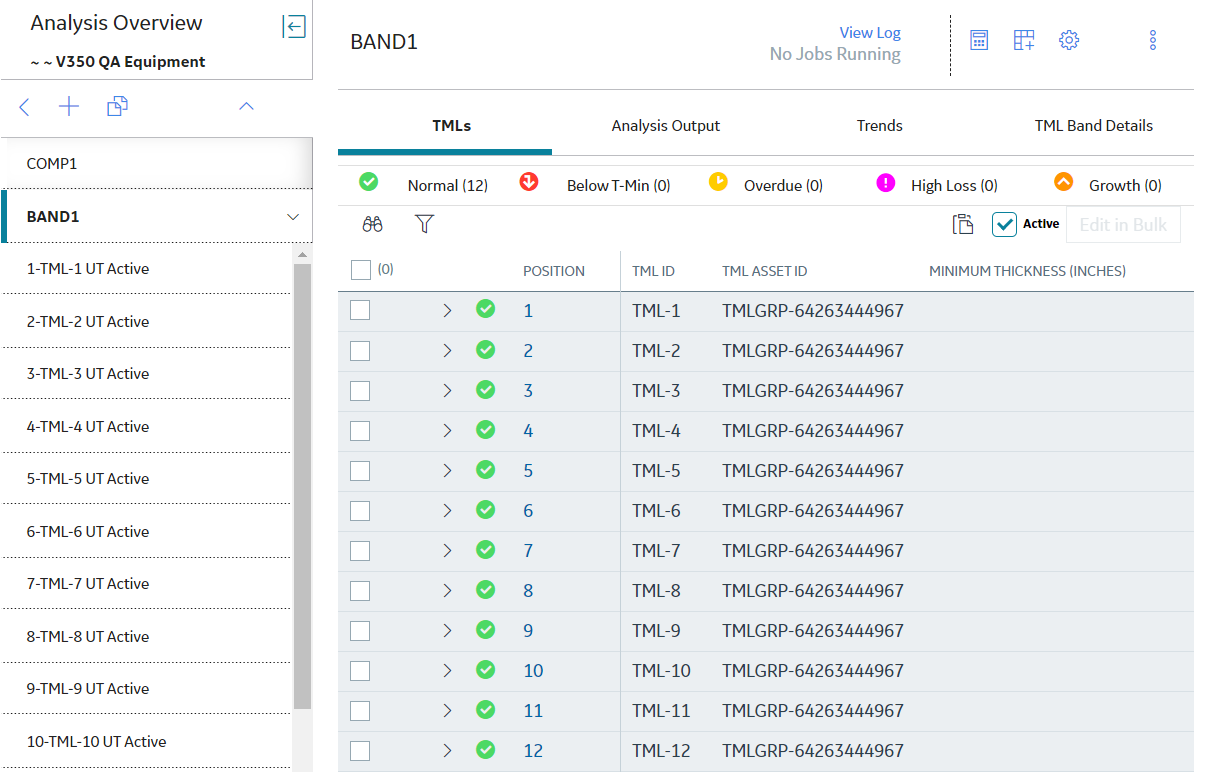
- The created band is linked to the component.
- The Corrosion Analysis Settings for each TML in the created band are inherited from the band.
What To Do Next
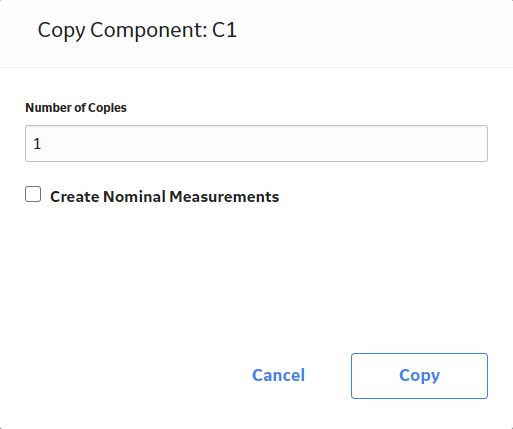
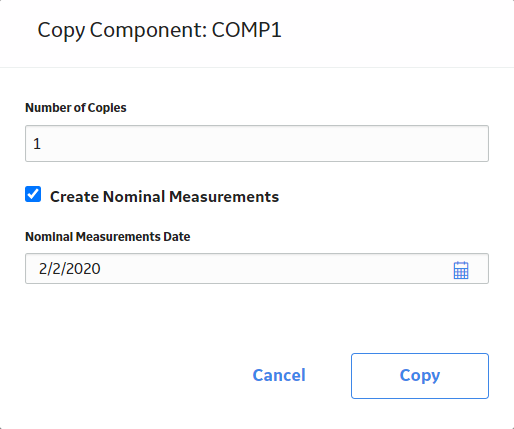
Copy a Component
Before You Begin
About This Task
Procedure
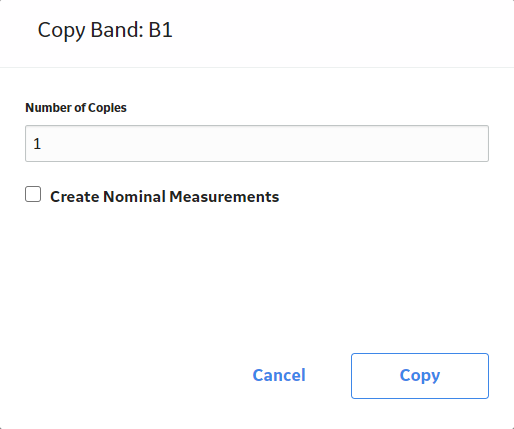
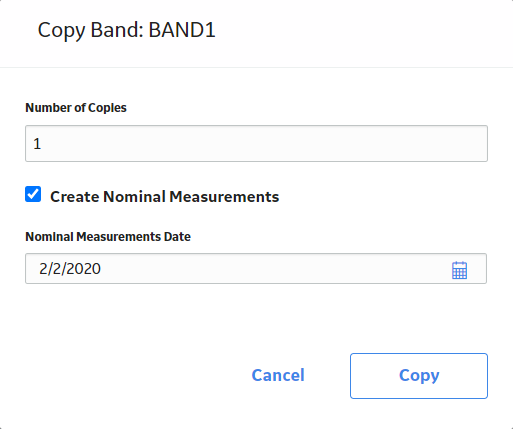
Copy a Band
Before You Begin
About This Task
Procedure
Access Trends Graphs for a Piping Band
About This Task
Procedure
Rotate a Straight Spool
Before You Begin
- Create corrosion analysis settings.
- Create a component.
- Create bands.
- Add thickness measurements.
About This Task
Procedure
Results
- If the job is successful, the component is rotated.
- For the asset, an inspection is created for the Pipe Rotation Event and appears under the Inspections section of the Inspection Management Overview page.
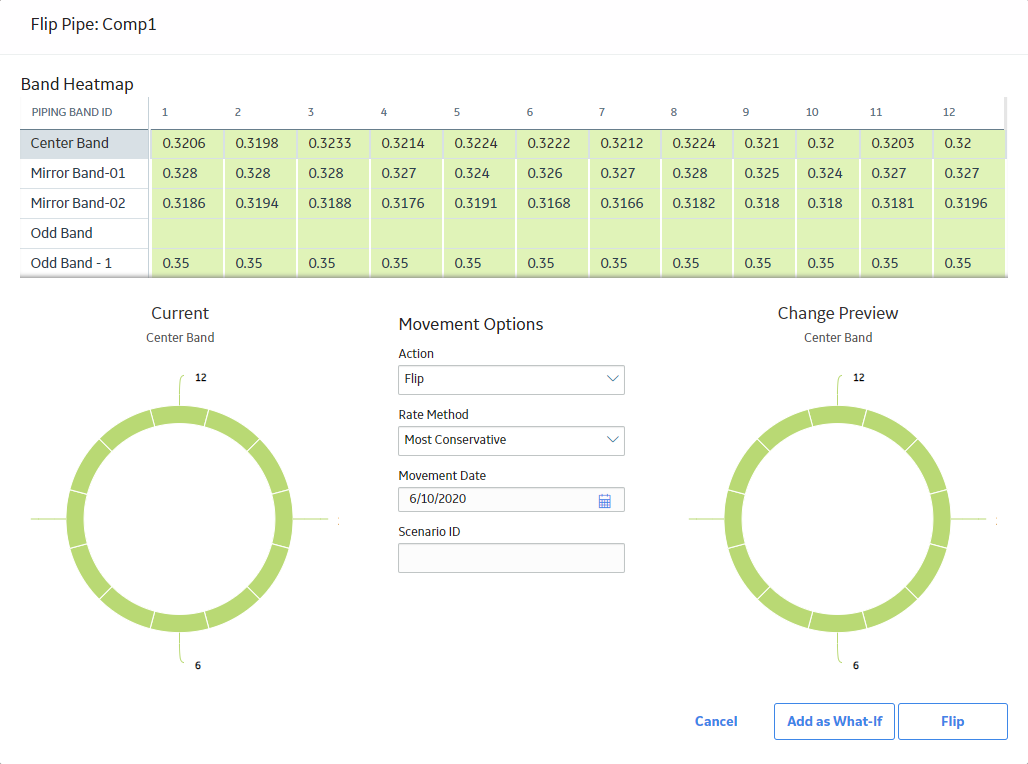
Flip a Piping Component
Before You Begin
- Create corrosion analysis settings.
- Create a component.
- Create bands.
- Add thickness measurements.
About This Task
Procedure
Results
- If the job is successful, the component is flipped.
- For the asset, an inspection is created for the Pipe Rotation Event and appears under the Inspections section of the Inspection Management Overview page.
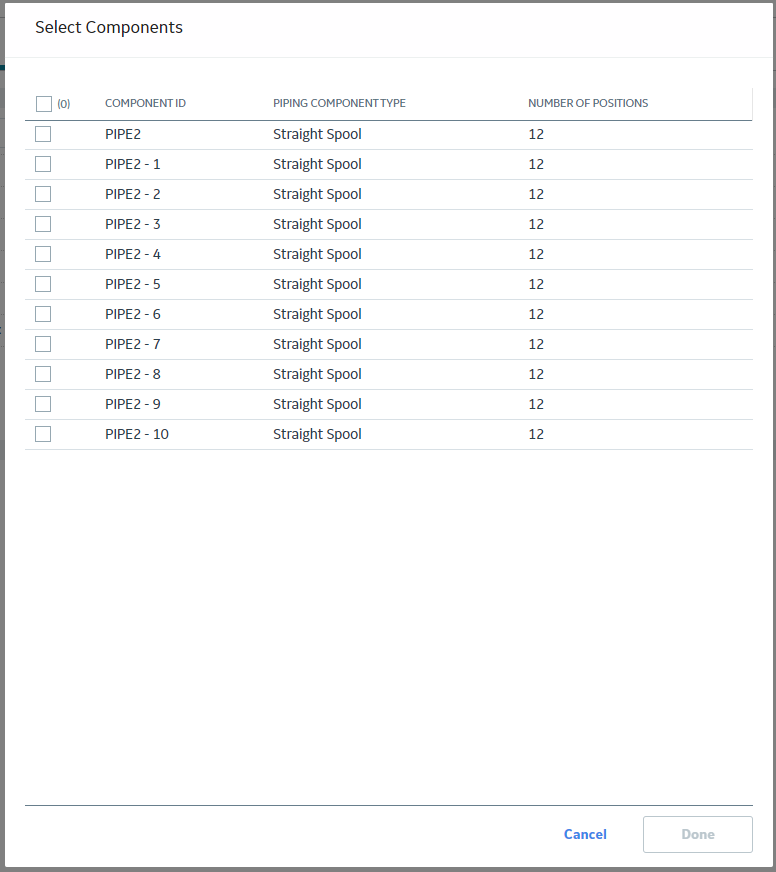
Rotate or Flip Multiple Spools
Before You Begin
- Create corrosion analysis settings.
- Create a component.
- Create bands.
- Add thickness measurements.
About This Task
Procedure
Results
- If the job is successful, the selected components are rotated or flipped.
- For the asset, an inspection is created for the Pipe Rotation Event and appears under the Inspections section of the Inspection Management Overview page.
Access the Piping Rotation or Flip History
Before You Begin
About This Task
Procedure
Undo Last Rotation or Flip
About This Task
Procedure
Results
- The last performed rotation or flip on the selected piping component is reverted.
Create a What-If Scenario
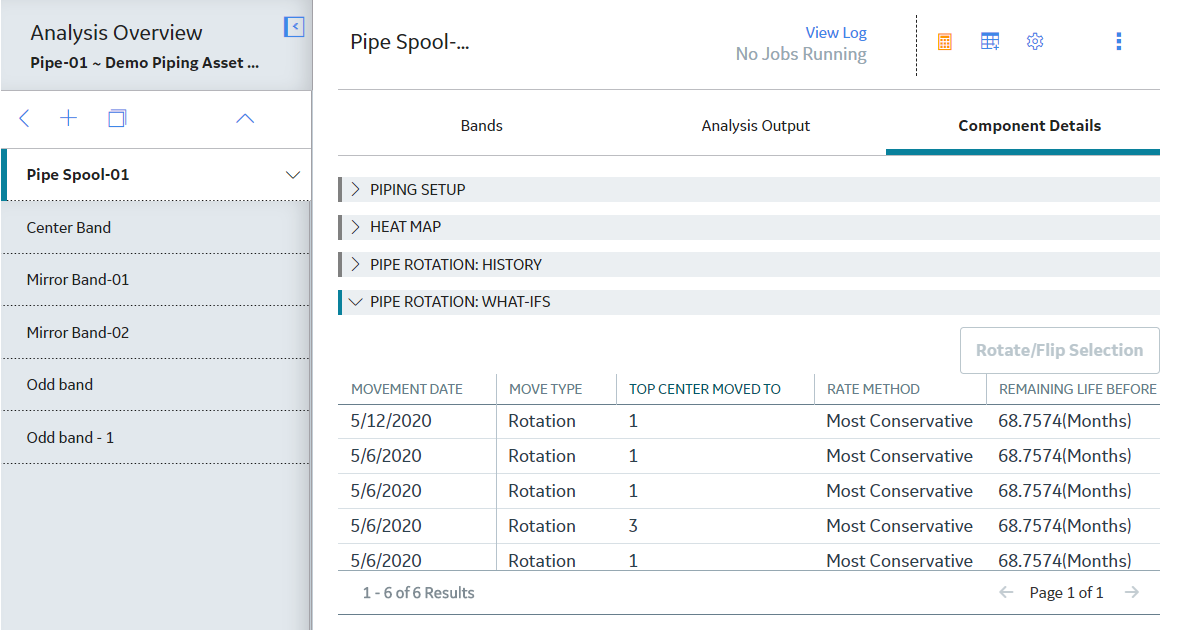
Before scheduling a rotation or flip event for a piping component, you can create different scenarios for analysis. You can evaluate these scenarios and select the most optimal scenario based on the analysis outputs such as remaining life and retirement date. You can then perform an actual rotation or flip from the selected scenario. For creating a What-If scenario, a virtual rotation or flip is performed, and the analysis results are stored in a Pipe Rotation Event for comparison and future use. However, the change in TML positions are not stored. After you perform a rotation or flip from a scenario, all existing What-If scenarios for the component are deleted.
Before You Begin
- Create corrosion analysis settings.
- Create component.
- Create band.
- Add thickness measurements.
About This Task
Procedure
Results
- If the job is successful, a What-If Pipe Rotation Event containing the analysis results of the rotation or flip is created for the component. The created scenario is available under the PIPE ROTATION: WHAT-IFS section.
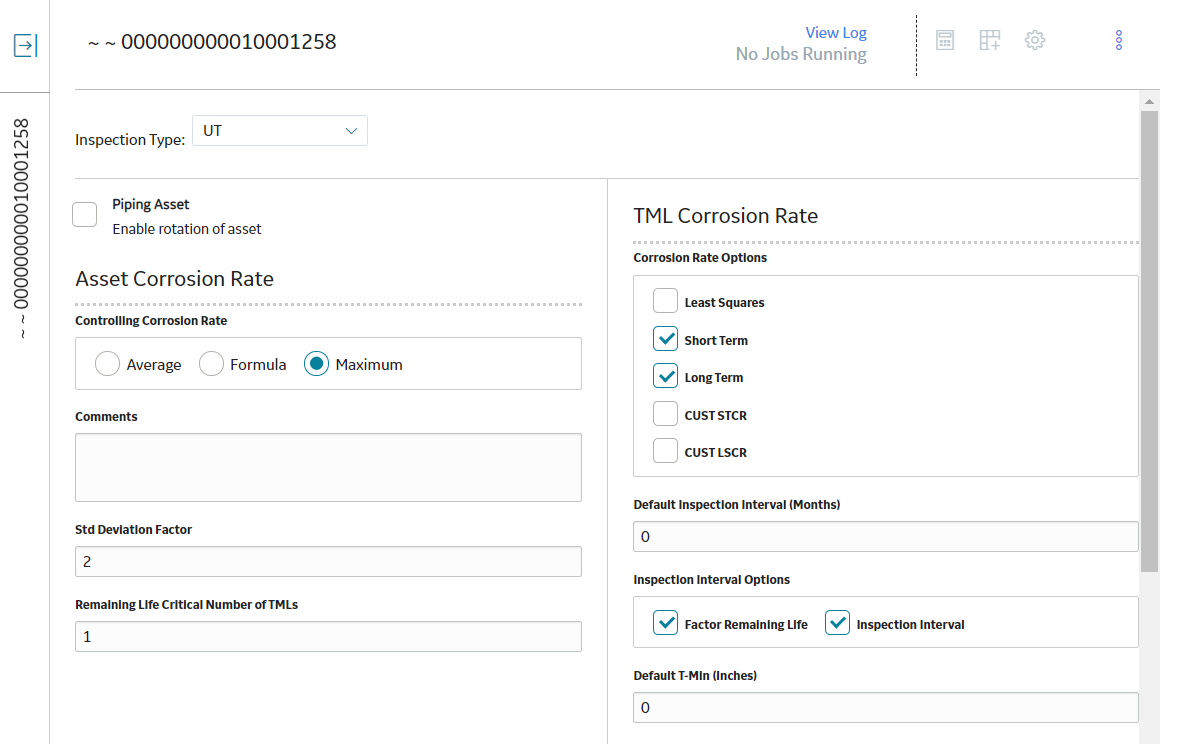
 ), and then select
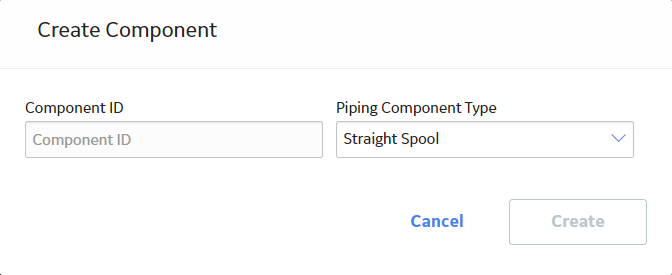
 ).
).