TMLs

About Thickness Measurement Locations (TMLs)

A TML is a specific location on an asset where Thickness Measurement readings are taken and for which various values, including minimum thickness, are calculated. Each asset or TML Group can have multiple TMLs associated with it, which stores identifying information. Thickness Measurements are linked to TMLs, which store readings taken at that location.

About Renewing Thickness Measurement Locations (TMLs)

Renewing TMLs provides a mechanism for optionally recording a new base measurement for a TML and setting all existing Thickness Measurements to Inactive. Additionally, the value that was the Controlling Corrosion Rate for the TML prior to the renewal replaces the Minimum Corrosion Rate value in the associated Corrosion Analysis Settings after the renewal. You can renew Thickness Measurement Locations without adding new measurements.

Details

Generally, you will want to renew TMLs when you replace an asset. For example, if an asset representing a tank is linked to one or more TMLs that have Thickness Measurements, when you replace the tank, you can renew the TMLs to retain the measurement data recorded for the old tank while creating a new base measurement for the new tank. When you do this, you can begin calculating Corrosion Analyses for the new tank.

When you renew a TML:

  • In linked Thickness Measurements, if the Measurement Status Indicator field was set to Active prior to the renewal, it will be set to Inactive. In addition, the value in the Measurement Status Indicator Basis will be populated.
  • The value in the Historical Sequence Number field in linked Thickness Measurements that were used during that life cycle will be incremented. For example, if the Historical Sequence Number field previously contained no value, indicating that the associated TML had never been renewed, it will now be 1, indicating that the associated Thickness Measurement Location record has been renewed one time.
  • The value in the Renew Historical Sequence Number field of the TML will be populated with the largest Historical Sequence Number in the associated Thickness Measurements that were used during that life cycle. For example, assume there are two associated Thickness Measurements that were used during the life cycle. If the Historical Sequence Number of the first measurement is 1 and that of the second measurement is 2, the Renew Historical Sequence Number field in the TML is populated with the value 2. This will keep track of the life cycle for that TML.
  • The value in the Minimum Corrosion Rate field in the Corrosion Analysis Settings for the TML is replaced with the current value in the Controlling Corrosion Rate field in the TML.
  • The value in the Status Changed By field in the TML will update to reflect the User ID of the Security User who renewed the TML.
  • The value in the Status Changed Date field in the TML will change to the current date.

About Moving Thickness Measurement Locations (TMLs)

Under some circumstances, it may be necessary to move TMLs from one asset or TML Group to another. There are two scenarios in which you might perform this task.

Moving TMLs from one Corrosion Analysis to another

You may determine that a TML that was originally linked to one asset or TML Group actually belongs to a different asset or TML Group that is included in a different Corrosion Analysis. In this case, rather than creating a new TML for the correct asset or TML Group, you can relocate the TML.

In this case, you will use Relocate TMLs to select the TML that you want to move and the asset or TML Group to which it will be linked.

Moving TMLs from one TML Group to another in the same Corrosion Analysis

You may determine that a particular subset of existing TMLs actually belong in their own TML Group. If so, you would create a TML Group for the asset, and then move the TMLs to the new TML Group.

In this case, you will use Organize TMLs to move the TMLs from one TML Group to another.

Details

When you move a TML from one asset or TML Group to another:

  • The TML ID of the TML you want to relocate cannot be the same as that of a TML that is already linked to the target asset or TML Group.
  • The TML that you relocate will now be linked only to the target asset or TML Group that you select via the Has Datapoints relationship.
  • The value in the TML Asset ID field of any relocated TML will be updated to reflect the target asset or TML Group.
  • Any Thickness Measurements, TML Corrosion Analyses, and Corrosion Analysis Settings that are linked to a TML will remain linked after the TML is relocated.
  • The Corrosion Analysis Settings for the relocated TML will inherit the values in the Corrosion Analysis Settings that are linked to the target asset or TML Group, with the exception of the following fields:
    • Allowable Measured Variance
    • Corrosion Rate Variance
    • Default Inspection Interval
    • Minimum CR
  • You can select TMLs from multiple source assets or TML Groups for a single relocate operation, but you can select only a single target. If you want to relocate TMLs to more than one target asset or TML Group, you will need to perform the relocate procedure multiple times.
  • After the TMLs are relocated, all calculations will be updated for the Corrosion Analysis that is associated with the source and target asset or TML Groups.

Access a Thickness Measurement Location (TML)

About This Task

This topic describes how to access a TML via the Analysis Overview workspace for an asset or TML Group. You can also access the Analysis Overview workspace directly for a TML.

Procedure

  1. Access the Analysis Overview workspace for the asset or TML Group that contains the TML that you want to access.
  2. In the workspace, select the TMLs tab.

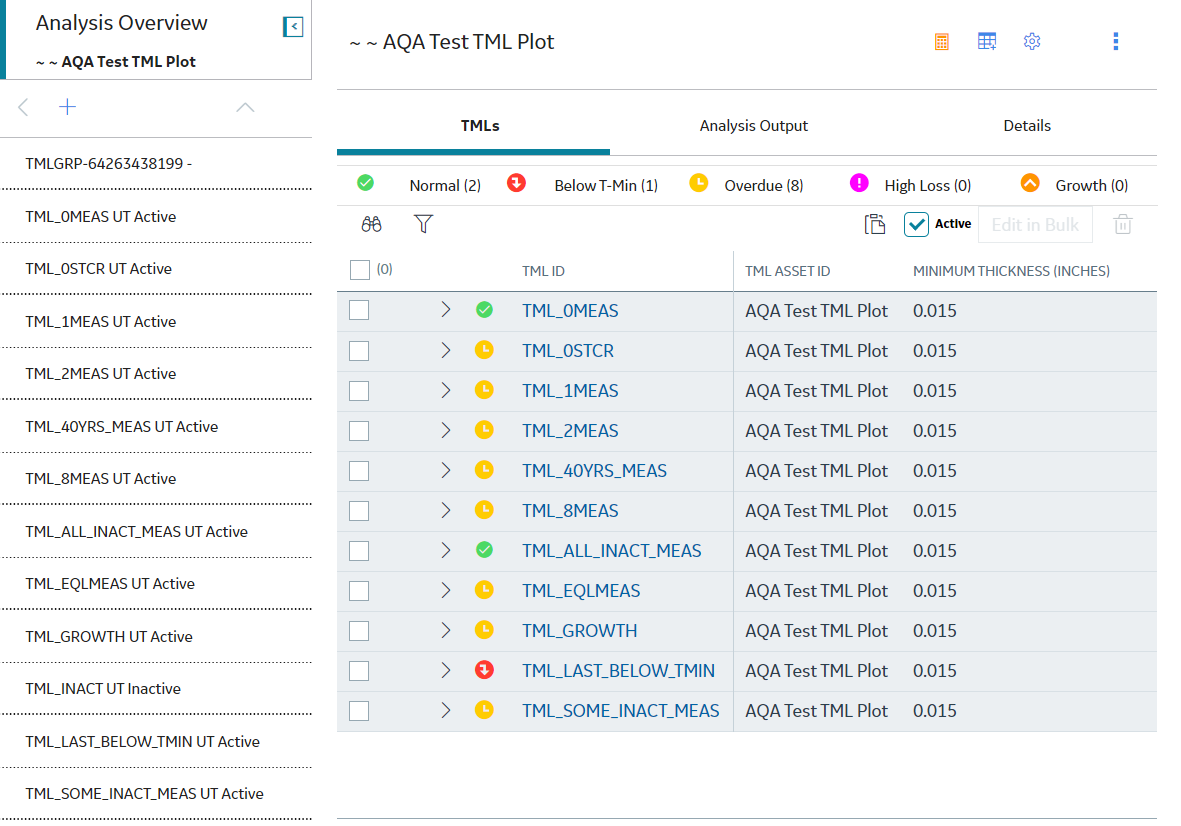
    The TMLs section appears, displaying the following information:

    • If you selected an asset, a list of TMLs linked to the asset appears. This list includes TMLs linked to TML Groups or subcomponents linked to the selected asset.
    • If you selected a TML Group, a list of TMLs linked to the TML Group appears.
    • The color-coding categories appear at the top of the section. The number in parentheses next to each category indicates the number of TMLs in each category.
    • The visual cue that appears in each row indicates the color-coding category that is applicable to the TML.


    Tip: In the TMLs section, you can:
    • Choose to view all TMLs or only the TMLs whose status is Active. To view all TMLs, clear the Active check box.
    • Select a color-coding category to filter the list of TMLs in that category. For example, if you select Below T-Min, the TMLs that meet the criterion for Below T-Min appear. You can remove the filter by selecting the same category again.
    • Delete a TML by selecting . This button is only available for security users associated with the MI Thickness Monitoring Administrator Security Group.
  3. In the row containing the TML that you want to access, select the link.
    The Measurements section appears.
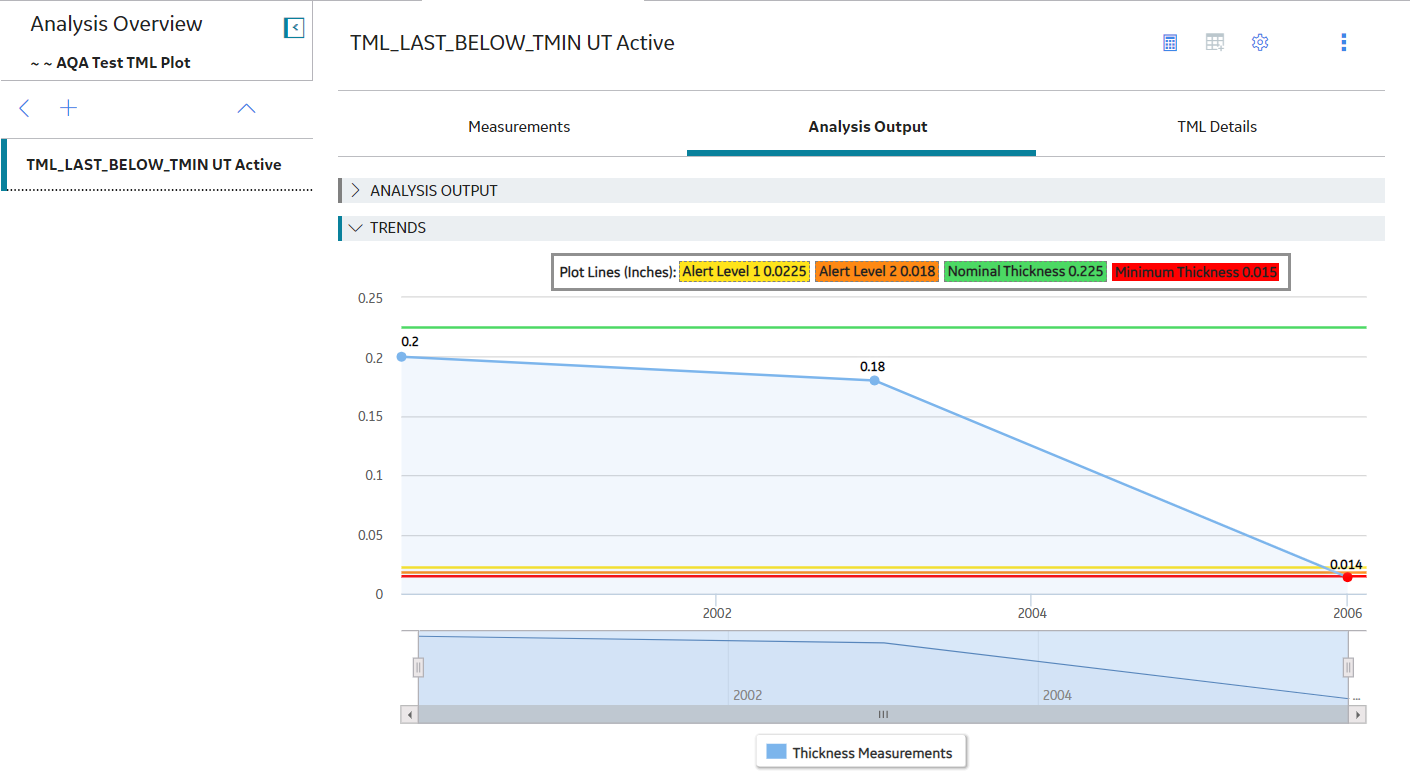
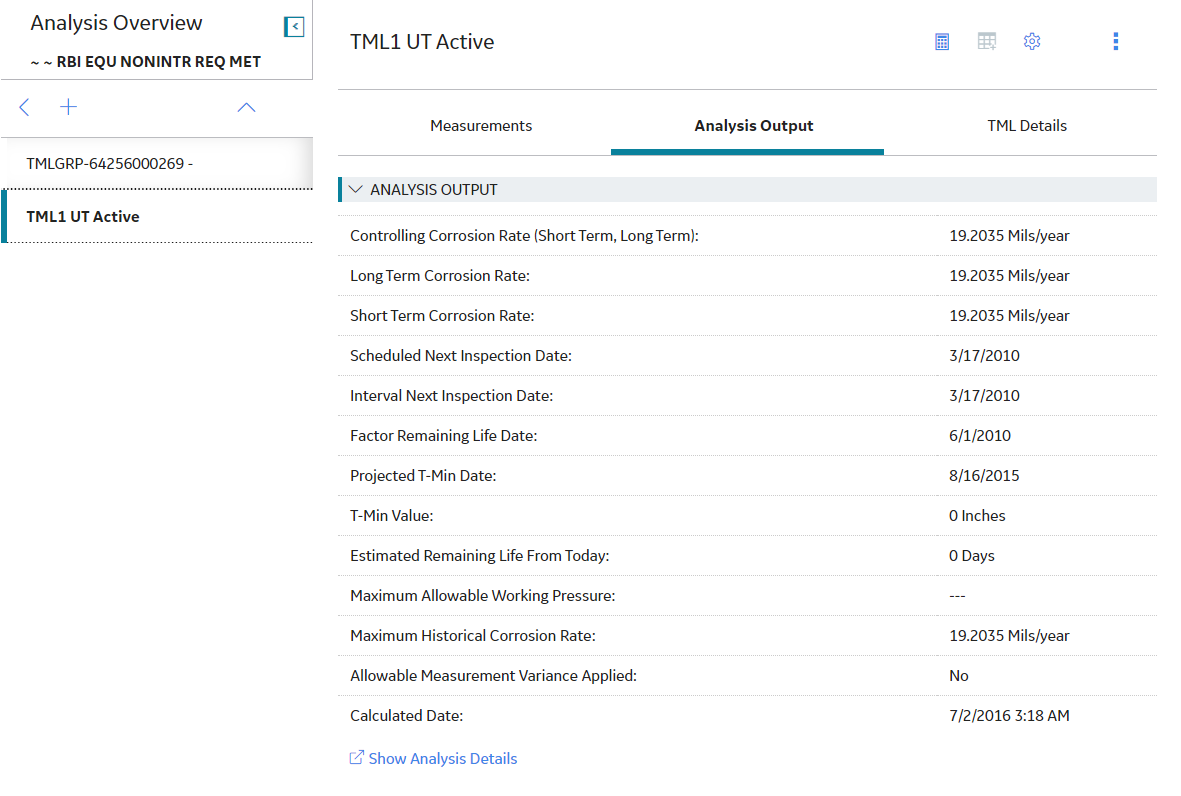
  4. Select the Analysis Output tab.
    The Analysis Output section appears, displaying a summary of the associated TML Corrosion Analysis.

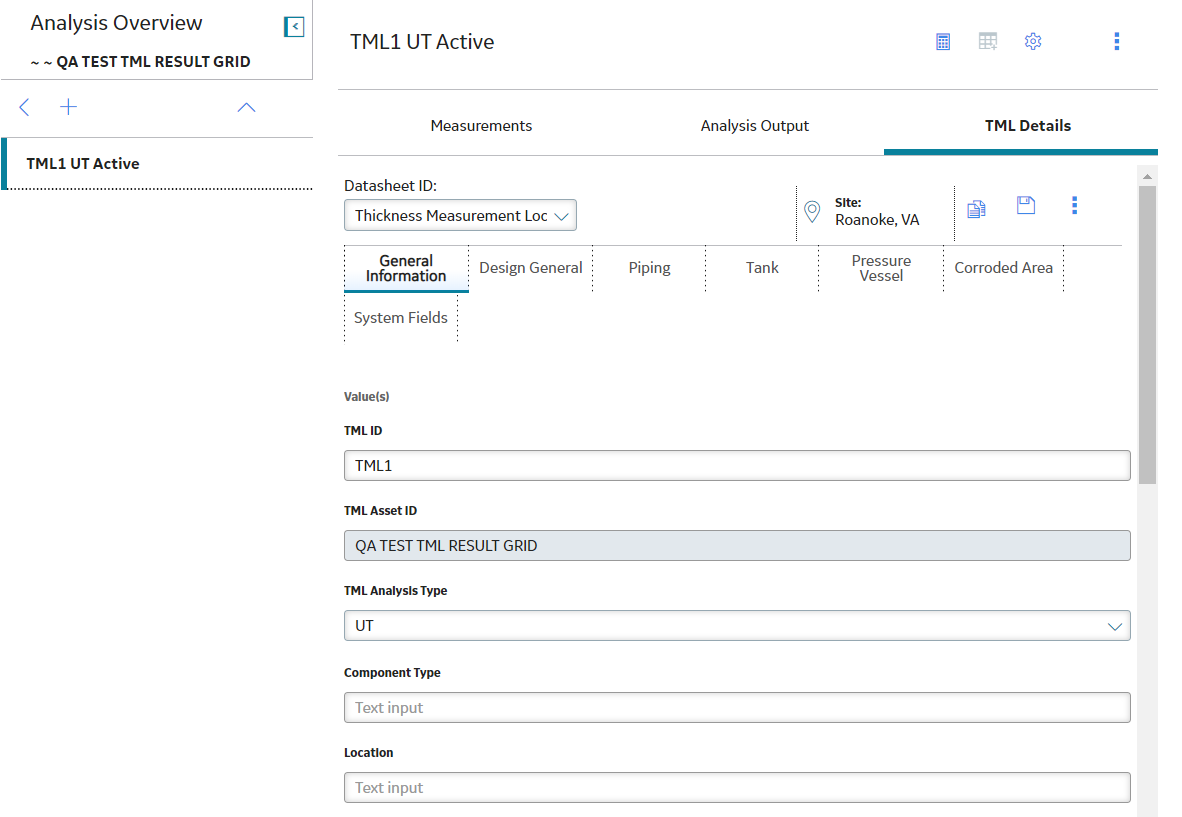
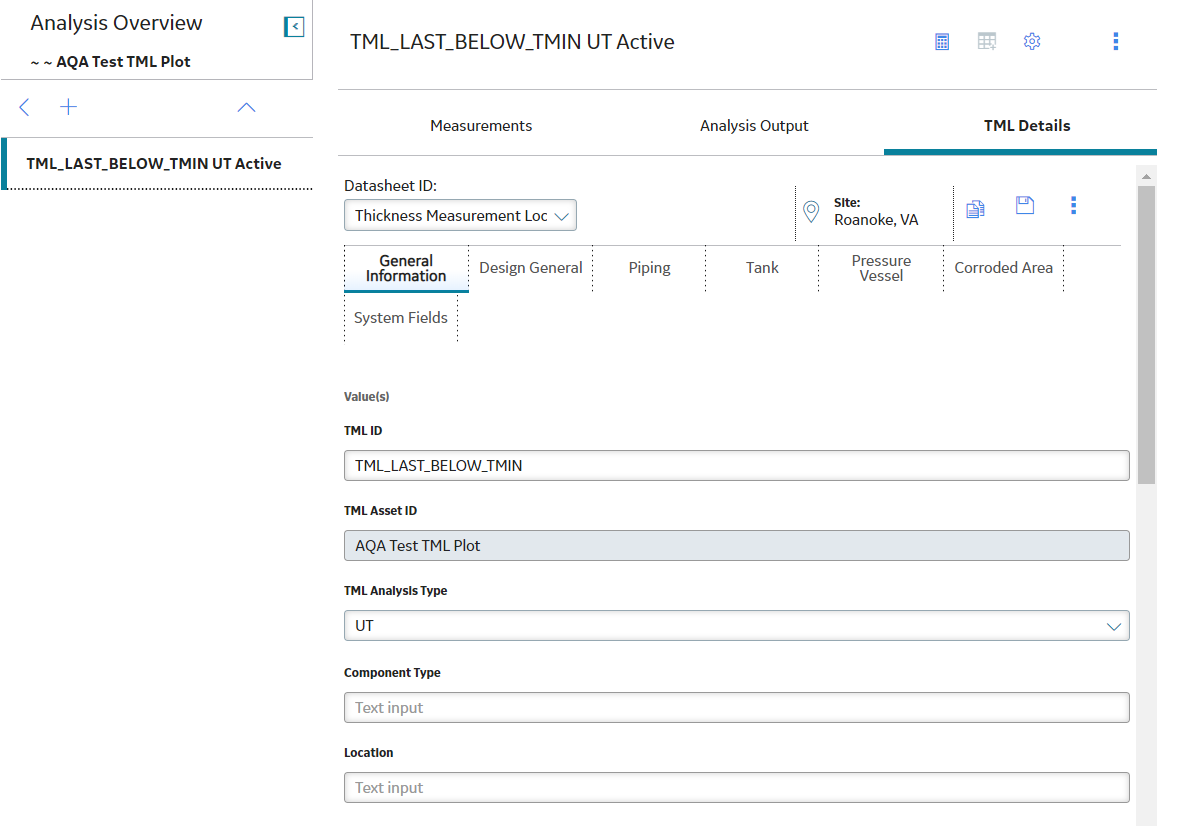
  5. If you want to access the TML datasheet, select the TML Details tab.
    The TML Details section appears, displaying the TML datasheet.

    Tip: If needed, modify values in the available fields, and then select to save your changes.

Filter Thickness Measurement Locations (TMLs)

About This Task

This topic describes how to filter TMLs based on set criteria.

Procedure

  1. Access the Analysis Overview workspace for the asset or TML Group that contains the TML that you want to access.
  2. In the workspace, select the TMLs tab.

    The TMLs section appears.


  3. Select .
    The Filter Columns window appears.
  4. Specify filter criteria in the Filter Columns window, and then select Apply.
    The TMLs are filtered based on the criteria you entered.
    Note: You can also filter TMLs using the button in the following windows:
    • Relocate TMLs
    • Organize TMLs
    • Renew TMLs
    • Exclude TMLs
    Tip: To clear a filter, next to the filter that you want to clear, select .

Create a Thickness Measurement Location (TML)

Procedure

  1. Access the Analysis Overview workspace for the asset or TML Group for which you want to create a new TML.
  2. In the left pane, select , and then select TML.

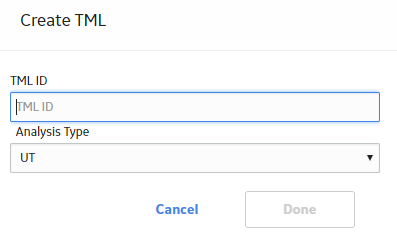
    The Create TML window appears.

  3. In the TML ID box, enter a unique TML ID.
  4. In the Analysis Type box, select the type of analysis that you want to create.

    If you have defined additional required fields for TMLs, proceed to the next step. Otherwise, skip to step 7.

  5. Select Next.

    The TML datasheet appears.

  6. As needed, enter values in the available fields.
  7. Select Done.

    The new TML is created, and the TML Overview workspace appears.

Results

  • The new TML is linked to the record selected in step 1.
  • TML Corrosion Analysis Settings are created automatically for the new TML. The values in the TML Analysis Settings are inherited from the analysis settings for the asset or TML Group selected in step 1.
  • You can modify the TML by accessing the datasheet.

Configure the Thickness Monitoring Location (TML) Section

About This Task

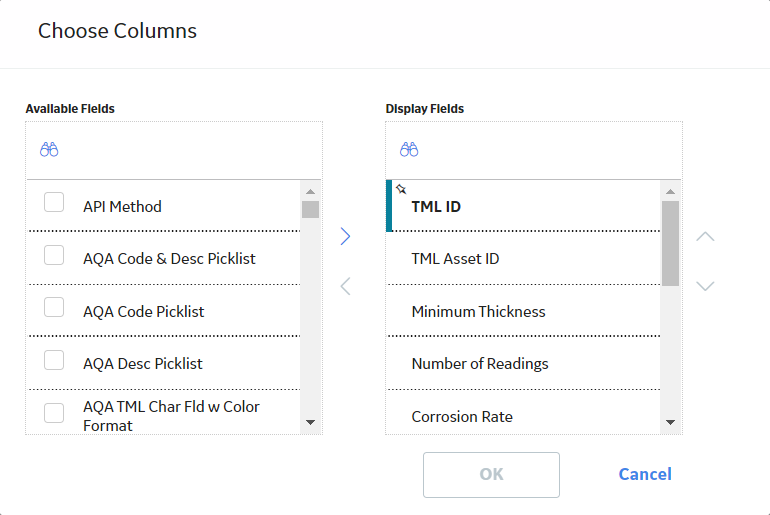
You can configure the table in the TMLs section by adding or removing fields using the Choose Columns window.

Note: The Choose Columns window displays all the fields from the TML Corrosion Analysis and Thickness Monitoring Location families except for the TML ID field. The table in the TMLs section displays the default column configuration for first-time users. You can access the Choose Columns window to add or remove columns from the table. You can also arrange the columns in the table. Any changes made to the columns in the table in the TMLs section of the Analysis Overview page are saved to the GE Digital APM database for GE Digital APM users.

Procedure

  1. Access the Analysis Overview workspace containing the TMLs section that you want to configure.
  2. In the Analysis Overview workspace, select the TMLs tab.
    The TMLs section appears.

  3. In the TMLs section, select .
    The Choose Columns window appears.

  4. In the Choose Columns window, in the Available Fields section, select the fields you want to appear in the table, and then select .
    Tip: To remove a field from the table, in the Choose Columns window, in the Display Fields section, select the field you want to remove from the table, and then select .
  5. Optionally, to reorder the fields in the Display Fields section, select
  6. Select OK.
    The selected fields appear in the TMLs section.

Results

  • The TML table configuration is saved as a user preference in the GE Digital APM database.
  • The fields added via the Choose Columns window also appear in the following areas:

Copy Thickness Measurement Locations (TMLs)

Procedure

  1. Access the TML that you want to copy.
  2. In the upper-right corner of the page, select , and then select Copy TML.
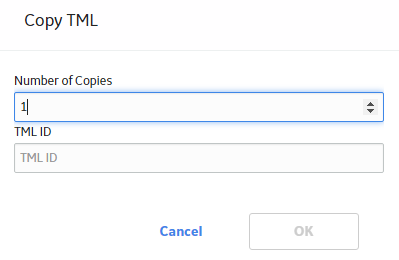
    The Copy TML window appears.

  3. Complete the required fields:
    • In the Number of Copies box, use the arrows to indicate how many copies of the selected TML you want to create.
    • In the TML ID field, enter a unique name for the copied TML
    • Important: You cannot update the TML ID field if are copying more than one TML. If you copy multiple TMLs, this field will be populated automatically.
  4. Select OK.
    The Analysis Overview workspace appears, and the newly copied TMLs appear in the left pane.

Relocate a Thickness Measurement Location (TML)

About This Task

You can relocate TMLs to move TMLs from a source asset or TML Group to a different target asset, or to a TML Group or subcomponent linked to that target asset. If you need to move TMLs to or between subcomponents linked to the same asset, use the Organize TMLs method.

Procedure

  1. Access the Analysis Overview workspace for the asset the TMLs you want to relocate.
  2. Select , and then select Relocate TMLs.
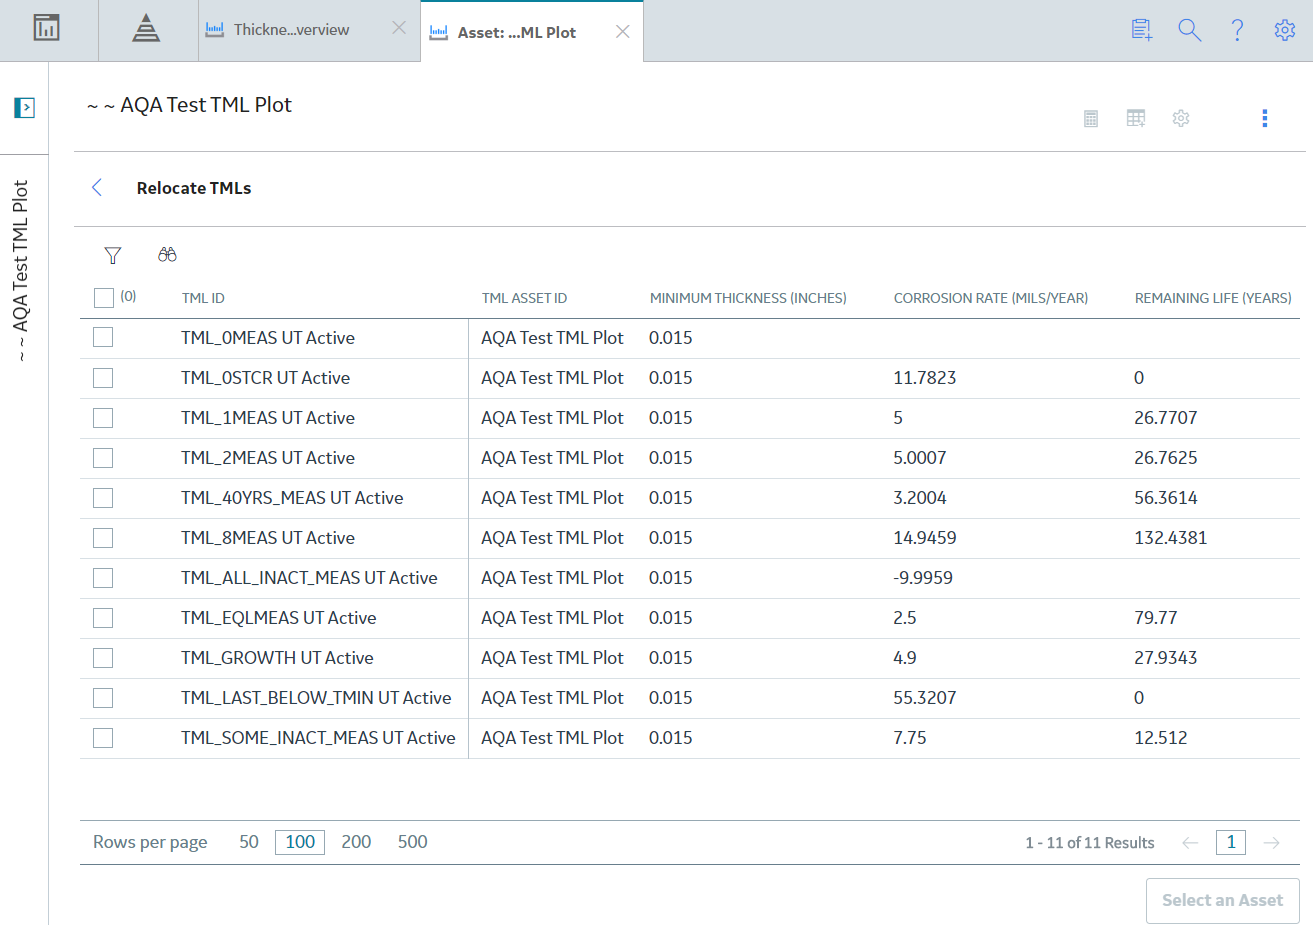
    The Relocate TMLs workspace appears.

  3. In the list, select the check boxes corresponding to the TMLs that you want to relocate.
    Note: If you do not see the TMLs that you expect, or want to limit the list, in the upper-left corner of the workspace, confirm the setting in the Analysis Type list, and whether the Active TMLs Only check box is selected.
  4. Select Select an Asset.
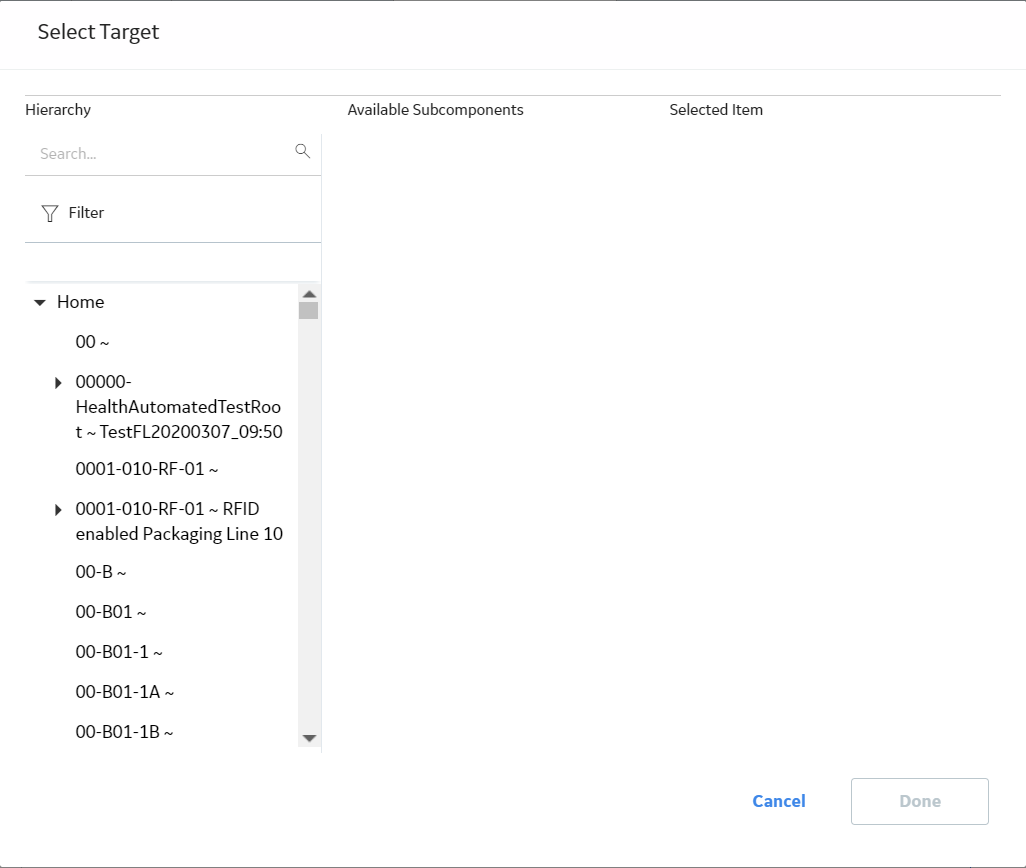
    The Select Target window appears.

  5. In the Asset Hierarchy, navigate to the asset to which you want to relocate the TMLs.
    In the Selected Item box, the Asset ID for the asset appears. In the Available Subcomponents box, a list of linked subcomponents appears.
  6. If you want to relocate the TMLs to a subcomponent, such as a TML Group, in the Available Subcomponents box, select the subcomponent to which you want to relocate the TMLs.
  7. Select Done.
    The TMLs are relocated to the selected asset or subcomponent.

Results

The analyses of the affected assets and subcomponents are recalculated.
Important: You cannot relocate TMLs from a non-piping asset to a piping asset. In addition, the Relocate TMLs option is not available for piping assets.

Renew Thickness Measurement Locations (TMLs)

Procedure

  1. Access the Analysis Overview workspace for the asset or TML Group that contains the TMLs that you want to renew.
  2. Select , and then select Renew TMLs.
    Note: For piping assets, the Renew TMLs option is only available at the component and band levels.
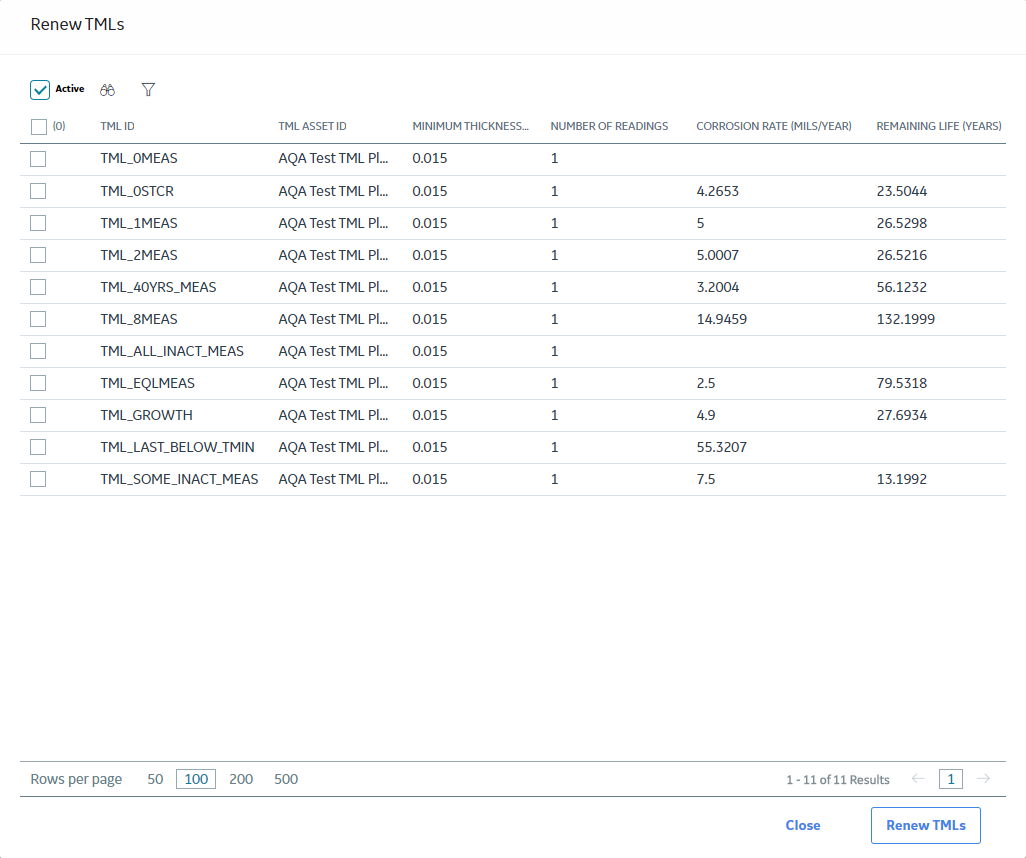
    The Renew TMLs window appears, displaying a list of the TMLs linked to the asset or TML group.
    Tip: For piping components and bands, you can view the position of each TML in the band from the POSITION column.
  3. Select the check boxes corresponding to the TMLs that you want to renew.
    Note: If you do not see the TMLs that you expect, or want to filter the list, verify the filter settings. You can configure to view only the active TMLs and filter the list based on the analysis type.
  4. Select Renew TMLs.
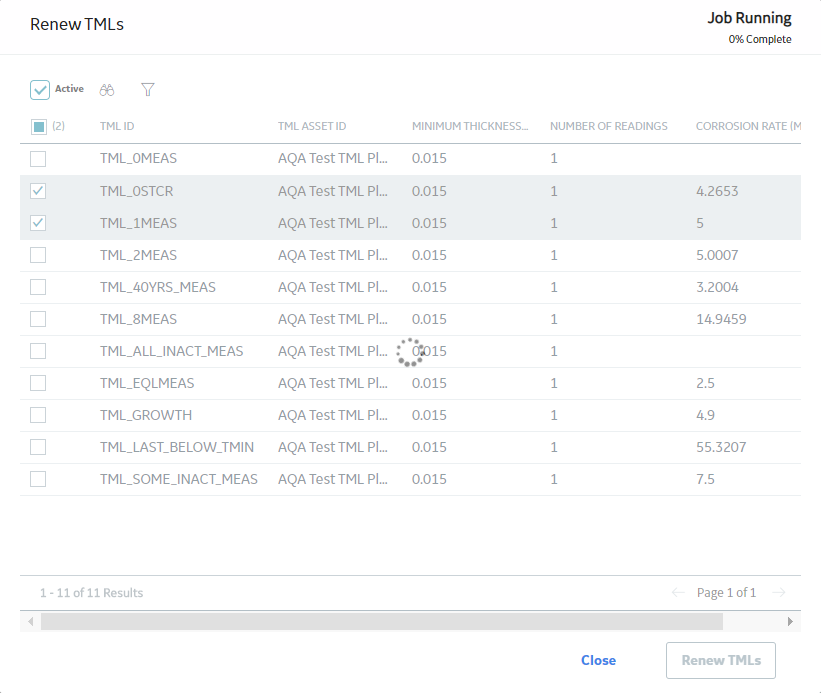
    The renewal of TMLs starts and the renewal progress appears in the upper-right corner of the Renew TMLs window.

    Tip: The renewal process continues even if you close the Renew TMLs window. You can view the progress of the job from the Schedule Logs. In case any TML fails to renew, the job is placed in the Failed section of the Schedule Logs page.

Organize Thickness Measurement Locations (TMLs)

About This Task

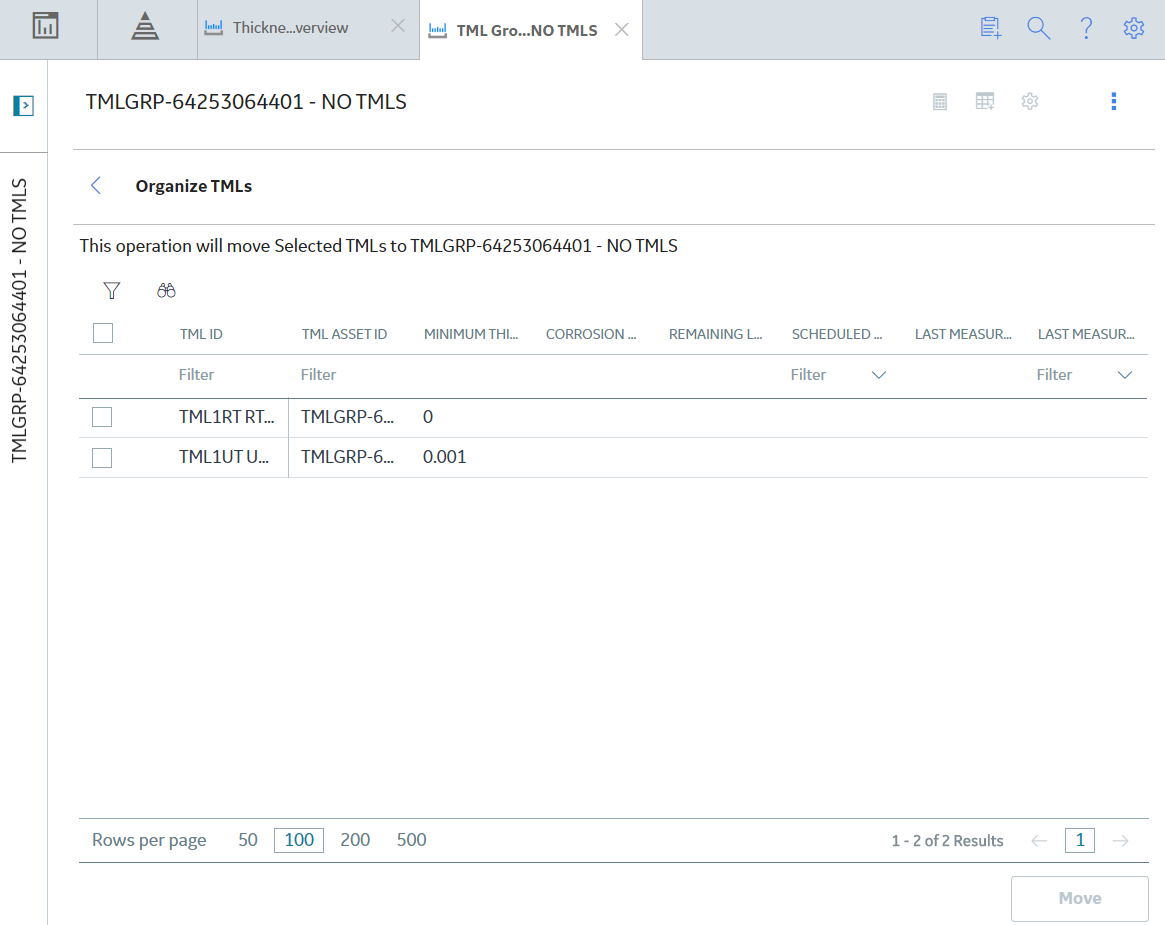
You can organize TMLs to move TMLs to or between TML Groups and subcomponents associated with the same asset. If you want to move TMLs to another asset, or to a subcomponent of that asset, you should relocate those TMLs.

Procedure

  1. Access the Analysis Overview workspace for the TML Group or subcomponent to which you want to move TMLs.
  2. In the upper-right corner of the workspace, select , and then select Organize TMLs.
    The Organize TMLs workspace appears, displaying a list of TMLs linked to the asset to which the TML Group or subcomponent you selected in step 1 is linked. This list includes TMLs linked to all TML Groups and subcomponents that the asset contains, including the one that you selected in step 1.

    Note: If you do not see the TMLs that you expect, or want to limit the list, in the upper-left corner of the workspace, confirm the setting in the Analysis Type list, and whether the Active TMLs Only check box is selected.
  3. Select the check boxes corresponding to the TMLs that you want to move to the TML Group or subcomponent.
  4. Select Move.
    The selected TMLs are moved to the TML Group or subcomponent, and the corrosion analysis is recalculated.

Results

Important: The Organize TMLs option is not available for piping assets.

Exclude a Thickness Monitoring Location (TML)

Before You Begin

Procedure

  1. Access the Analysis Overview workspace for the asset or TML Group that contains the TMLs that you want to exclude.
  2. In the workspace, select the TMLs tab.
    A list of TMLs contained in the analysis appears in the workspace.

  3. In the upper-right corner of the workspace, select , and then select Exclude TMLs.
    Note: For piping assets, the Exclude TMLs option is only available at the component and band levels.
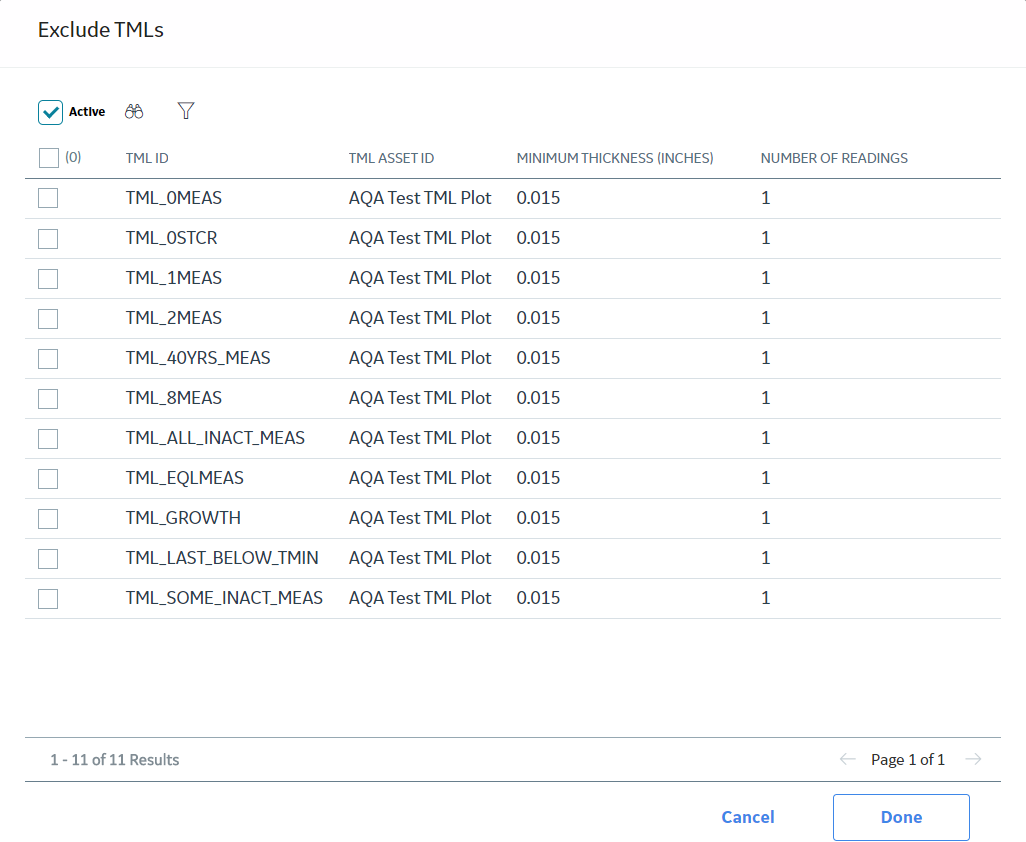
    The Exclude TMLs window appears, providing a list of TMLs in the analysis. If a TML has already been excluded, the corresponding check box is selected.
    Tip: For piping components and bands, you can view the position of each TML in the band from the POSITION column.


  4. In the list, select the check boxes corresponding to the TMLs that you want to exclude.
    Note: If you do not see the TMLs that you expect, or want to limit the list, in the upper-left corner of the window, confirm the setting in the Analysis Type box, and whether the Active TMLs Only check box is selected.
  5. Select Done.
    The selected TMLs are excluded from the analysis.
    Tip: At this time, you can calculate the Analysis with the newly excluded TMLs by selecting .

Access the TM Quick View Page

About This Task

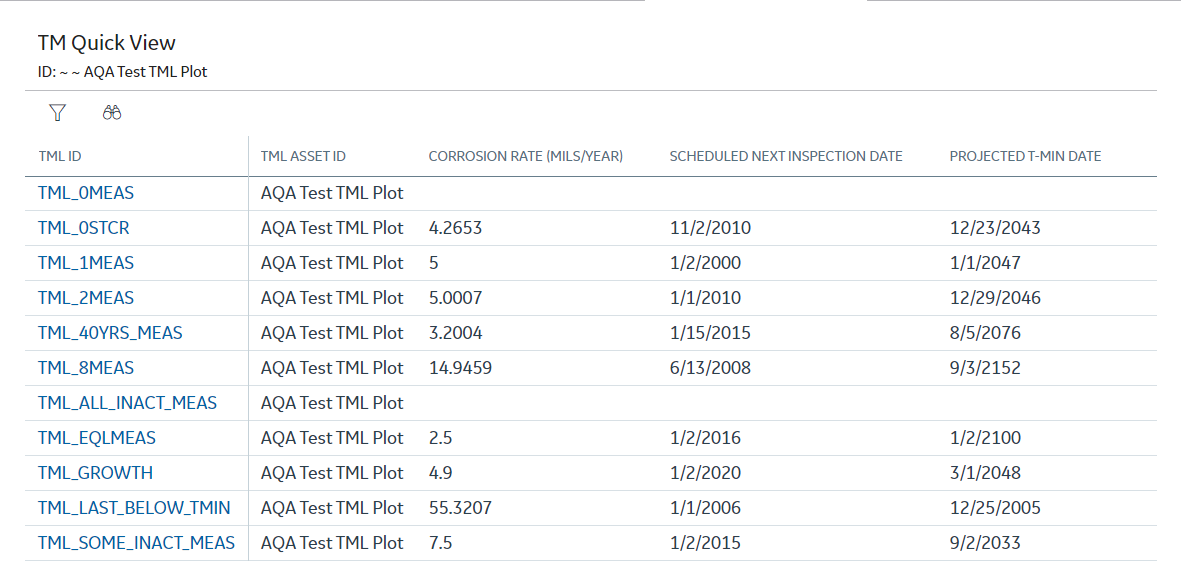
The TM Quick View page displays a list of TMLs in an asset or TML Group, along with details on the corrosion rate, next inspection date, measurements taken in each month, and so on.

Procedure

  1. Access the Analysis Overview workspace for the asset or TML Group whose TMLs you want to view.
  2. Select , and then select Quick View.
    Note: For piping assets, the Quick View option is only available at the component and band levels.
    The TM Quick View page appears.
    Tip: For piping components and bands, you can view the position of each TML in the band from the POSITION column.


    Note: The unit of measure displayed on the grid is based on your selections on the Units of Measure and Conversion Set page.
    The TM Quick View page displays the following information:
    • From the Thickness Measurement Location family:
      • Minimum Thickness
      • TML Analysis Type
      • TML Asset ID
      • TML ID
        Tip: You can select the link in the TML ID column to access the Analysis Overview page corresponding to a TML.
    • From the TML Corrosion Analysis family:
      • Corrosion Rate
      • Projected T-Min Date
      • Scheduled Next Inspection Date
    • From the Thickness Measurement family:
      • <Month><Year>: Contains a list of measurements for the month and year displayed in the column heading, separated by a semicolon.
    Note: By default, the TM Quick View page displays measurements taken in the past ten years. If you want to modify the data range, in the upper-left corner of the page, select .

Modify TMLs in Bulk

Procedure

  1. Access the Analysis Overview workspace for the asset or TML Group that you want to modify.
  2. In the workspace, select the TMLs tab.
    The TMLs section appears.

  3. Next to each TML that you want to modify, select the check box, and then, in the upper-right corner of the section, select Edit in Bulk.
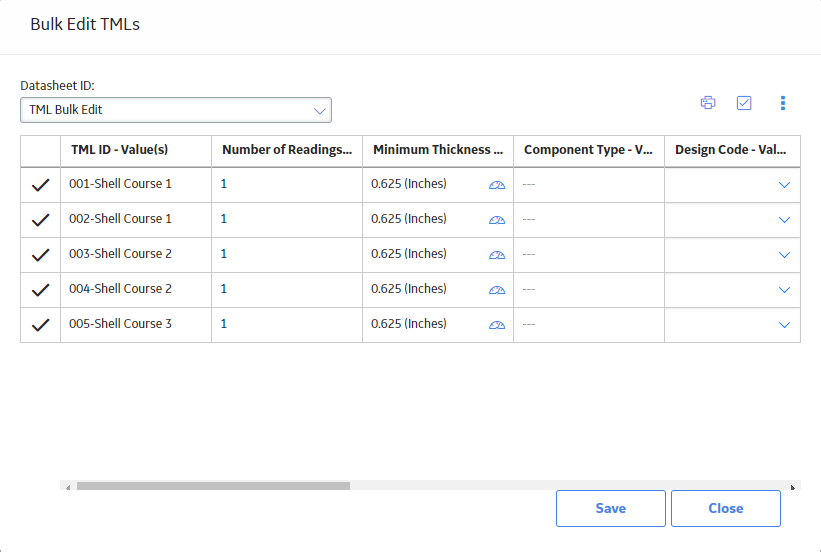
    The Bulk Edit TMLs window appears, displaying the selected TMLs.
    Tip: The Bulk Edit TMLs window displays 50 TMLs per page.


  4. As needed, on the Bulk Edit TMLs window, modify the fields.
  5. Select Save, and then select Close.
    The selected TMLs are modified.
    Tip: The TMLs you selected appear in the TML Bulk Edit datasheet.

Define Allowable Stress

About This Task

This topic describes how to define the Allowable Stress value for a TML manually. You can also have GE Digital APM populate the value based on values in a few fields in the TML record. This procedure can be performed before or after you have automatically calculated Allowable Stress for a TML.

Note: Refer to the Allowable Stress reference tables and the method of interpolation used in Thickness Monitoring.

Procedure

  1. Access the TML for which you want to define Allowable Stress.
  2. In the workspace, select the TML Details tab.
    The TML Details section appears, displaying the General Information subsection.

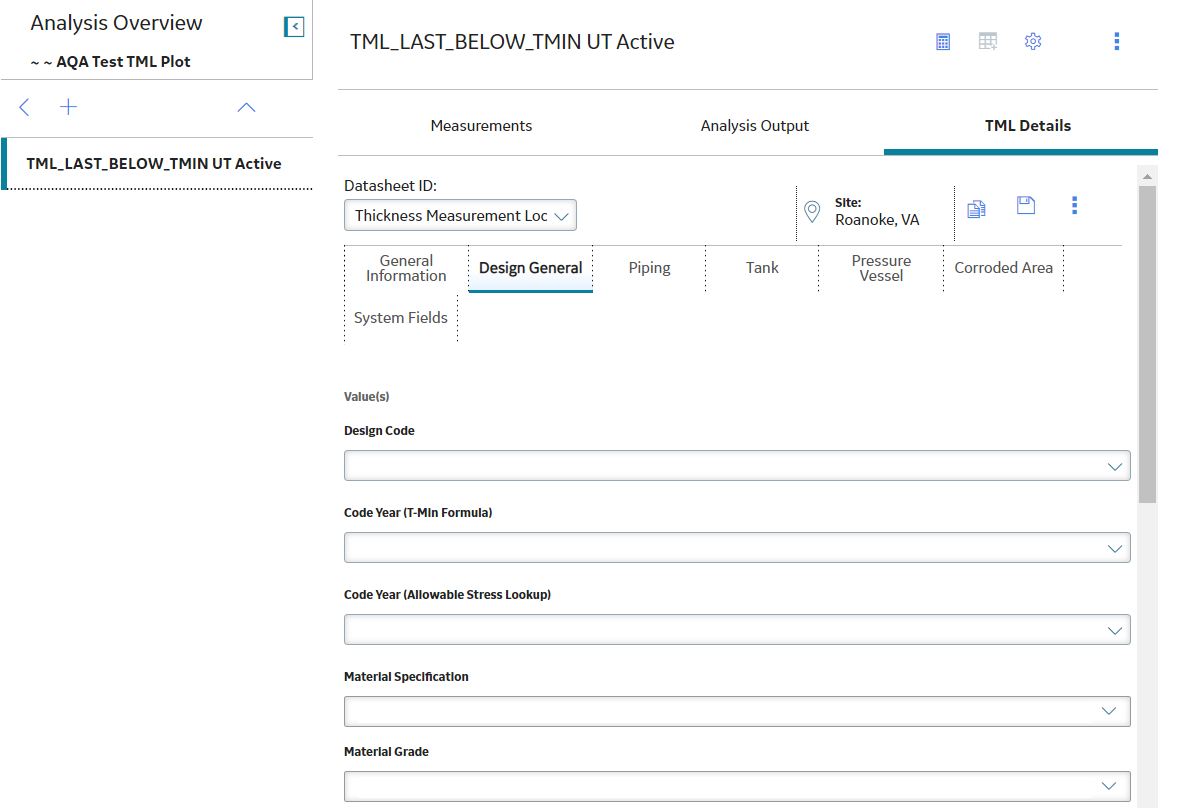
  3. Select the Design General tab.
    The Design General subsection appears.

  4. Select the Override Allowable Stress check box.
    The Allowable Stress box is enabled.
  5. Enter a value in the Allowable Stress box.
  6. Select .
    The Allowable Stress value is saved.

Calculate Allowable Stress

About This Task

This topic describes how to have GE Digital APM calculate the value in the Allowable Stress field automatically. You can also define a value manually.

Note: Refer to the Allowable Stress reference tables and the method of interpolation> used in Thickness Monitoring.

Procedure

  1. Access the TML for which you want to define Allowable Stress.
  2. In the workspace, select the TML Details tab.
    The TML Details section appears, displaying the General Information subsection.

  3. Depending on the type of equipment the TML represents (i.e., the component type), enter values in the required fields.
    For Piping and Pressure Vessels, enter values in the following fields:
    • Code Year (Allowable Stress Lookup)
    • Design Code
    • Material Grade
    • Material Specification
    • Design Temperature
    For Tanks of the type Welded Shell, enter values in the following fields:
    • Code Year (Allowable Stress Lookup)
    • Course Number
    • Design Code
    • Tank Type
    • Material Grade
    • Material Specification
    For Tanks of the type Annular Ring, enter values in the following fields:
    • Maximum Operating Fill Height
    • Tank Diameter
    • Specific Gravity
    • Plate Thickness
    The Allowable Stress field is populated with a value based on the component type.
  4. In the upper-right corner of the section, select .
    The Allowable Stress value is saved.

Make a Thickness Measurement Location (TML) Inactive

Before You Begin

  • When you make a Thickness Measurement Location (TML) inactive, it will be excluded from any future corrosion analysis calculations.

Procedure

  1. Access the TML that you want to make Inactive.
  2. In the workspace, select the TML Details tab.
    The TML Details section appears, displaying the General Information subsection.

  3. In the Status Indicator box, select Inactive, and then select Save.
    The TML is now inactive.

Delete a Thickness Measurement Location (TML)

Before You Begin

  • When you delete a TML, any linked measurements, Corrosion Analysis Settings, and TM Corrosion Analyses are also deleted.
Procedure

  1. Access the TML that you want to delete.
  2. Select , and then select Delete.
    Note: The Delete option is only available for security users associated with the MI Thickness Monitoring Administrator Security Group.

    A message appears, asking you to confirm that you want to delete the TML and any linked Thickness Measurements.

  3. Select Yes.

    The TML is deleted.