The Proficy Application Server installs Workflow components as prerequisites for Plant Applications.
Before you begin
Verify that licensing has been installed before installing the Plant Applications Server.
About this task
Workflow is required even if you are planning to use legacy Plant Applications features and Plant Applications data models without any merged SOA data models. You need a Workflow license to use workflows.
During the Proficy Application Server installation, you must specify the location for the SQL Server that hosts the database, as well as the name of the database. Stored in an XML file the Plant Applications installation uses this information in one of these scenarios:
When Workflow adds Plant Applications tables to the SOA database to install a UMDB. After installing Plant Applications, you must run scripts to prepare data when a UMDB is installed with existing SOA data.
When Workflow adds SOA tables and keys to a Plant Applications database (if specified as the database during installation) to install a UMDB. Before installing Workflow, you must run a script to prepare the Plant Applications database for the UMDB installation.
Refer to the following log files when troubleshooting service provider installation failures: configuresite.log and configureproficymocule.log. You can find the log files in the Documents and Settings\users\application data proficy\logdirectory, or at \programdata\proficy\logs.
Procedure
Copy software and extract files to the machine where you want to install the Proficy Application Server components, then run InstallFrontEnd.exe as an administrator.
From the Installation Menu, select Proficy Application Server from the Prerequisites group.
Select the Proficy Application Server from the options in the Application Server Setup Wizard screen.
Select Core as the type of Proficy Application Server, then click Next.
Accept the End User License Agreement (EULA) for Proficy Workflow by clicking I Agree.
From the Installation Folders and Architecture screen, select the destination folders for the installation location, then select 32-bit architecture. Click Next to continue.
Note:Plant Applications does not support 64-bit architecture.
Specify Active Directory Lightweight Directory Services (AD LDS) settings if using AD LDS, or use a standalone local directory. Click Next to continue.
Note: If AD LDS is not installed, the wizard defines a standalone local directory.
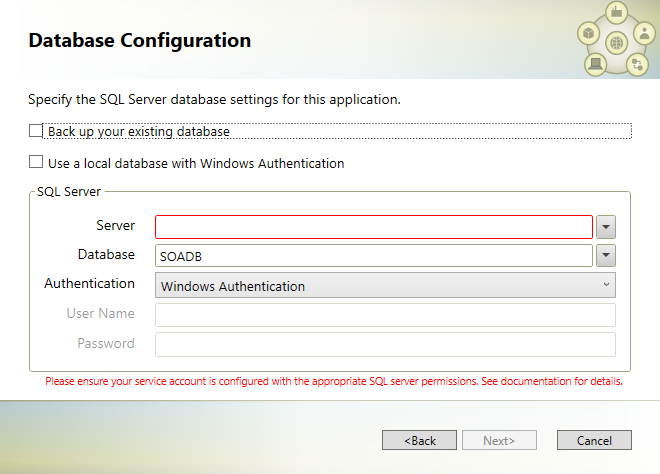
Verify that the SQL Server Browser service is running. At the Database Configuration screen, specify SQL Server settings for the installation. The example screen specifies a database named SOADB, which is typical when installing a UMDB from a SOA database. If upgrading from an existing Plant Applications database, specify its name. Or enter a new name for the UMDB. Click Next to continue.
The SQL User account used for the database when installing Plant Applications requires, at minimum, system administrator privileges. To review login permissions and connection properties set up in SQL Server:
Select Properties by right-clicking a server name in Object Explorer in SQL Server Management Studio.
Review the Security and Permissions pages in the Server Properties window.
Click View connection properties in the Connections pane.
If needed, start the SQL Server Agent (MSSQLSERVER) service.
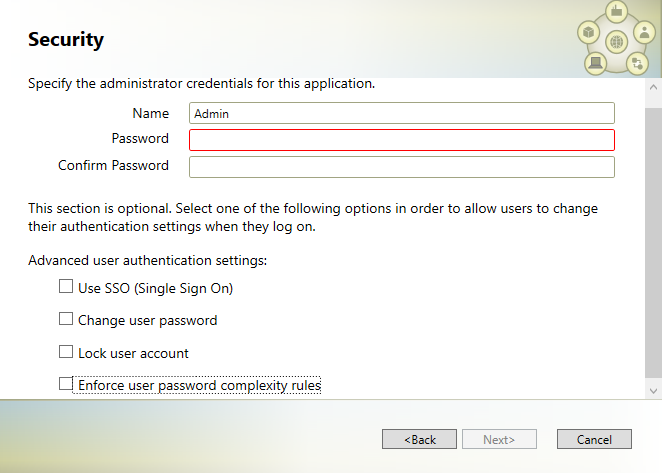
At the Security screen, enter administrator credentials for Workflow.
From the Service Certificates screen, generate new certificates or import existing certificates. For more information, see, SSL Security Certificates. Click Next to continue.
The installation program places a certificate into the trusted root store on the server where the Application Server is installed.
If the installation wizard displays a Firewall Detected message, disable your firewalls or configure your computer to communicate with the server. Click Next to continue.
From the Installation Confirmation screen, click Install to install Proficy components. Follow any additional screen prompts.
Note: The installation program times out after 10 minutes if the Proficy Server service does not start, and a message prompts you to manually start the service. Once the service starts, the installation automatically continues.
The installation script performs the following actions:
Installs MS Visual C++ redistributables.
Note: In order to install Workflow 2.6, you may be required to uninstall version VC++ 2017 and then reinstall it.
Installs Proficy Application Server.
Sets up the SOA database.
Sets up security.
Sets up IIS.
Sets up SQL.
Upon successful installation, the wizard displays a confirmation message. Click Exit to close the installation wizard.
You can verify that the SQL Server installed successfully by checking the SQL server setup failed status in the SetupDataPlantAppsTemplateFile.xml file under Program Data/Proficy.
 Note: Plant Applications does not support 64-bit architecture.