Installing Plant Applications Universal Client Without Using Docker
About Installing Plant Applications Universal Client Without Using Docker
Installing Plant Applications Universal Client without using a docker container installs only the process applications. You must perform this type of installation if you want to upgrade from a previous version of Plant Applications. You can choose this method for a first-time installation as well. However, the discrete applications are not installed using this method.
About Preinstallation Requirements
System Requirements
Ensure that your computer meets the system requirements as described in the following table. For more information, refer to the System Requirements section in the Plant Applications Important Product Information document for the latest Plant Applications release.
| Item | Version |
|---|---|
| GE OpHub UAA | UAA 3.0.209.0 |
| Web browsers | Chrome 65.0 or later |
| Operating system | 64-bit Windows 7, Windows 10, Windows Server 2012, Windows Server 2016, or Windows Server 2019 |
| Framework | Microsoft® .NET Framework 4.7 or later |
| SQL server | SQL server 2012, 2014, 2016 (64-bit), or 2017 (64-bit) Note: Ensure that you have configured the SQL server database as the Plant Applications database. For more information, refer to the Plant Applications Getting Started Guide for the latest release. |
| Hard drive | 80 GB (minimum) |
| Processor | 2.4 GHz clock-speed Intel Core i3, i5, or i7 CPU or equivalent AMD Phenom CPU with 16 GB RAM Note: It is recommended to use a quad core (4-cores) processor for better performance. |
| Memory | 16 GB (recommended) Note: You must have 32 GB if you plan to install Plant Applications, Historian, OpHub UAA, Universal Client (UC), Message Bridge on the same node. However, it is recommended to install them in a distributed environment. |
Port Requirements
| Port | Description |
|---|---|
| 5672 | The default port for the RabbitMQ Message bridge required to communicate with the Plant Applications server for retrieving data updates. |
| 8444 | The default port for the Tomcat server. |
| 1433 | The default port for the Microsoft SQL server. |
Software Requirements
The installer identifies all available and missing software packages required before installing the Plant Applications Universal Client.
You must install the following software packages before you run the installer:
- Microsoft OLE DB Driver 18 for SQL ServerNote: You can download the Microsoft OLE DB Driver 18 for SQL Server from the following URL: https://www.microsoft.com/en-us/download/details.aspx?id=56730.
If you do not install Microsoft OLE DB Driver 18 for SQL Server, the following screen appears, and the installation is stopped. 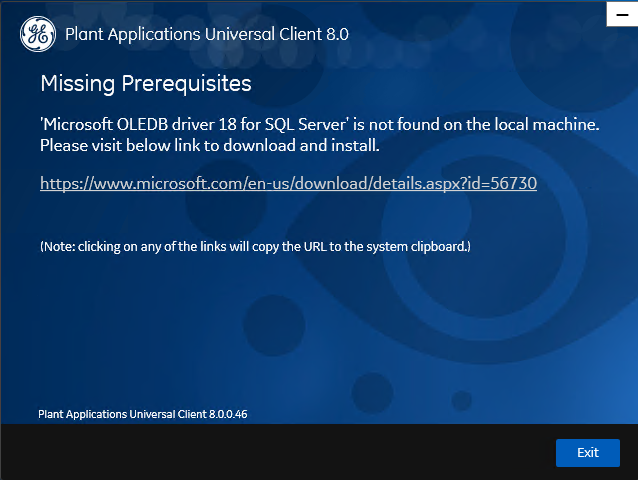
- Apache Tomcat version 9.0.1
- Ruby 2.3.3
- Ruby DevKit version 4.65.0.0Note:
Ruby is required because the UAA Command Line Interface (UAAC) is dependent on Ruby.
- NodeJS 8.12
- Python 2.7
- OpenJDK 1.8
Plant Applications Server Requirements
Ensure that the Plant Applications Server 8.0 is installed. For more information, refer to the Plant Applications Getting Started Guide for the latest release.
Install Operations Hub UAA
For instructions, refer to the UAA installation Guide provided along with the Operations Hub UAA installation package.
Plant Applications Message Bridge Requirements
GE recommends that you configure the RabbitMQ Message Bridge in the Plant Applications server before installing the Plant Applications Universal Client. For more information, refer to the Installing the Plant Applications Message Bridge section in the Plant Applications Getting Started Guide.
Install the Plant Applications Universal Client Without Using Docker
About This Task
Procedure
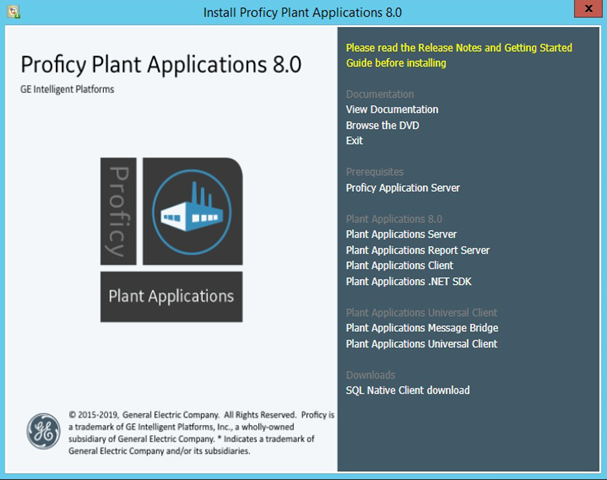
- Run the installfrontend.exe file as an Administrator.The installation menu appears, displaying the Install Proficy Plant Applications 8.0 screen.
 Tip: You can hover over each task that appears in the installation menu to refer to the tooltip associated with that task.
 - Select Plant Applications Universal Client 8.0.The Plant Applications Universal Client installation wizard appears, displaying the Welcome to Plant Applications Universal Client 8.0 screen.

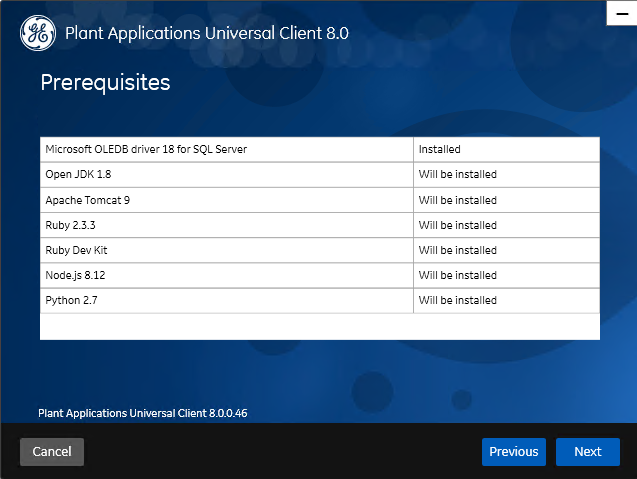
- In the Welcome to Plant Applications Universal Client 8.0 screen, select Next.The Prerequisites screen appears.
 Note: If Microsoft OLE DB Driver 18 for SQL Server or later is not installed, the Missing Prerequisites screen appears informing you to install the required version of the missing software before you run the installer. You must exit the installation, and first install the required software.
 - In the Prerequisites screen, select Next to view all installed prerequisites and install any missing prerequisites.The Read and accept the license agreement to continue screen appears.
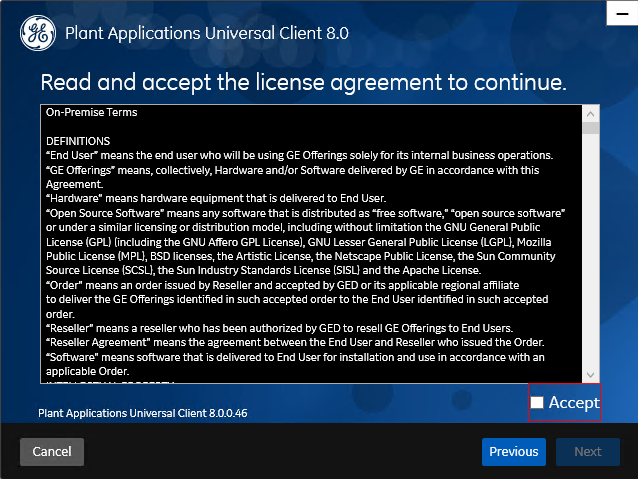
- Read the license agreement, select Accept, and then select Next to continue the installation.The Installation Directory screen appears with the default installation directory selected as C:\Program Files\GE Digital\PlantApplicationsUniversalClient.
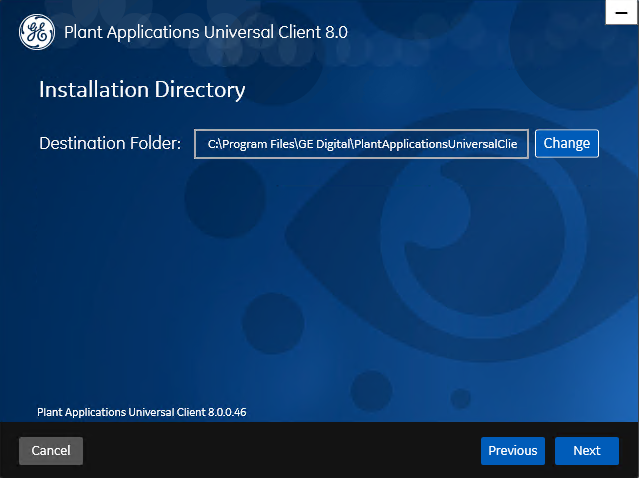
- In the Installation Directory screen, select Next.The UAA Credentials screen appears.
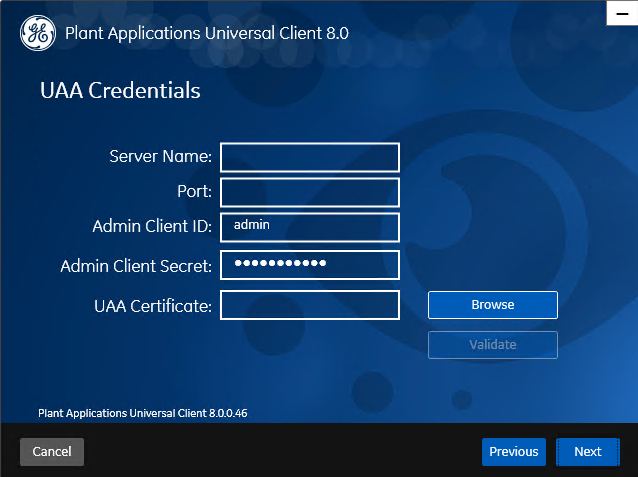
- In the UAA Credentials screen, enter the credentials to access the UAA server as described in the following table.
Credential Description Server Name Enter the host name of the UAA server. Note: Instead of IP address, it is recommended to use the UAA host name (computer name).Port Enter the UAA port number. Admin Client ID Enter the admin Client ID to access the UAA server instance. Note: The default user name isadmin.Admin Client Secret Enter the Client Secret for the user name you entered in the Admin Client ID box. UAA Certificate Select Browse to locate the UAA server certificate and upload it. Note: Copy the certificate from the UAA installed node’s location (C:\Program Files (x86)\GE_Digital\nginx\conf\cert to UC node).Validate Select Validate to validate the UAA server connection. Note: The following table describes each icon indicating a validation status that might appear during the validation process.Icon Description 
Indicates that the validation is in progress. 
Indicates that the validation was successful. 
Indicates that the validation was unsuccessful. In this case, make sure you enter the correct password. If all the options are entered correctly, the Next button is enabled. - Select Next.
The Plant Applications Database Credentials screen appears.

- Select Validate Connection to validate the database connection.Note: The validation process takes some time to check whether a compatible version of the Plant Applications server is installed.The following table describes each icon indicating a validation status that might appear during the validation process.
If the database connection is successfully validated, the Next button is enabled.Icon Description Indicates that the validation is in progress. Indicates that the validation was successful. Indicates that the validation was unsuccessful. In this case, make sure you enter the correct password. - Select Next.The Tomcat Installation screen appears.
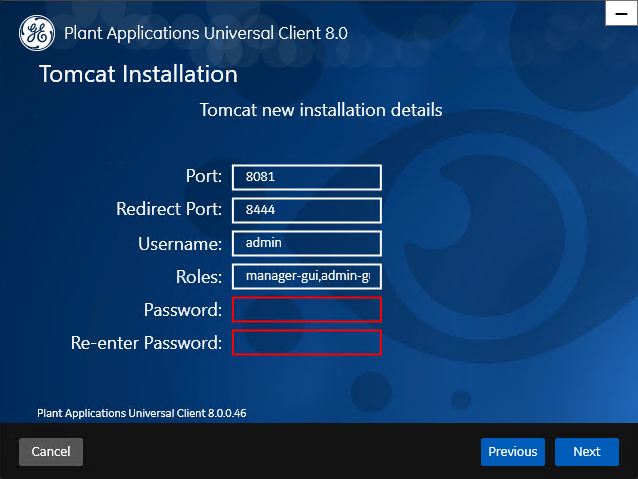
- Select Next.The RabbitMQ Credentials screen appears.
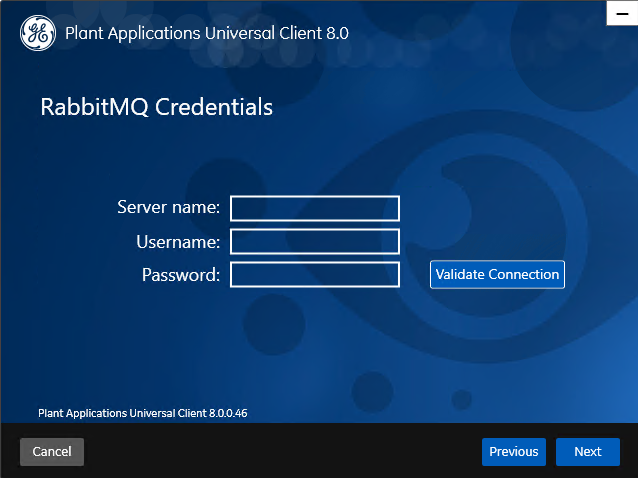
- In the RabbitMQ Credentials screen, perform one of the following steps:
- Enter the RabbitMQ credentials for the machine that hosts your Plant Applications message bridge as described in the following table, and then select Validate Connection.
Credential Description Server name Enter the computer name or IP address that hosts your Plant Applications Message Bridge. Username Enter the Administrator's user name that you set during Plant Applications Message Bridge installation. Password Enter the password for the Administrator's user name you entered in the Username box. The following table describes each icon indicating a validation status that might appear during the validation process.Icon Description Indicates that the validation is in progress. Indicates that the validation was successful. Indicates that the validation was unsuccessful. In this case, make sure you enter the correct password.
- Enter the RabbitMQ credentials for the machine that hosts your Plant Applications message bridge as described in the following table, and then select Validate Connection.
- Select Next.The You are ready to install screen appears.
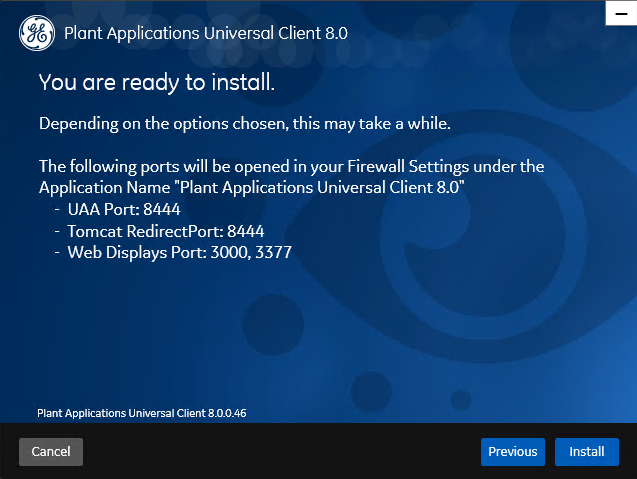
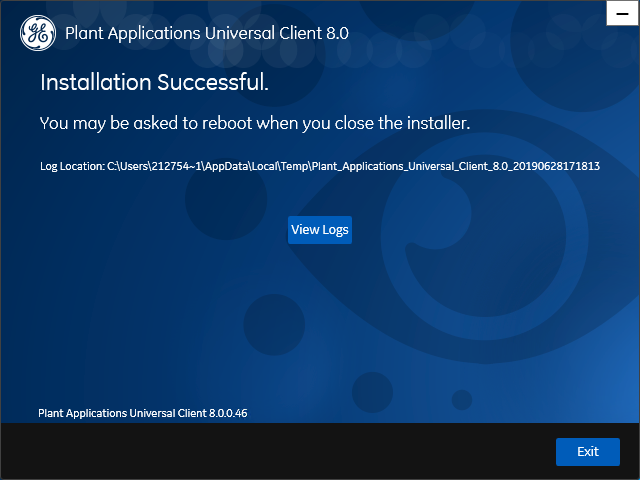
- Select Install, and then wait for the installation to complete. Depending on the options selected, the installation process may take some time. On successful installation, the Installation Successful screen appears.
Results
What To Do Next
About Post-Installation Tasks
Add a UAA User
About This Task
Before You Begin
Procedure
Results
Modify the Batch File to Add the User Details
About This Task
bm-line-leader or bm-operator. The access levels bm-line-leader and bm-operator are defined in the Plant Applications Administrator. The uaac-create-clients-and-users.bat file associates a default user for the access levels as described in the following table.| Access Levels | Default User |
|---|---|
bm-operator | bm_operator_1 |
bm-line-leader | bm_lineleader_1 |
Procedure
Results
Configure a GE Proficy Historian Server for the Analysis Application
About This Task
To configure one or more GE Proficy Historian Servers for the Analysis application, follow these steps:
Procedure
Results
Configure the Cache Settings for the Historian Tags
About This Task
mes-dataservice-impl and processanalyzer-service-impl microservices for the Analysis application. After the set duration, the Historian tags are cached again.Procedure
Results
mes-dataservice-impl and processanalyzer-service-impl microservices for the Analysis application.Performance Tuning Settings
About This Task
Procedure
- Update Tomcat default threads.
- Navigate to C:\Program Files\Apache Software Foundation\Tomcat 8.0\conf
- Open the Server.xml file in Notepad. In Server.xml, search for the line 102 or <Connector protocol="org.apache.coyote.http11.Http11NioProtocol" maxThreads="150"
- Change the max thread count to 800 (maxThreads=”800”).
- Save the file.
- Update JVM memory settings.
- Update database settings:
- Update the Cost Threshold for Parallelism value:
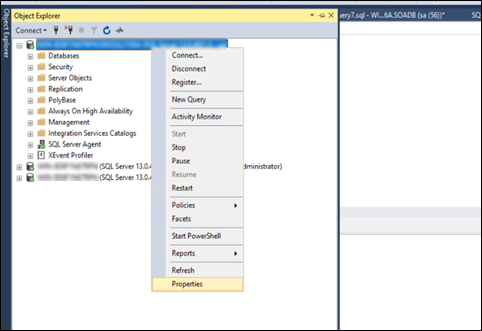
- Open SSMS connect to the instance, where SOA db is deployed.
- Select the instance. Now, right-click on the instance and then select Properties.
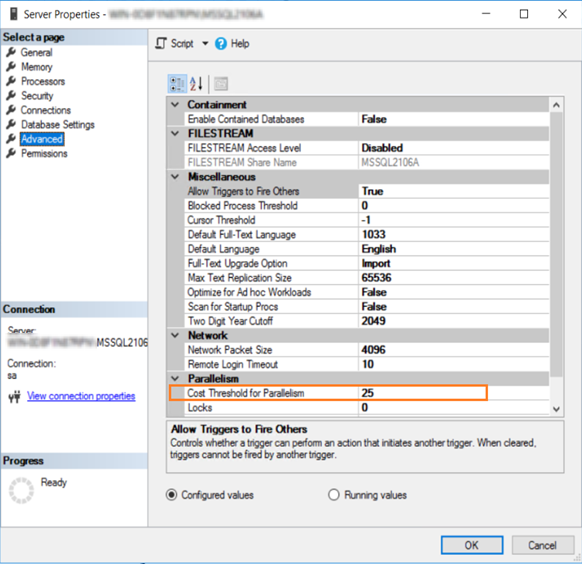
- Select the Advanced tab. In the Parallelism section, in the Cost Threshold for Parallelism box, change the default value from 5 to 25.
- Update the Cost Threshold for Parallelism value:
Node Application Manager Utility
About This Task
Procedure
- Enter the credentials that has the manager-ui role of Tomcat assigned to log in. The Node Application Manager appears displaying the health of the individual applications in a dashboard.

- You can select
 to reload the dashboard or refresh the browser.
 - You can select
 to logout from Node Application Manager.