Operations Hub
Add a Data Source with OPC UA Configuration
Creates a data source with OPC UA configuration.
Before you begin
About this task
Procedure
-
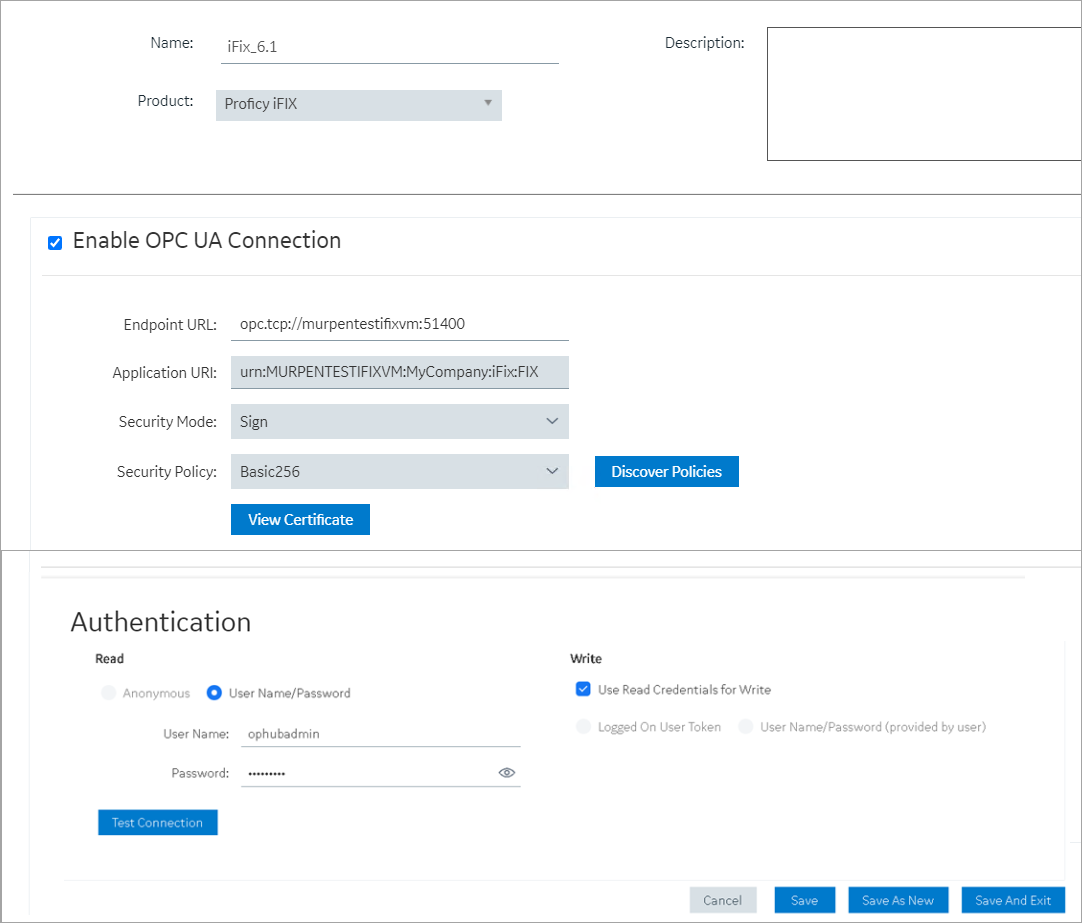
If you selected Proficy iFIX, Proficy CIMPLICITY, or OPC UA as the product, provide
these details to Enable OPC UA Connection.
Field Description Endpoint URL Enter the machine name and port number to connect to an OPC UA server. For example: opc.tcp://MyServer:51400.In iFIX, you can copy the URL from here:- screen.
In CIMPLICITY, you can copy the URL from here:- screen.
Discover policies Select to discover and display all the security profiles supported by the OPC UA server to establish a secure connection. The display list is based on the entered endpoint URL; the security modes and policies supported by either iFIX, CIMPLICITY, or IGS. 
From the discovered list for the endpoint URL, select the security profile you want to use for this connection, then select Apply.
Application URI This field is auto populated after defining a security profile for the OPC UA server. Security Mode This field is auto populated after defining a security profile for the OPC UA server. Note: If security mode is None, the connection is not secured. This is acceptable if you simply want to test a connection. Make sure to change this setting later to ensure that you have adequate security enabled for your connections.Security Policy This field is auto populated after defining a security profile for the OPC UA server. View Certificate For a secured connection, security certificates must be exchanged between Operations Hub and the OPC UA server. Select to view the OPC UA server certificate, and ifUntrusted, select Trust.
The server certificate gets added to the
C:\ProgramData\GE\Operations
                                    Hub\pki\trusted\certs
folder in your machine running Operations Hub.The certificate status now appears as
Trusted.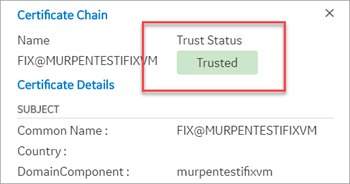
Select Cancel to close the trusted server certificate screen.
Important: Operations Hub client certificate must also be trusted on the OPC UA server (iFIX, CIMPLICITY, IGS) to establish a secured connection.- To trust the certificate on the CIMPLICITY server,
- Start the CIMPLICITY project.
- Attempt to connect via the Data source dialog box.
- Trust the certificate on the Data source dialog box.
- Go to the CIMPLICITY project's
\pki\rejected\certsfolder, and copy the rejected certificate to the\pki\trusted\certsfolder. - Test the connection again; it should now work.
- To trust the certificate on the iFIX server,
- Access the iFIX OPC UA Server Configuration Tool dialog box.
- On the Trust List tab, select
the failed entry and trust it.
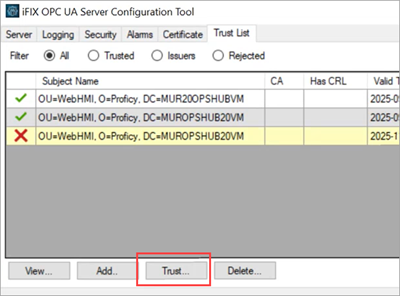
The failed entry appears when you attempt to test the connection in Operations Hub client.
C:\ProgramData\GE\Operations
                                 Hub\pki\own\certs
) to server location (\pki\trusted\certs).Ensure that you modify the certificate file name if you plan to copy more than one Operations Hub certificate to the CIMPLICITY trusted folder, to avoid replacing the already trusted clients.
-
Select the authentication type for read and write access to the database.
It is recommended that you select Username/Password to provide the highest level of encryption. Anonymous does not provide any protection for accessing data or login.
Field Description Read To authenticate read access: - Select User Name/Password and enter the credentials in the text field.
- Enter the user name to connect to the OPC UA server (iFIX, CIMPLICITY, IGS).
- Enter the password for the user name to connect to the OPC UA server.
Write To authenticate write access: - Select Logged On User Token if you want
to use token-based authentication.Note: To validate tokens, make sure to configure the OPC UA server with Proficy Authentication (UAA).
- Select User Name/Password (provided by user) if you want to enter credentials to authenticate.
- Select the check box for Use Read Credentials for Write to use the same user name and password that you provided for read access.
Test Connection Select to test the OPC UA connection. If the details provided to establish the connection are correct, a message appears confirming the successful connection. To troubleshoot connection related issues, refer to Error Messages.
- Select Save.
Example