
 Operations Hub
Html
The html widget is used to provide html code to create an application. For example,
to add a drop-down list box to an application, instead of using the dropdown widget, you can use html code, along with
css code, to create the drop-down list box with a customized look and feel.
Note: The
interaction of the html code can change based on how the responsive design works for some
elements.
When you use the html widget, in addition to the default properties of a widget, the
following properties are available.
| Property | Description |
|---|---|
| Flow | Select the query that should be used
to retrieve information for the widget. Without a flow, the widget will not
display any data. To populate values here, bind the html widget to a query on its PAGE DATA tab. |
| Select Data | Select an entity field. Values in this
drop-down list are populated based on the entities available in the selected query. Using these fields, you can
connect data to components that you create using the html widget. Next, select
+ Add Field to add the selected entity field to the
application for which you can add the html code. Tip: You can select
+ Add All Fields to add all the entity fields at
once. |
| Name | Provide a name for the added entity field. |
| Data | Select this option if you want to retrieve information from an output
field. Next, select the output field from Output data type. This drop-down list contains the output fields available in your selected query. Note: Select Data value must be
set to single to update the output fields. |
| Manual | Select this option if you want to provide manual values to retrieve information. Enter the value. |
| Formula | Select this option if you want to retrieve information based on a formula. Build a formula. |
| Edit Code | Select this button to access a code editor for html, css, and javascript. You
can enter the custom code in the code editor. Tip: The javascript code
editor contains instructions on how to use the javascript API. |
| Scoped css? | Indicates whether the css code must be applied only to the html widget or
globally.
|
Using the Html Widget
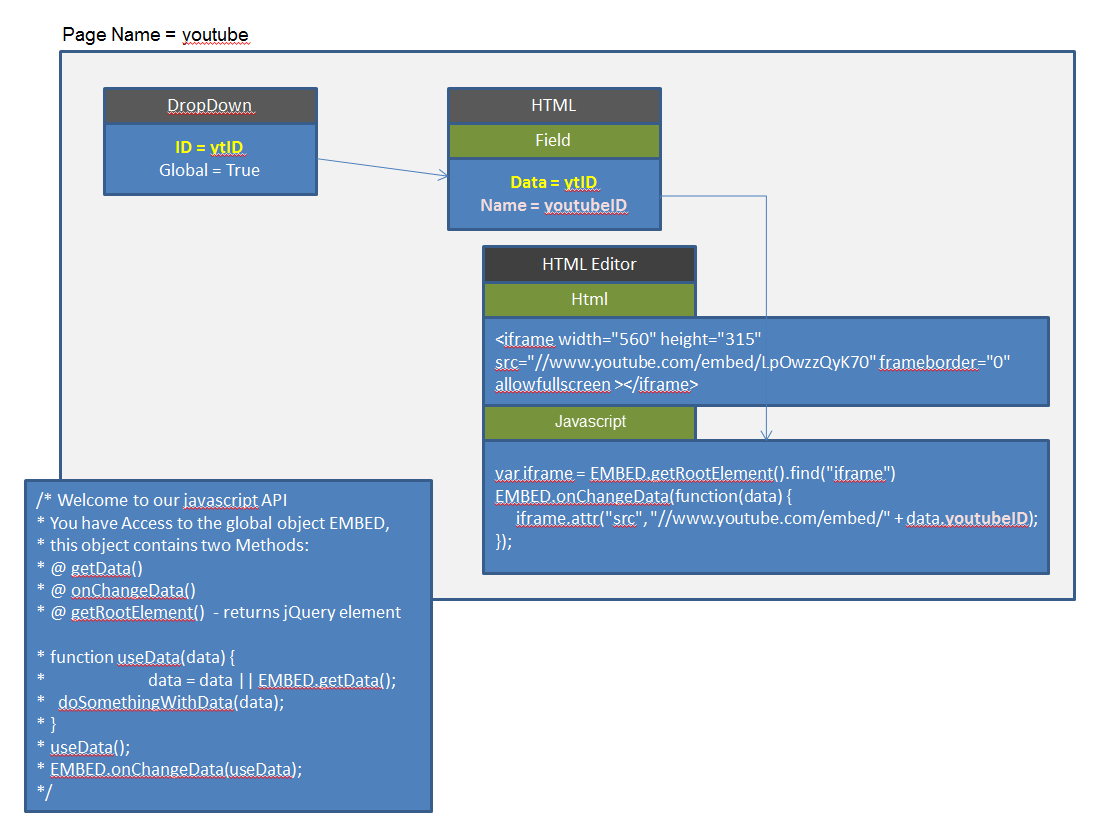
Example 1: Suppose you want to stream videos from YouTube based on values
selected in a drop-down list box. To do so, perform the following steps:
- When designing application pages, drag-and-drop the html and dropdown widgets to a container.
- Select the dropdown widget in the container
to access the DROPDOWN PROPERTIES tab.
- Under the GENERAL section, provide the details as specified
in the table:
Field Description Label Enter Select an option. Id Enter ytID. Global Data Select the check box.
- Under the GENERAL section, provide the details as specified
in the table:
- Select the html widget in the container to access the HTML
PROPERTIES tab.
- Under the DATA section, provide the details as specified in
the table:
Field Description Flow Select a query. Select Data Select an entity field from the query, and do the following: - Name: Enter ytID.
- Select Data.
- Output data type: Select the global variable (ytID) that stores the drop-down list box values.
- Under the DATA section, provide the details as specified in
the table:
A relationship is created between the dropdown and html widgets as shown in the following image.
Example 2: Suppose you want to create an application with the following
pages:
- Compass: Displays a compass with the needle indicating the angle that an application user enters.
- Stylish Header: Displays text in a header with special effects.
- Tiles: Displays tiles of various colors.
- Marquee: Displays text that moves from one end to the other of the page.
For Compass:
- Add an input widget to a container, and provide
INPUT PROPERTIES as specified in the table:
Field Description Enter Enter Angle: Enter direction Select the check box. - Add a html widget below the input widget, add a field, and provide values as shown in
the image.
Field Description Enter compass Enter angle Select compass - direction from the list. Select Text field from the list. - Select Edit Code to access the code editor, and save these lines
of code:
Html Enter these lines of code as shown in the following image: <div class="compass"> <div class="compass-inner"> <div class="north">N</div> <div class="east">E</div> <div class="west">W</div> <div class="south">S</div> <div class="main-arrow"> <div class="arrow-up"></div> <div class="arrow-down"></div> </div> </div> </div>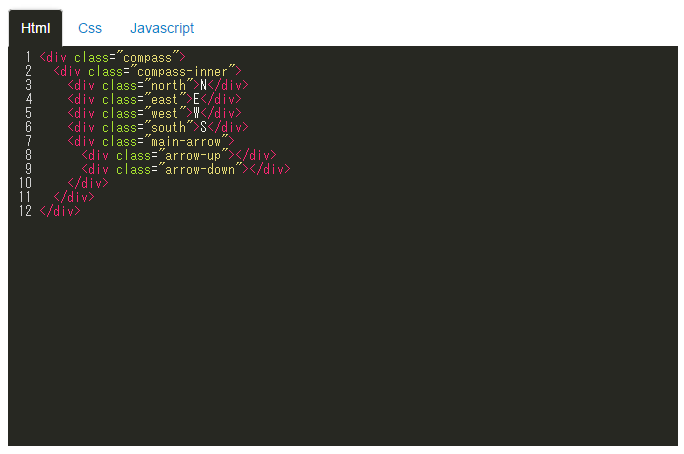
Css Enter the following lines of code: compass { width: 150px; height: 150px; font-size: 10px; background-color: transparent; border-radius: 100%; position: relative; margin: 0 auto; font-family: 'Lobster Two', Comic Sans MS; color: #2d2d2d; } .compass-inner { width: 85%; height: 85%; background-color: transparent; border-radius: 100%; position: relative; left: 6.9%; top: 6.9%; border: 2px solid #2d2d2d; } .main-arrow { height: 100%; width: 7.5%; left: 46%; position: relative; padding-top: 3%; box-sizing:border-box; -webkit-transform: rotate(50deg); -moz-transform : rotate(50deg); -o-transform: rotate(50deg); -ms-transform: rotate(50deg); transform: rotate(50deg); } .arrow-up, .arrow-down { width: 0; height: 0; border-bottom: 57px solid red; border-left: 4px solid transparent; border-right: 4px solid transparent; position: relative; } .arrow-down { border-bottom-color: #2d2d2d; -webkit-transform: rotate(180deg); -moz-transform : rotate(180deg); -o-transform: rotate(180deg); -ms-transform: rotate(180deg); } .north { position: absolute; left: 45%; top: 2.5%; } .east { position: absolute; left: 88%; top: 44%; } .west { position: absolute; left: 7%; top: 44%; } .south { position: absolute; left: 45%; top: 82%; } @media (max-width: 600px) { .compass { width: 150px; height: 150px; font-size: 11px; } .arrow-up, .arrow-down { border-bottom: 57px solid red; border-left: 4px solid transparent; border-right: 4px solid transparent; } .arrow-down { border-bottom-color: #2d2d2d; } } @media (max-width: 769px) { .compass { width: 150px; height: 150px; font-size: 11px; } .arrow-up, .arrow-down { border-bottom: 57px solid red; border-left: 4px solid transparent; border-right: 4px solid transparent; } .arrow-down { border-bottom-color: #2d2d2d; } } @media (max-width: 400px) { .compass { width: 100px; height: 100px; font-size: 11px; } .arrow-up, .arrow-down { border-bottom: 38px solid red; border-left: 3px solid transparent; border-right: 3px solid transparent; } .arrow-down { border-bottom-color: #2d2d2d; } }Javascript Enter the lines of code as shown in the following image: 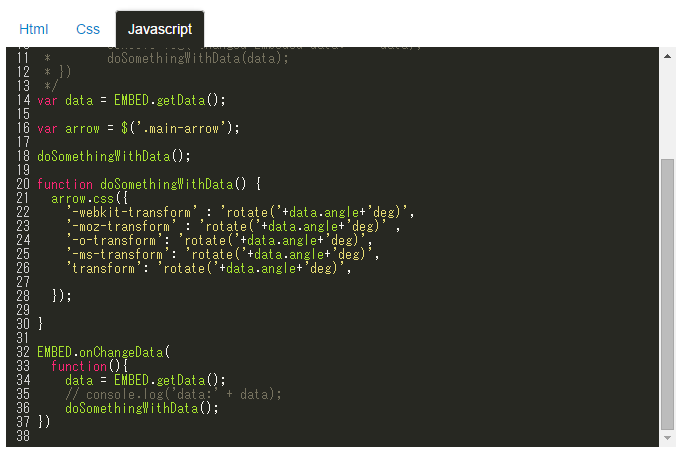
- Save the compass page.
For Stylish Header:
- Add a html widget, select Edit Code, and save these lines of
code:
Html Enter the following lines of code: <h1>3d text effect</h1>Css Enter the following lines of code: body{ text-align:center; background:#dfdfdf; } h1{ text-transform:uppercase; font-size:72px; font-family:'Verdana'; padding:30px; }Javascript Enter the following lines of code: jQuery(document).ready(function(){ $('h1').mousemove(function(e){ var rXP = (e.pageX - this.offsetLeft-$(this).width()/2); var rYP = (e.pageY - this.offsetTop-$(this).height()/2); $('h1').css('text-shadow', +rYP/10+'px '+rXP/80+'px rgba(227,6,19,.8), '+rYP/8+'px '+rXP/60+'px rgba(255,237,0,1), '+rXP/70+'px '+rYP/12+'px rgba(0,159,227,.7)'); }); }); - Save the stylish header page.
For Tiles:
- Add a html widget, select Edit Code, and save these lines of
code:
Html Enter the following lines of code: <div class="tile"></div>Css Enter the lines of code as shown in the following image: 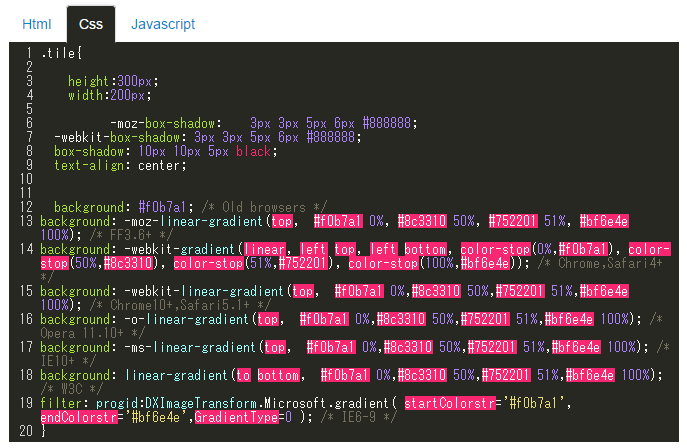
- Save the tiles page.
For Marquee:
- Add a html widget, select Edit Code, and save these lines of
code:
Html Enter the lines of code as shown in the following image: 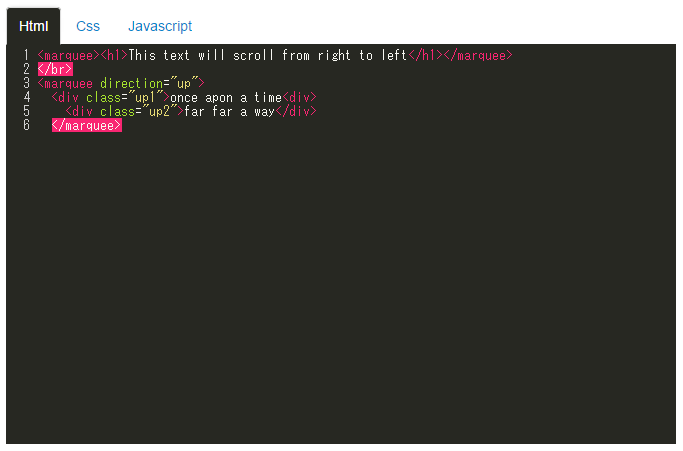
Css Enter the lines of code as shown in the following image: 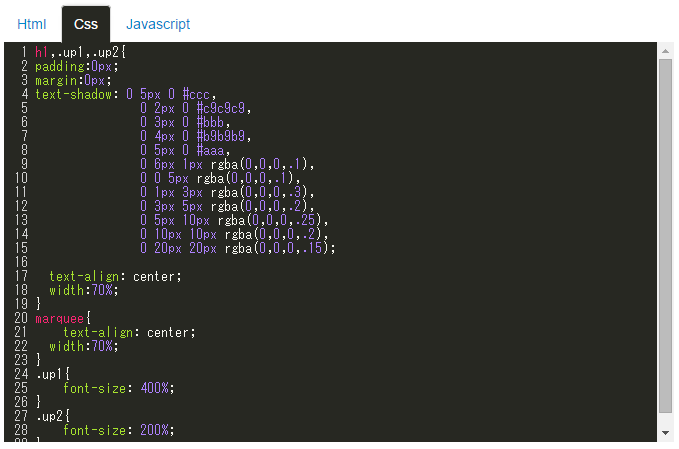
- Save the marquee page.
Save and preview the application. The application has four pages built using a html widget.