Thickness Measurements
About Thickness Measurements
Thickness Measurements represent readings that are recorded at locations on an asset or one of its components. They are created and linked to TMLs.
Details
A Thickness Measurement is a value that quantifies the thickness of a given TML at a specific point in time.
Each TML will have various types of Thickness Measurements, including:
- Base Measurement : The first measurement taken for the TML.
- Near Measurement : The second-most-recently-recorded measurement for the TML.
- Last Measurement : The most-recently-recorded measurement for the TML.
Base, Near and Last Measurements are not recorded in the Thickness Measurements themselves. Instead, they are determined for the TML Corrosion Analysis by evaluating how many Thickness Measurements exist, and when the Thickness Measurements were created. After you create a new TML, you will want to record the base measurement, which represents the first recorded reading for that TML. Additional Thickness Measurements will be created later, as measurement readings are taken throughout the life of the asset.
About Nominal and Actual Measurements
Each Thickness Measurement can be classified as either a nominal measurement or an actual measurement.
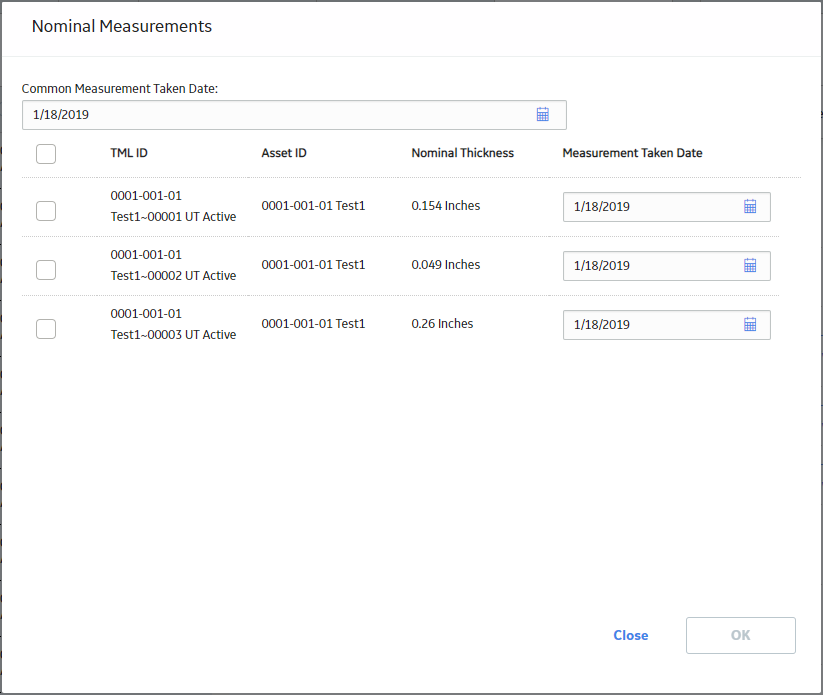
- A nominal measurement represents a reading that is not taken physically but is recorded from some other source, such as a design specification.
- An actual measurement represents a reading that is taken manually at the physical thickness measurement location on the equipment.
Details
Actual measurements are typically more accurate and result in calculations that are more representative of the actual asset. Nominal measurements may not be as accurate, but provide an efficient mechanism for recording initial measurement data.
Any nominal measurement value can be used in the creation of a nominal measurement. Nominal measurements are used only for the base measurement (i.e., the first measurement).
- Measurement data will be populated automatically for the initial Thickness Measurement linked to TMLs configured for nominal base measurements.
- Measurement data must be entered manually for Thickness Measurements that are linked to TMLs that are not configured for nominal base measurements.
Thickness Monitoring will use all active thickness measurements for performing TML Corrosion Analysis calculations. Nominal measurements will become inactive measurement automatically after two subsequent actual measurements have been recorded. In other words, if the Measurement Taken Date of any two actual measurements is after the Measurement Taken Date of a nominal measurement, the nominal measurement will become an inactive measurement.
About Skipped Measurements
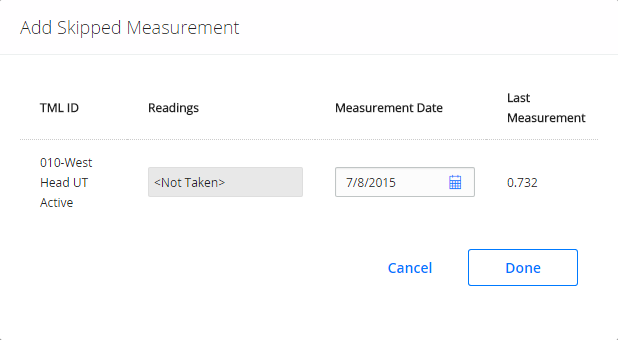
GE Digital APM Thickness Monitoring provides the option to skip measurements. This applies when you want to satisfy inspection requirements, but do not want to take an actual measurement at the TML. When you skip a measurement, instead of creating a Thickness Measurement for a TML, you will create a Measurement Not Taken (MNT) record to store the inspection data.
Details
Some reasons that you may want to skip measurements include:
- The physical location of certain TMLs may be difficult to reach or may require a shutdown in order to take a measurement.
- Your organization may have a strategy that calculates based on a certain percentage of TML measurements for an asset.
- Resource limitations may make it difficult or impossible to take measurements at all TMLs on an asset or its components.
In order to skip measurements in Thickness Monitoring, the Allow Measurements to be Skipped check box must be selected on the TM Admin Preferences page. Then you will need to create MNT records to represent any measurement that was skipped. After you have enabled this option and created MNT records, Corrosion Analyses containing skipped measurements will be updated to take those MNT records into account.
Skipping Measurements Consecutively
If you enable the option to skip measurements in TM, you will also have the option to enable a feature that allows you to skip measurements consecutively. When you do this, you will be able to create successive MNT records.
Example: Skipping Measurements Consecutively
Suppose that the TML TML01 is difficult to reach. As a result, your organizational policy dictates that while readings for all other TMLs on the associated piece of equipment must be taken every six months, a reading for TML01 must be taken only once per year, as illustrated in the following table.
| TML | Scheduled Readings |
|---|---|
| TML01 |
June 1, 2014 June 1, 2015 |
| TML02 |
June 1, 2014 December 1, 2014 June 1, 2015 December 1, 2015 |
| TML03 |
June 1, 2014 December 1, 2014 June 1, 2015 December 1, 2015 |
Suppose that you create an MNT record when a reading is skipped for TML01 on December 1, 2014. Next, suppose that, due to budget constraints at your facility, the scaffolding necessary to gain access to TML01 is unable to be built on June 1, 2015 (the date on which an actual thickness measurement reading is scheduled to be taken for this TML). In this case, you may want to create another MNT record for TML01, assuming that an actual measurement will be taken when possible.
Interpreting Calculations in Corrosion Analyses that Include Skipped Measurements
When active Thickness Measurements and MNT records exist in a Corrosion Analysis, all calculations, with the exception of Interval Next Inspection Date, are calculated as if MNT records are not included in your Corrosion Analysis.
Consider the calculation for Short Term Corrosion Rate. Short Term Corrosion Rate is calculated using the Short Term Loss and Short Term Interval, where:
Short Term Corrosion Rate = Short Term Loss / Short Term Interval
...where:
Short Term Loss = Near Measurement Value - Last Measurement Value
...and:
Short Term Interval = Last Measurement Date - Near Measurement Date
Example: Corrosion Analyses that Include Skipped Measurements
Consider the following measurements.
ReadingDateMeasurement (inches)
| Reading | Date | Measurement (Inches) |
|---|---|---|
| Base | 1/1/1985 | .2 |
| N/A | 1/1/1987 | <Measurement Not Taken> |
| Near | 1/1/1990 | .195 |
| N/A | 1/1/1993 | <Measurement Not Taken> |
| Last | 1/1/1995 | .19 |
| N/A | 1/1/2000 | <Measurement Not Taken> |
Short Term Loss = .195 - .19
Short Term Loss = .005
Short Term Interval = 1/1/1995 - 1/1/1990
Short Term Interval = 5 years
Short Term Corrosion Rate = .005 / 5
Short Term Corrosion Rate = .001
The Short Term Loss was not calculated using a Last Measurement Value of 1/1/2000, the date in the MNT record that is associated with the most recent inspection of this TML. There is no value associated with this date (or the date in ANY MNT record) and therefore, these records are ignored in all calculations with the exception of Interval Next Inspection Date.
Interval Next Inspection Date
When MNT records are included in a Corrosion Analysis, Interval Next Inspection Date is calculated using the following equation:
Interval Next Inspection Date = Last Measurement Date + Default Inspection Interval
Where Last Measurement Date is the most recent value in the Measurement Taken Date field of both the active Thickness Measurement and active MNT records linked to a given TM
Example: Interval Next Inspection Date
Consider a Default Inspection Interval of 60 months (i.e., 5 years) and a TML that is linked to records with the following Measurement Taken Dates:
| Record | Measurement Taken Date |
|---|---|
| Thickness Measurement | 1/1/2004 |
| Measurement Not Taken | 1/1/2005 |
| Thickness Measurement | 1/1/2006 |
| Measurement Not Taken | 1/1/2007 |
In this case, the Interval Next Inspection Date would be calculated as:
Interval Next Inspection Date = 1/1/2007 + 60 months
Interval Next Inspection Date = 1/1/2012
Skipped Measurements and TML Corrosion Analysis Fields
When the most recent date is from an MNT record, and when the Corrosion Rate of a TML is less than the Controlling Corrosion Rate of the asset, the following fields in the TML Corrosion Analysis are populated with data based on the Controlling Corrosion Rate:
- Asset Average Corrosion Rate
- Asset Average Corrosion Rate Remaining Life
- Asset Average Corrosion Rate Retirement Date
- Asset Average Corrosion Rate Next Inspection Date
This differs from when the fields are populated in a Corrosion Analysis that does not include skipped measurements.
Example: Skipped Measurements in TML Corrosion Analysis Fields
Consider an asset with:
- An Asset Corrosion Analysis with a Controlling Corrosion Rate of 2.9 Mils/year.
- A TML Corrosion Analysis for a TML linked to the asset, with a Corrosion Rate of 2.2 Mils/year. The most recent measurement date is from an MNT record.
In this case, the Asset Average Corrosion Rate would be set to 2.9 Mils/year.
This Asset Average Corrosion Rate value could be the result of any method that is specified to determine the asset controlling corrosion rate (Maximum, Average, or Formula). This differs from a Corrosion Analysis that does not include skipped measurements. When a Corrosion Analysis does not include skipped measurements, the Asset Average Corrosion Rate field is populated only when certain settings are specified, and this value can be the result only of an Average or Formula method.
Asset Average Corrosion Rate is an input to some of the calculations that are used to populate the Asset Average Corrosion Rate Remaining Life, Retirement Date, and Next Inspection Date fields. These calculations are performed using the same formulas that are used when a Corrosion Analysis does not include skipped measurements. The results of the same calculations in a Corrosion Analysis that includes skipped measurements versus a Corrosion Analysis that does not include skipped measurements, however, may differ because of the values that will be used to populate the Asset Average Corrosion Rate field in each of these Corrosion Analyses.
In every case, the value selected will be the most conservative (i.e., highest) corrosion rate, whether from the TML Corrosion Analysis Corrosion Rate field, or the Asset Corrosion Analysis Controlling Corrosion Rate field.
How Measurement Values Are Determined
The final value associated with a Thickness Measurement is stored in the Measurement Value field. Values are not, however, entered directly into the Measurement Value field itself. Instead, values are entered into the Readings field.
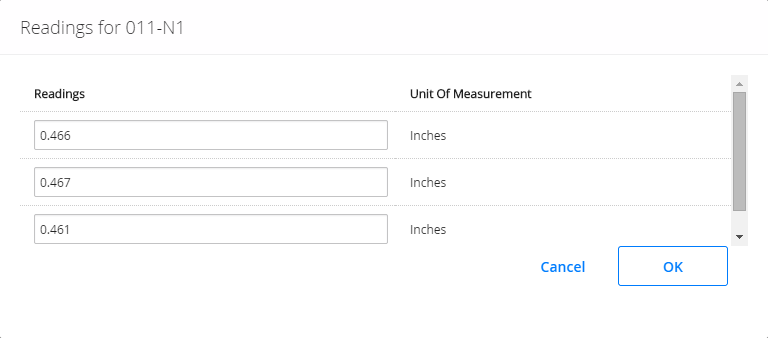
To determine the Measurement Value for a Thickness Measurement, one or more readings will be collected at a given TML. To account for the margin of error associated with user error, equipment malfunction, or environmental conditions, you may wish to collect multiple readings for each Thickness Measurement. The number of readings that you may take for a measurement will depend upon various factors, including your company's policies, the characteristics of the TML, and the method that you are using to collect the readings. The number of readings that you must take for each measurement is determined by the value specified in the Number of Readings field in the TML to which the Thickness Measurement is linked.
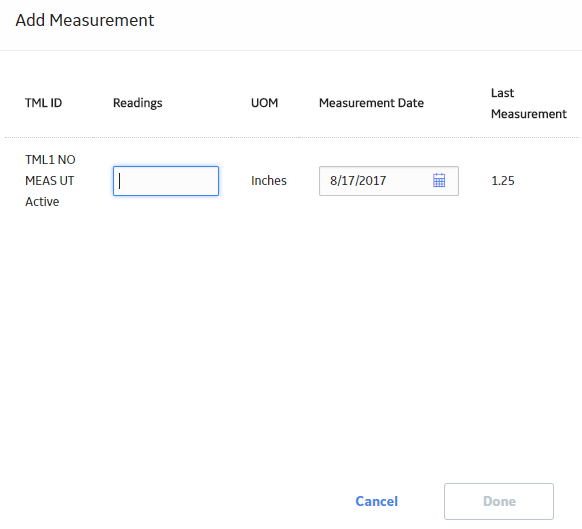
After you have determined how many readings you must take for a specific measurement and have collected those readings, you will add a Thickness Measurement and log the reading values in the Readings box. A calculation will be performed against the values in the Readings box, based on the settings that you have defined for measurement readings. Then, the Uncorrected Measurement field will be populated with the result of that calculation. Finally, the Measurement Value field will be populated with the value in the Uncorrected Measurement field. The Measurement Value field will then contain a value representing the final, corrected thickness measurement value.
About Measurement and Corrosion Rate Variance
Measurement Variance is the difference between the Measurement Value for a new Thickness Measurement record and the Measurement Value for the previous Thickness Measurement record.
Corrosion Rate Variance
Corrosion Rate Variance is the amount of variation allowed between the current Short Term Corrosion Rate for a given TML and the expected Short Term Corrosion rate that will be calculated based on the new measurement. Assuming that corrosion should occur at a somewhat predictable rate, you can use corrosion rate variance as a means for validating measurement data when corrosion rate is not consistent with the expected rate.
The expected corrosion rate is equal to the Minimum Corrosion Rate value defined in the analysis settings for the associated Thickness Measurement Location record.
Allowable Measurement Variance
Using Allowable Measurement Variance, you can define how much measurement variation is allowed.
When values have been defined for the Allowable Measurement Variance, the GE Digital APM system will evaluate the measurement values and validate whether or not those values fall within the acceptable variance range. Measurement values that fall outside of the acceptable range will be flagged using the Verify Measurement field and will require manual validation.
About Measurement and Corrosion Rate Variance Validation
Measurement and Corrosion Rate Variance can be used to validate measurement data that falls outside of the expected range for a specific Thickness Measurement Record. After the Allowable Measurement Variance has been defined in the Corrosion Analysis settings, this value is used by the GE Digital APM system to validate manual measurements.
Measurement Variance Validation
Measurement and Corrosion Rate Variance evaluations serve as a mechanism for validating measurement data. Using the assumption that only a certain amount of growth or loss should occur over a certain amount of time or at a certain rate, Measurement and Corrosion Rate Variance allows you to evaluate the measurement data that has been entered to ensure that it falls within the expected range. If it is outside the expected range, then the value in the Verify Measurement field will be set to Yes (Y) as an indication that you need to validate the measurement data.
Three values in the analysis settings for the associated Thickness Measurement Location record are used for evaluating measurement and corrosion rate variance:
Together, these values, combined with the measurement data that has been entered, allow the GE Digital APM system to perform measurement variance evaluations.
Measurement Variance Validation Requirements
The following conditions must be satisfied for Measurement Variance Validation to occur:
- Three or more Thickness Measurement records must exist before validation will occur.
- Measurement and Corrosion Rate Variance Validation is performed against unsaved data. In other words, when you create new Thickness Measurement records, validation is performed whenever the Measurement Value field is populated with a value.
- The Verify Measurement field will be populated with a value based upon the validation that has been performed only on the newly entered (i.e., latest) data.
- Measurement and Corrosion Rate Variance Validation is performed only on actual measurements. This validation is not performed against nominal measurements.
- Measurement and Corrosion Rate Variance Validation will be performed only if the Corrosion Rate Variance setting is greater than 0 (zero).
Calculations
The following calculations are used in the Measurement and Corrosion Rate Variance Validation process:
Measurement Variation = Previous Measurement Value - New Measurement Value
Temporary Short Term Corrosion Rate = Measurement Variation / (New Measurement Value Date - Previous Measurement Value Date)
Measurement Ratio = Temporary Short Term Corrosion Rate / Minimum Corrosion Rate
Loss Evaluation
The following table describes the measurement variance evaluation that is performed on new Measurement Values that are less than the previous Measurement Value.
|
If the Measurement Variation is: |
...and the Measurement Ratio is: |
...then in the Thickness Measurement record, then the value in the Verify Measurement field is set to: |
...and in the TML Corrosion Analysis record, the value in the Verify Measurements field will be set to: |
...and in the TML Corrosion Analysis record, the Short Term Corrosion Rate field will be populated with the: |
...and the value in the Allowable Measurement Variance Applied field will be set to: |
|---|---|---|---|---|---|
|
Less than the Allowable Measurement Variance value and the Count of Active Measurements value is greater than 2 (two) |
Less than or equal to 1 (one) |
No |
No |
The Temporary Short Term Corrosion Rate value |
No |
|
Less than the Allowable Measurement Variance value and the Count of Active Measurements value is greater than 2 (two) |
Greater than 1 (one) |
Yes |
Yes |
0 (zero) |
Yes |
|
Less than the Allowable Measurement Variance value and the Count of Active Measurements value is less than or equal to 2 (two) | Less than or equal to the Corrosion Rate Variance value | No | No | The Temporary Short Term Corrosion Rate value | No |
|
Less than the Allowable Measurement Variance value and the Count of Active Measurements value is less than or equal to 2 (two) |
Greater than the Corrosion Rate Variance value | Yes | Yes | The Temporary Short Term Corrosion Rate value | No |
|
Greater than or equal to the Allowable Measurement Variance value |
Less than or equal to the Corrosion Rate Variance value |
No |
No |
The Temporary Short Term Corrosion Rate value |
No |
|
Greater than or equal to the Allowable Measurement Variance value |
Greater than the Corrosion Rate Variance value |
Yes |
Yes |
The Temporary Short Term Corrosion Rate value |
No |
Growth Evaluation
The following table describes the measurement variance evaluation that is performed on new Measurement Values that are greater than the previous Measurement Value.
|
If the Measurement Variation is: |
...then, in the Thickness Measurement record, the value in the Verify Measurement field is set to: |
...and, in the TML Corrosion Analysis record, the value in the Verify Measurements field will be set to: |
...and, in the TML Corrosion Analysis record, the Short Term Corrosion Rate field will be populated with the: |
...and the value in the Allowable Measurement Variance Applied field will be set to: |
|---|---|---|---|---|
|
Less than or equal to the Allowable Measurement Variance value |
No |
No |
The Temporary Short Term Corrosion Rate value |
No |
|
Greater than or equal to the Allowable Measurement Variance value |
Yes |
Yes |
The Temporary Short Term Corrosion Rate value |
No |
Consider an example where the following TML Analysis Settings are defined:
- Minimum Corrosion Rate: 5 Mils/Year
- Allowable Measurement Variance: 0.04 Inches
- Corrosion Rate Variance: 2
Assume that the following measurement data already exists for the TML:
|
Measurement |
Measurement Value (Inches) |
Measurement Taken Date |
|---|---|---|
|
1 |
0.3 |
3/1/1995 |
|
2 |
0.29 |
3/1/2000 |
|
3 |
0.275 |
3/1/2005 |
Now, assume that you take a fourth measurement reading on 3/1/2010 with the value 0.220 Inches.
Based upon the data shown in this example, the following calculations will be performed when the new measurement data is entered:
- Measurement Variation:
- Measurement Variation = Previous Measurement Value - New Measurement Value
- Measurement Variation = 0.275 - 0.22
- Measurement Variation = 0.055 Inches
- Temporary Short Term Corrosion Rate
- Temporary Short Term Corrosion Rate = Measurement Variation / (New Measurement Value Date - Previous Measurement Value Date)
- Temporary Short Term Corrosion Rate = 0.055 / (3/1/2010 - 3/1/2005)
- Temporary Short Term Corrosion Rate = 0.055 / (5 years)
- Temporary Short Term Corrosion Rate = 0.011 Inches/Year
- Temporary Short Term Corrosion Rate = 11 Mils/Year
- Measurement Ratio:
- Measurement Ratio = Temporary Short Term Corrosion Rate / Minimum Corrosion Rate
- Measurement Ratio = 11 / 5
- Measurement Ratio = 2.2
- Loss Evaluation
- Because the new measurement value is less than the previously recorded measurement value, a loss evaluation is performed using the new measurement data and the calculations shown above. As a result of the evaluation, the following conclusions can be drawn:
- The Measurement Variation (0.055) is greater than the Allowable Measurement Variance (0.04).
-
The Measurement Ratio (2.2) is greater than the Corrosion Rate Variance (2).
Therefore:
-
In the Thickness Measurement record, the value in the Verify Measurement field will be set to Yes.
-and-
-
In the TML Corrosion Analysis record, the value in the Verify Measurements field will be set to Yes.
-and-
-
In the TML Corrosion Analysis record, the Short Term Corrosion Rate field will be populated with the Temporary Short Term Corrosion Rate (11 Mils/Year).
-and-
-
-
In the TML Corrosion Analysis record, the value in the Allowable Measurement Variance Applied field will be set to No.
-
Access Thickness Measurements
About This Task
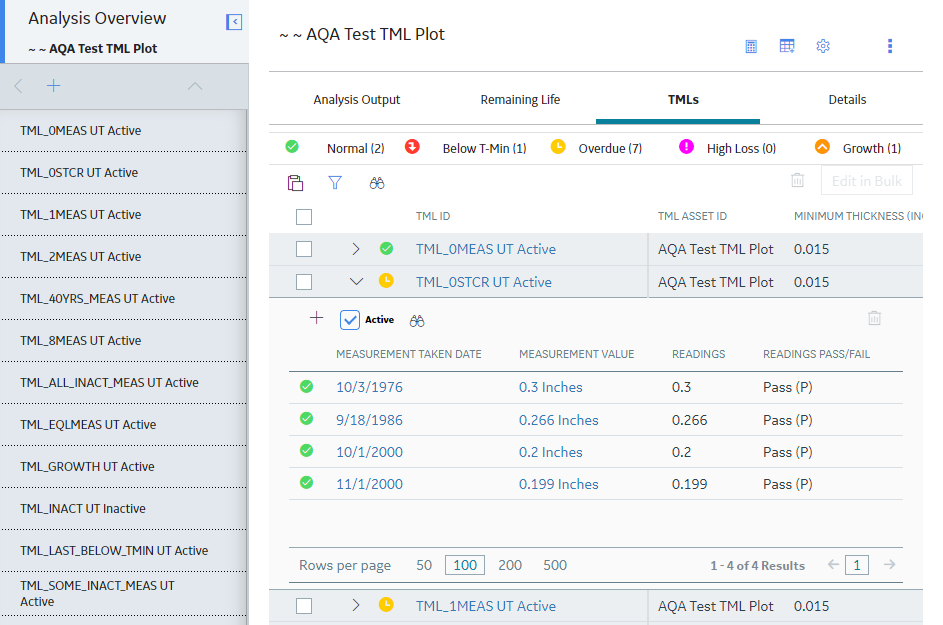
- TMLs
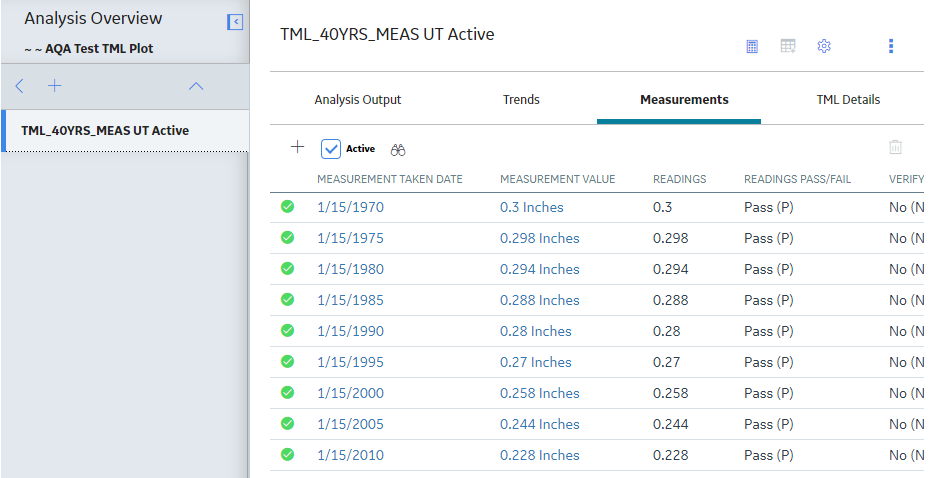
- Measurements
Procedure
- To access Thickness Measurements in the TMLs section, perform the following steps:
- To access Thickness Measurements in the Measurements section, perform the following steps:
Add a Thickness Measurement
Before You Begin
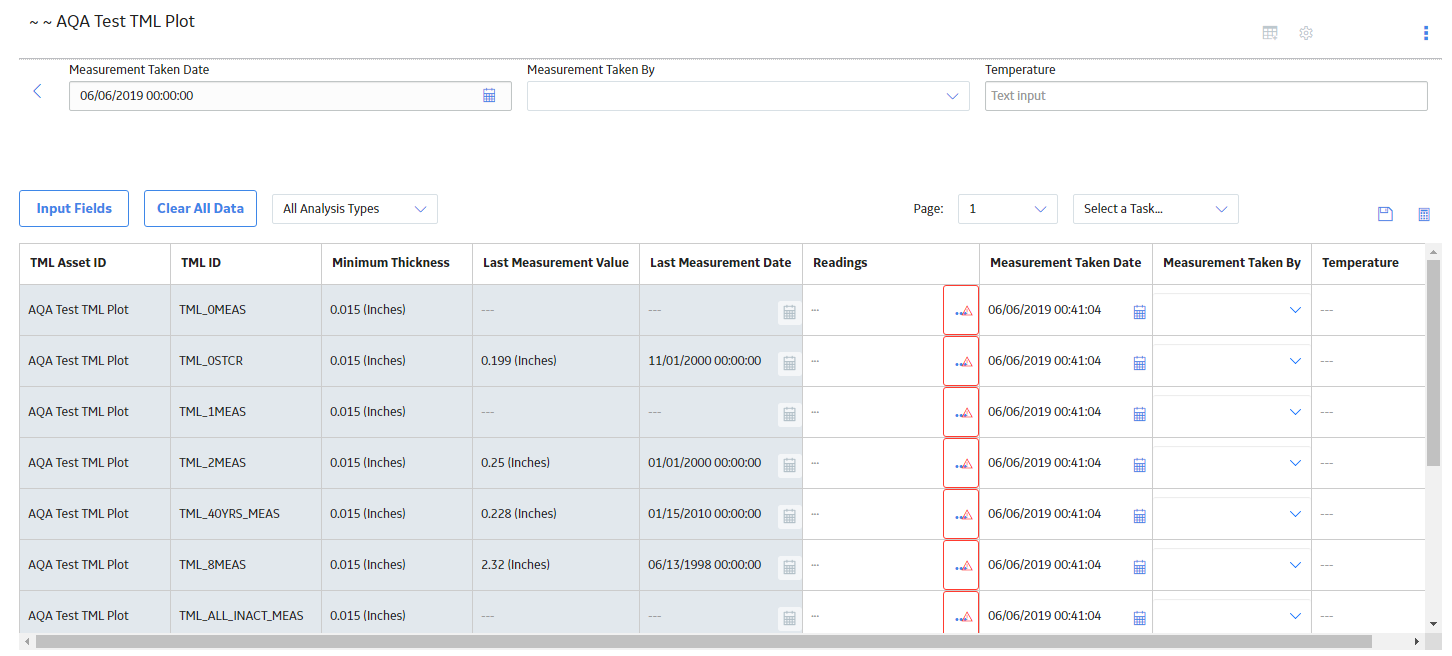
- If you are recording readings for multiple Thickness Measurements, you can use the Measurement Data Entry workspace. Additionally, you can use a datalogger to record Thickness Measurement readings.
Procedure
What To Do Next
Add a Nominal Measurement
Procedure
Results
Create Measurement Not Taken (MNT) Records
Before You Begin
Optionally, you can also select the Allow Consecutive Measurements to be Skipped check box to allow the recording of multiple consecutive MNTs for a single TML without the recording of an actual measurement.
Procedure
Modify a Thickness Measurement
Procedure
Use the Measurement Data Entry (MDE) Workspace
Procedure
Results
- For each reading that is saved, a Thickness Measurement is created and linked to the corresponding TML.
- You can now recalculate the corrosion analysis.
 .
.
 to save your changes.
 .
. 
 , and then select
 button in the
 .
.
 .
.
 .
. .
.