Get Started With Proficy Authentication
This topic helps you to get started with the application.
Proficy Authentication provides identity-based security for Proficy based applications and APIs.
You can perform the following tasks in Proficy Authentication:
- Configure UAA/LDAP/SAML identity providers
- Create new user accounts
- Create new group accounts and add users/other groups as members
- Perform UAA/LDAP/SAML group mapping
Task Roadmap
The roadmap is designed to guide you through a sequence of task workflows within
Proficy Authentication.
| # | Task | Description |
|---|---|---|
| 1 | Install and set up Proficy Authentication. | Set up Proficy Authentication |
| 2 | Enhance security by implementing multi-factor authentication. | Enable Multi-Factor Authentication |
| 3 | (Optional) For seamless user experience, consider implementing auto-login. But make sure that your system operates within a trusted network to reduce the risk of unauthorized access. | Windows Integrated Authentication / Auto-login |
| 4 | (Optional) For continuous, reliable, and scalable access to authentication and authorization systems, consider implementing high availability. | Configure High Availability for Proficy Authentication |
| 5 | Define scopes and permissions to control access to resources. | Overview of Managing Groups in Proficy Authentication |
| 6 | Develop a backup and recovery plan to ensure data integrity and availability. | Backup and Restore |
Check Installed Version
To check the version of the Proficy Authentication application within Configuration Hub, select the application name on the NAVIGATION menu. The version information appears under DETAILS.
The following screenshot shows Proficy Authentication 2024 installed, highlighting
its specific build version.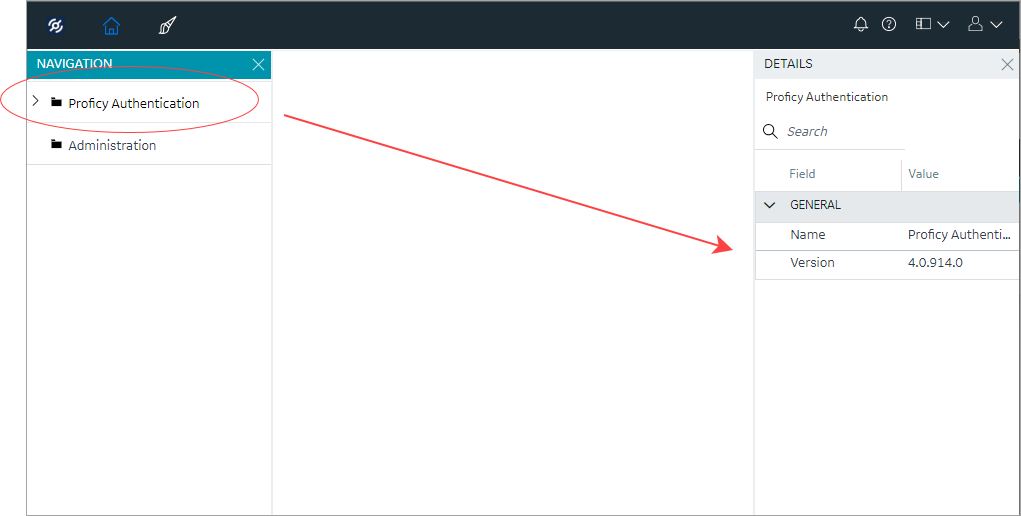
Show or Hide Data Columns
Customize the display of data by choosing which columns to display and which to hide.
You can show or hide columns based on your needs, making it easier to focus on
relevant information and de-clutter the display.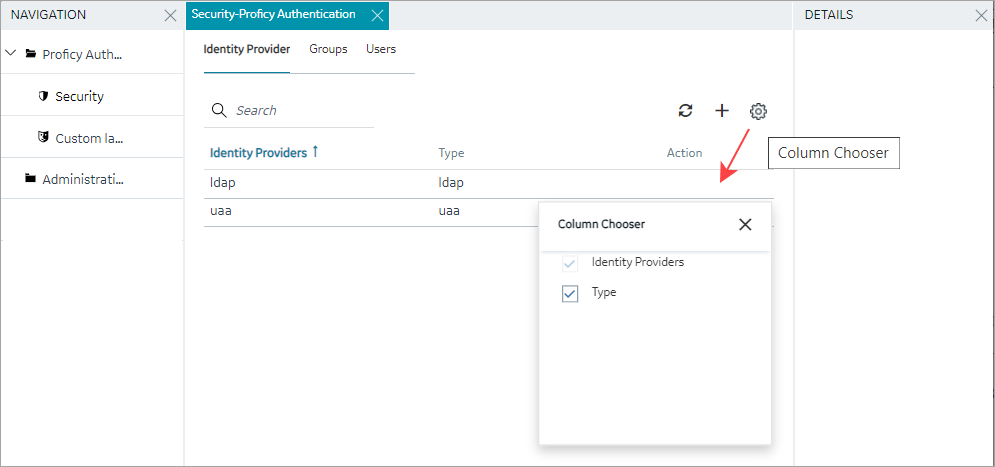
- Select
 for the respective data. The Column
Chooser dialog appears with a list of available
columns.
for the respective data. The Column
Chooser dialog appears with a list of available
columns. - Select the check box for the column you want to show. To hide a column, clear its check box.
- Close the dialog to apply the changes.
Sort by Columns
Use the sorting option to sort data in columns by ascending or descending order. When
dealing with large datasets, it is easier to analyze, compare, and understand the
information when the data is organized in a meaningful way. The sorting option
appears when you select a data column.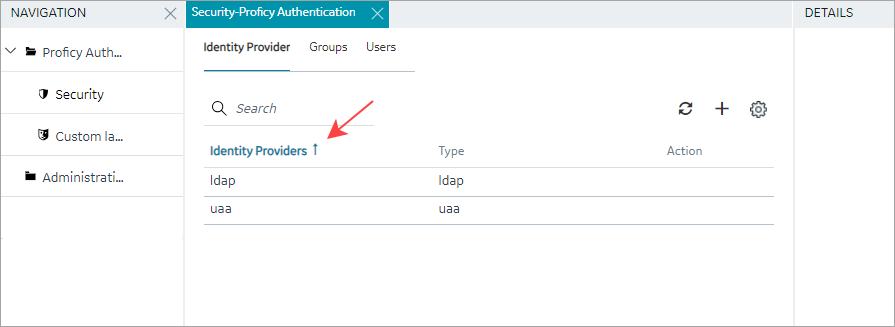
- Select
 to sort data in an ascending order.
 - Select
 to sort data in a descending order.
Filter by Columns
Use the filter option to narrow down a dataset and focus on specific information. The
filtering option appears next to each data column.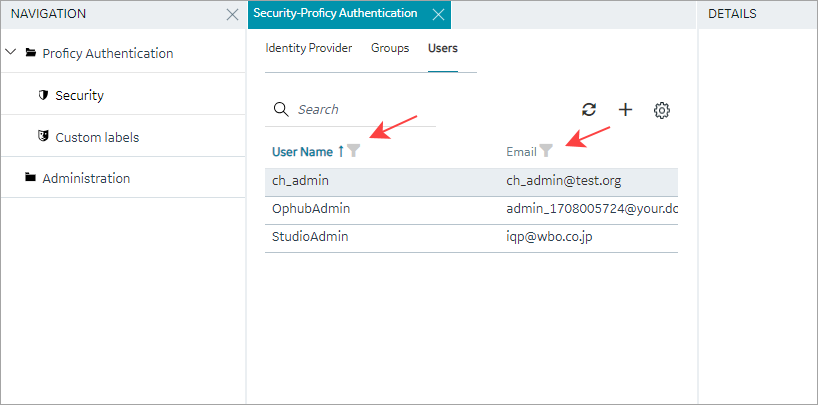
- Select the filter icon for the data you want to filter. A screen appears with a list of existing data in that column.
- Select the check box for the data you want to filter.
To undo filtering, you can Select All.
- Select OK to apply.
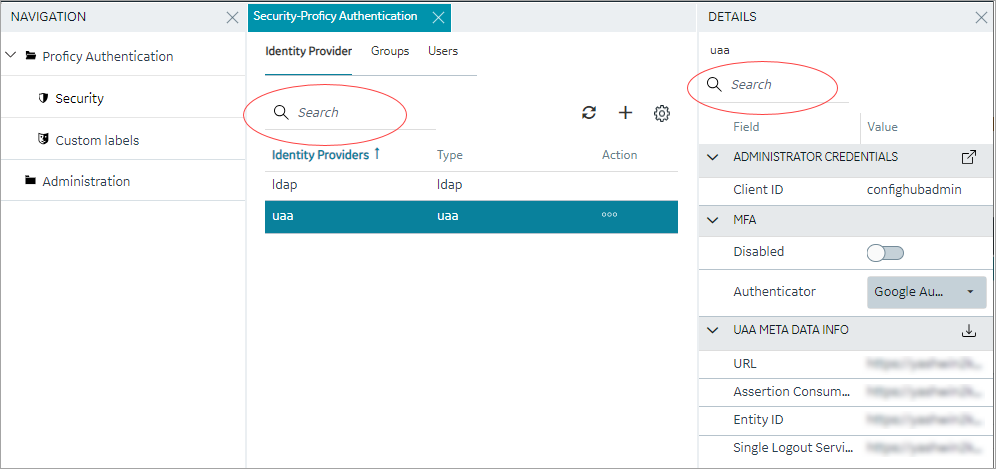
Search with Keywords
Use the search option to search within a dataset using keywords or specific terms
that match with the existing accounts in Proficy Authentication. You can also filter
account details using search keywords.