
 Proficy Historian for Cloud
Migrate Data Using an AWS Transfer Family
Before you begin
About this task
Procedure
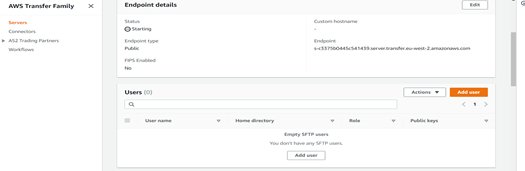
- Create an SFTP-enabled server.
-
After the server is running (online), you need to add a user. To create a user,
generate an ssh key-pair (using powershell or ubuntu):
For both the private and public key:
ssh-keygen -t rsaTo copy the id_rsa.pub (using the public key):cat ~/.ssh/id_rsa.pub -
Add a user.
- While adding user we need to provide User ID, Group ID, Secondary Group IDs as 999.
-
Specify the Home directory path as: <File system
ID(EFS)>/archiver/archives:
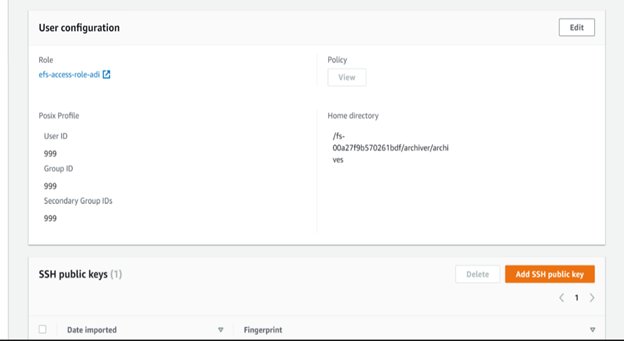
When creating a user, it is required that IAM role with specific permissions be applied.
-
To create an IAM role, from the IAM screen, click
Roles and then Create Role.
The following screen appears.
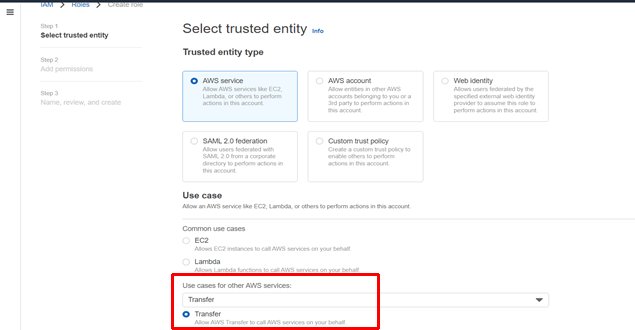
- In the Use Cases for Other AWS Services, select Transfer and then click Next.
-
To create the IMA policy, select Service as EFS,
Actions as ClientMount and ClientWrite,
Resources as All Resources, and leave the rest of the
settings with the defaults.
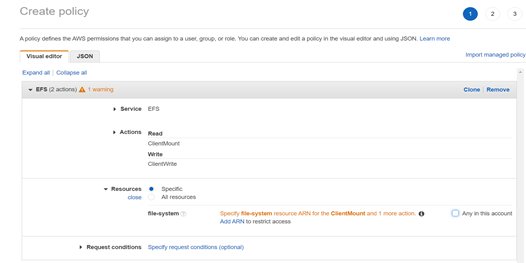
The IMA role and policy is created:

- Provide the home directory and the VPC and public key using an application.
-
To transfer data we can use an application like sftp or WinSCP.
Using sftp:
- Login to the sftp to the
server.
sftp -i <pravate_key_along with path> <name of the user created>@<endpoint generated in transfer family> - After you successfully login, transfer the file using the put
command:
put <source file> <destination file>
Using WinSCP:- Open WinSCP.
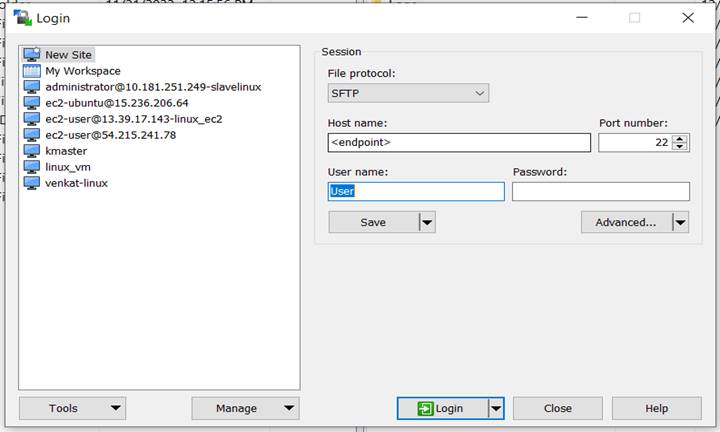
- In the Host Name field, enter the hostname as Endpoint.
- In the User Name field, enter the User from the AWS transfer family server.
- Click Advance to add the private key.
- Under Authentication, add the private key that
you generated using ssh key-pair and click OK.

Now WinSCP will be connected with the server and you can transfer files to EFS. - Login to the sftp to the
server.
-
While connected to EFS, go to the historian/archiver/archives folder and
drag-and-drop the .iha and .ihc files.
Note: Rename the local .ihc file as historian-archiver-sts-0_Config.ihc.
-
Change the mode of operation to reload:
-
Enter the number corresponding to changing the configuration of
Historian Data Archiver. For example, see the following
figure.
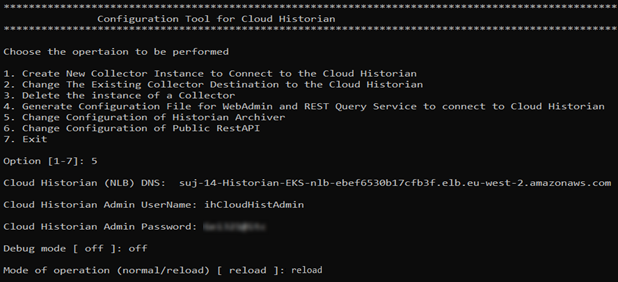
A message appears when the operations completes: "Successfully updated Historian Configuration." The mode of operation is changed to reload. -
Enter the number corresponding to changing the configuration of
Historian Data Archiver. For example, see the following
figure.