The APM Connect installer completes many tasks, including installing Java, installing APM Connect Windows services, and installing the intermediate repository (PostgreSQL).
-
On your APM Connect server, access the APM Connect installation package, navigate the Installer folder, and then open it.
-
Double-click the file APMConnect-Base.exe.
A message appears, asking if you want to allow the installer to make changes to your machine.
- Select Yes.
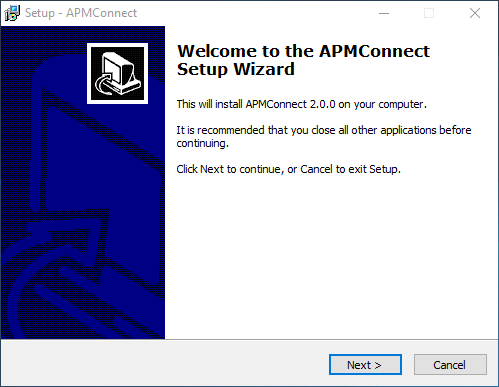
The Setup - APM Connect window appears.
-
Select Next.
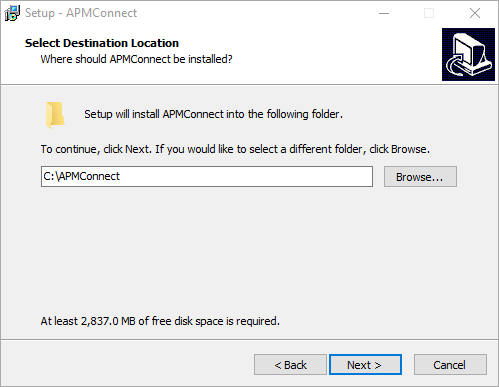
The Select Destination Location screen appears.
-
By default, the APM Connect software will be saved to the following folder: C:\APMConnect. If you are satisfied with the default location where the software will be installed, select Next.
-or-
If you want to change the location where the software will be installed, select Browse..., and then navigate to the location where you want to install the APM Connect software. The folder path that you select will be displayed in place of the default folder path. When you are satisfied with the installation location, select OK, and then select Next.
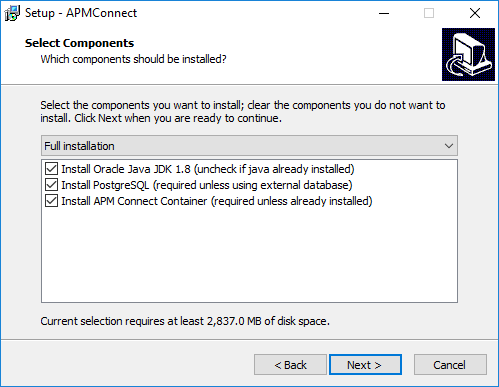
The Select Components screen appears.
-
If you want to install all components, select Next.
-or-
As needed, clear the check boxes based on your APM Connect license and the APM Connect component(s) you are deploying:
- Install PostgreSQL (required unless using external database): If you are using an external database configuration, clear the check box.
- Install APM Connect Container (required unless already installed): If you have previously installed the APM Connect Container, clear the check box.
-
Select Next.
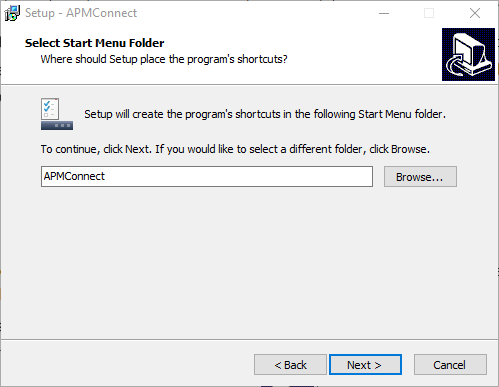
The Select Start Menu Folder screen appears.
-
By default, the Start Menu folder will be saved to the following folder: APMConnect. If you are satisfied with the default location where the software will be installed, select Next.
-or-
If you want to change the location where the folder will be saved, select Browse..., and then navigate to the location where you want to install the APM Connect software. The folder path that you select will be displayed in place of the default folder path. When you are satisfied with the installation location, select OK, and then select Next.
The Select Additional Tasks screen appears.
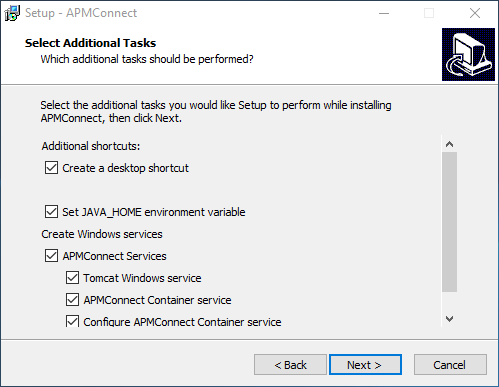
-
If you want to perform all additional tasks, select Next.
-or-
As needed, clear the check boxes based on your APM Connect license and the APM Connect component(s) you are deploying:
- Create a desktop shortcut: If you do not want to create a shortcut on your desktop, clear the box.
- Set JAVA_HOME environment variable: If Java is already installed, and an environment variable does not need to be created, clear the check box.
-
APMConnect Services: If the APM Connect Services do not need to be installed, clear the check box.
- Tomcat Windows service: If the Tomcat Windows service does not need to be created, clear the check box.
- APMConnect Container service: If you don't want to install the APM Connect Container service, clear the check box.
- Configure APMConnect Container service: If you don't want to configure the APM Connect Container service, clear the check box.
-
Install APM Connect Container service SAP JCO driver software: If your source system is SAP, select this check box.
- Select Next.
The Ready to Install screen appears.
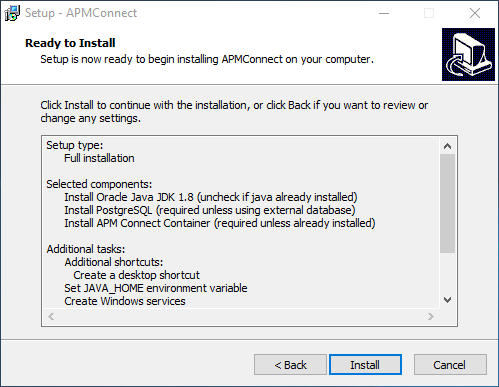
-
Review the items to be installed, and then select Install.
If you selected Install APM Connect Container service SAP JCO driver software on the previous screen, the Select the SAP JCO Driver Location screen appears.

Note: If you did not select Install APM Connect Container service SAP JCO driver software, the Select the Job Location screen appears, and you can proceed to Step 13.
-
In the SAP Bundle box, specify the location of the file sapjco3.jar, which is part of the SAP Java Connector Files (SAP JCO) that you downloaded from the SAP marketplace, and then select Next.
The Select the Job Location screen appears.
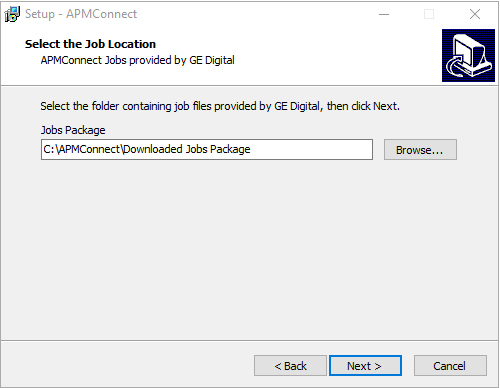
-
By default, the folder containing the job files is specified as C:\APMConnect\Downloaded Jobs Package. If this location is correct, select Next.
-or-
If this location is incorrect, select Browse..., navigate to the location where the jobs package is located, select OK, and then select Next.
Note: The jobs package is not part of the APM Connect Installation package. Instead, you will receive it as a separate artifact (e.g., download from a designated ftp site).
The Select the APMConnect License file screen appears.
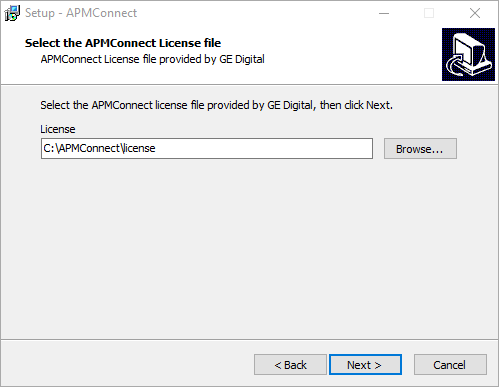
-
By default, the folder specified is C:\APMConnect\license. If this location is correct, select Next.
-or-
If this location is incorrect, select Browse..., navigate to the location where the license file is located, select OK, and then select Next.
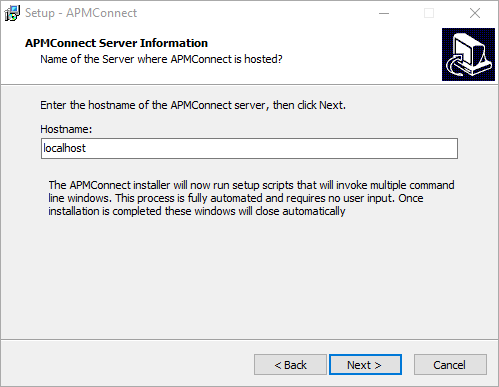
The APMConnect Server Information screen appears.
-
In the Hostname box, enter the name of you APM Connect server, and then select Next.
The Installing screen appears, displaying an installation progress bar.
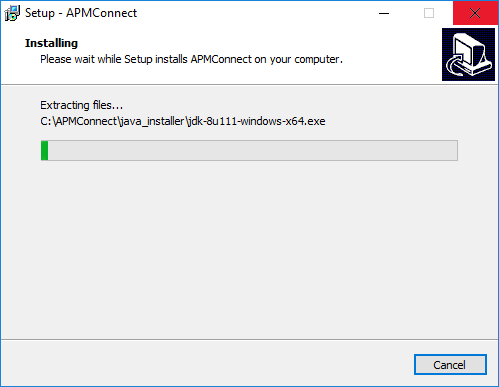
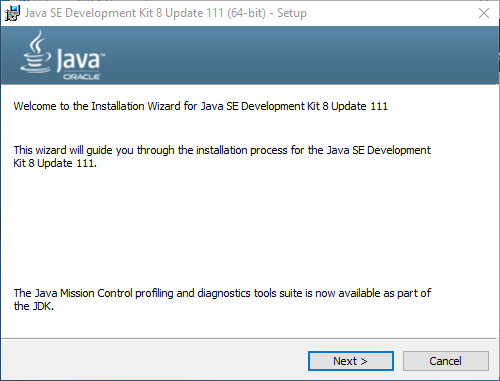
Once the progress bar indicates that the APM Connect installer is Finishing installation..., Java SE Development Kit <JAVA_VERSION_NUMBER> - Setup window appears.
-
Select Next.
The Select optional features to install screen appears.
-
Select Next.
The Java installation progress bar appears. Once the progress bar indicates that the process is complete, the Destination Folder screen appears.
-
Select Next to install Java in the default location.
IMPORTANT: These instructions assume that Java is installed in the default location.
The progress bar reappears. After the progress bar indicates that the installation is complete, the Successfully Installed Java SE Development Kit <JAVA_VERSION_NUMBER> screen appears.
-
Select Close.
Java is installed.
A command prompt appears, prompting you to press any key to continue.
Hint: If an error appears on the command prompt window, refer to creating Java environment variables.
-
Press any key.
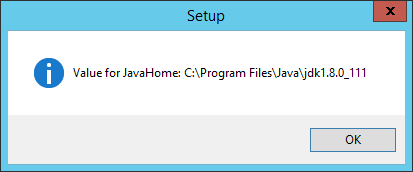
The command prompt window closes, then the Installing screen reappears briefly, and then the Setup dialog box appears, displaying the JavaHome path.
-
Select OK.
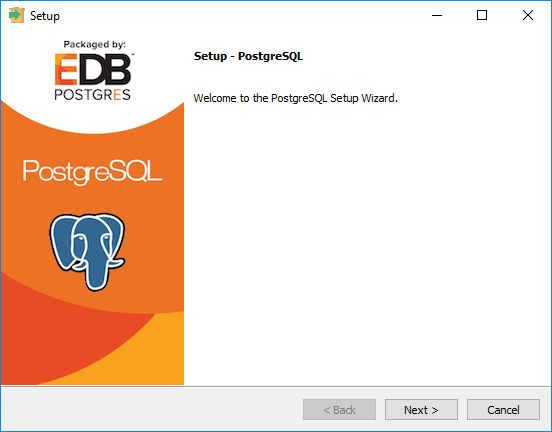
The Setup - PostgreSQL screen appears.
-
Select Next.
The Installation Directory screen appears, prompting you to select the location where PostgreSQL for APM Connect will be installed.
- By default, PostgreSQL will be saved to the following folder: C:\Program Files\PostgreSQL\9.6. If you are satisfied with the default location, select Next.
-or-
If you want to change the location where the software will be installed, select the  button, then navigate to the location where you want to install PostgreSQL for APM Connect, and then select Next.
The Data Directory screen appears.
-
Select Next.
The Password screen appears.
-
In the Password box, and in the Retype password box, enter a password.
Hint: This password will be used as a service account for PostgreSQL, and is needed in later configuration. Be sure to record it. Additionally, this documentation assumes admin as the password, and uses it in subsequent default configurations.
-
Select Next.
The Port screen appears.
-
If you are satisfied with the default port, select Next.
Hint: The port number is needed in later configuration. Be sure to record it. Additionally, these instructions and all subsequent instructions assume that the default port 5432 is used.
-or-
In the Port box, enter the port on which you prefer the server to listen, and then select Next.
The Advanced Options screen appears.
-
Select Next.
The Ready to Install screen appears.
-
Select Next.
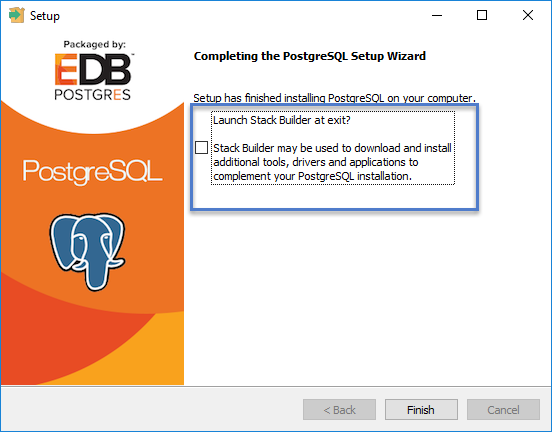
The Installing screen appears, displaying an installation progress bar. After the installation bar indicates that the installation is complete, the Completing the PostgreSQL Setup Wizard screen appears.
-
Clear the Stack Builder may be used to download and install additional tools, drivers and applications to complement your PostgreSQL installation check box.
-
Select Finish.
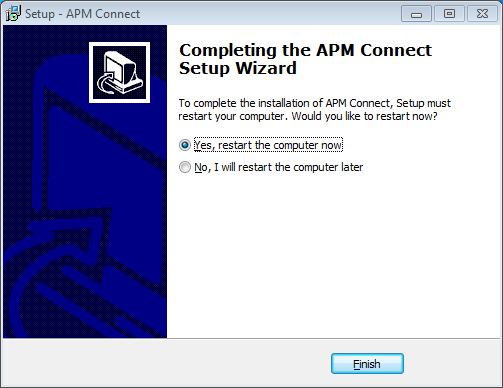
PostgreSQL server is installed, then the Installing screen reappears briefly, and then Completing the APM Connect Setup Wizard appears.
Note: If you have selected the installation of APM Connect Container service or the SAPJCO driver software , the Administrator: Windows Power Shell and Administrator: Karaf windows appear. Installation progress may not be visible on the screen for 2-3 minutes. During this time, do not press any key or close the windows.
The Yes, restart the computer now check box should be selected.
-
Select Finish.
The APM Connect installer has completed its operations, and the machine should restart automatically.
- If it does not do so automatically, restart your machine.