
Deploy the Web Admin Console by Launching from Website
Before you begin
About this task
This topic describes how to deploy the Web Admin console using an Amazon Machine Image (AMI) by launching from a website. You can also deploy it by launching through EC2.
When you deploy the AMI, you will create a key pair (or use an existing one), which will be used later to connect the Web Admin console with the Historian server.
Procedure
- Log in to the AWS marketplace.
-
Search for Proficy Historian.
A list of products in Proficy Historian appears.
-
Select WebAdmin and Rest API for Proficy
Historian.
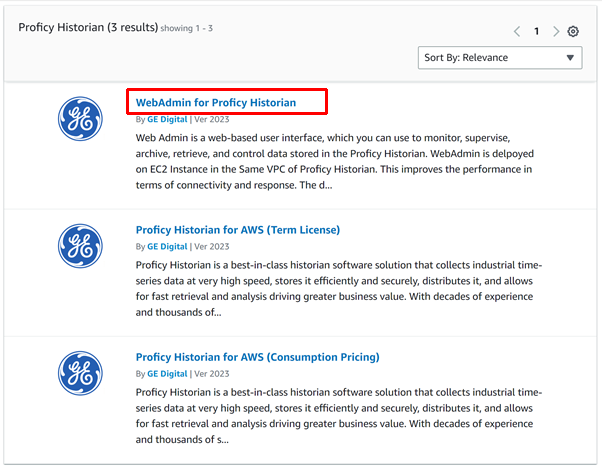 The product overview and other details appear.
 -
Select Continue to Subscribe.
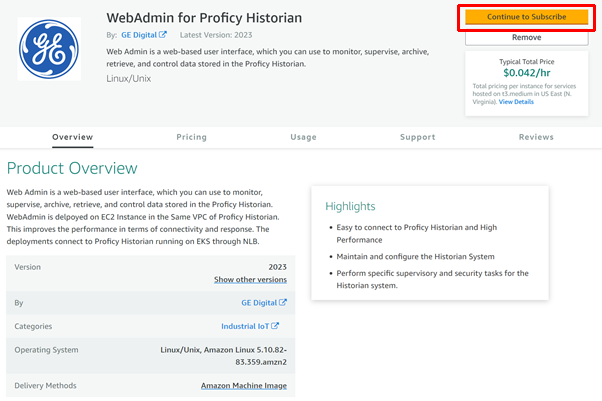 Your request for subscription is processed.
 -
Select Continue to Configuration.
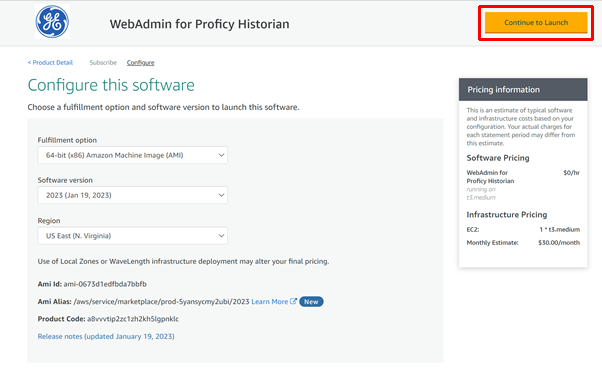
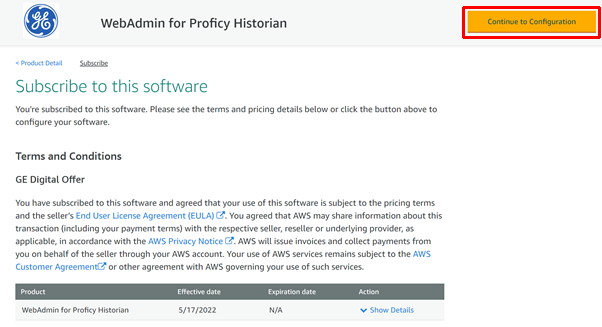 The Configure this Software page appears.
 -
Enter values as described in the following table.
Field Description Fulfilment option Select 64-bit (x86) Amazon Machine Image (AMI). Software version Select 2023. Region Select the region on which you want to deploy the Web Admin console. For optimum performance, we recommend that you use the same region as the one on which you have deployed Proficy Historian for AWS. -
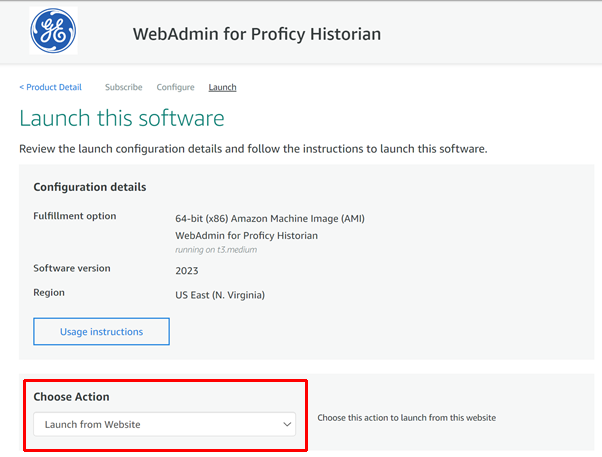
Select Continue to Launch.
 The Launch this software page appears.
 -
In the Choose Action field, select Launch
from Website, and then select
Launch.
-
Enter values as described in the following table.
Field Description EC2 Instance type Select the instance type for the Web Admin console. Choose the type based on your data consumption. We recommend a minimum configuration of t3.medium. VPC Settings Select the VPC on which you want to deploy the Web Admin console. Subnet Settings Select the public subnet of the VPC on which you have deployed Proficy Historian for AWS. If you have used the default VPC, you need not provide the subnet details. -
Under Security Group Settings, select Create
New Based on Seller Settings.

-
Enter a name and description for the security group. In the Source
(IP or Group) column, leave the default value (Anywhere) as is
for now. You will change these values later.
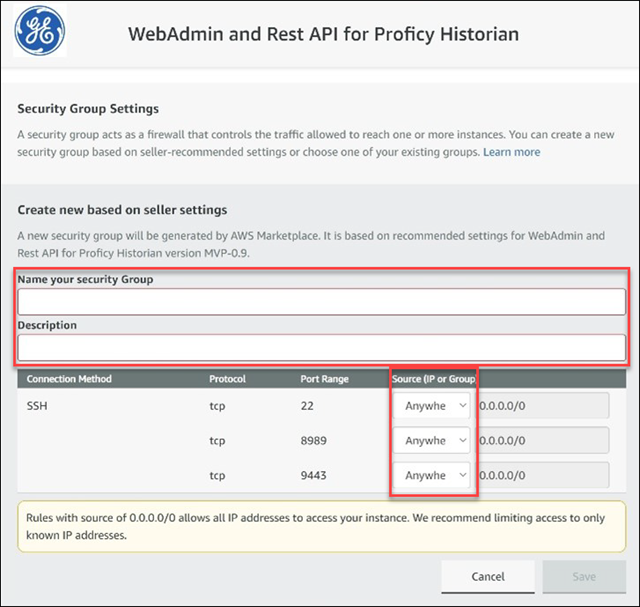
- Select Save.
- Under Key Pair Settings, select a key pair of the type RSA and format .pem. If you do not have a key pair, you can create it.
-
Under Inbound security groups rules, enter the following
values for security group rules 1 and 2 respectively:
Type Protocol Port Range Source type SSH TCP 22 Select Custom, and enter the public IP address of the machine or network from which you want to access the Web Admin console Provide a static IP address, or use the CIDR notation (for example, <IP address>/16). Custom TCP Rule TCP 9443 Select Custom, and enter the public IP address of the machine or network from which you want to access the Web Admin console. Provide a static IP address, or use the CIDR notation (for example, <IP address>/16). Or, if you want to access the Web Admin console only from your local machine, select My IP.
-
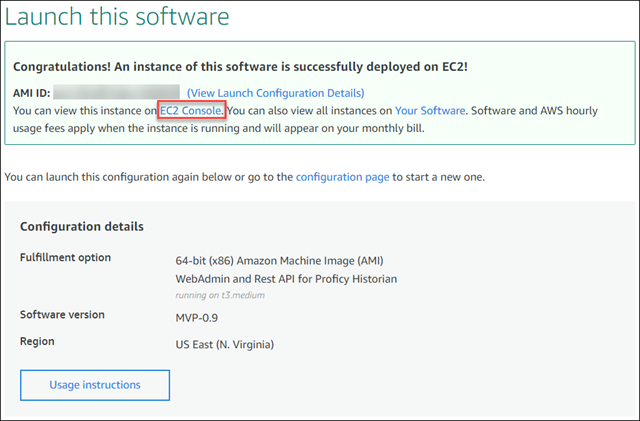
Select Launch.
The Web Admin console is deployed.
What to do next
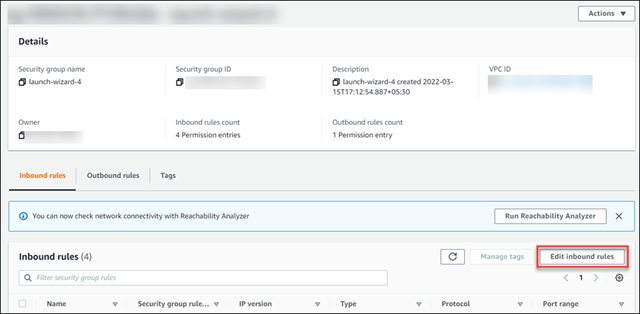
- Edit the inbound security rules:
- In the success message that appears at the top of the page, select
EC2 Console.
- In the list of instances that appears, select the one on which you have deployed the Web Admin console.
- Select Security, and then select the security
group.
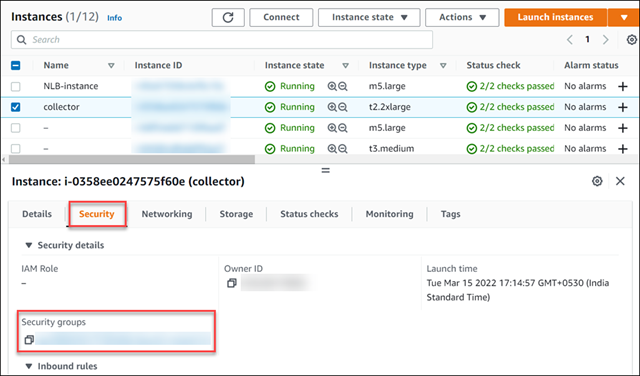
- Under Inbound rules, select Edit inbound
rules.
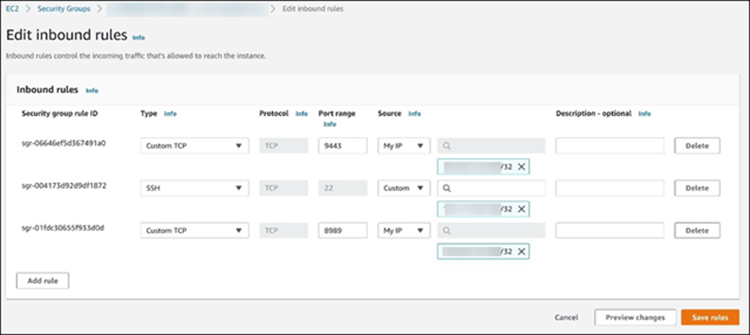
- Edit the security groups as follows, and then select Save
rules:
Type Protocol Port Range Source type SSH TCP 22 Select Custom, and enter the public IP address of the machine or network from which you want to access the Web Admin console. Provide a static IP address, or use the CIDR notation (for example, <IP address>/16). Custom TCP Rule TCP 9443 Select Custom, and enter the public IP address of the machine or network from which you want to access the Web Admin console. Provide a static IP address, or use the CIDR notation (for example, <IP address>/16). Or, if you want to access the Web Admin console only from your local machine, select My IP.
- In the success message that appears at the top of the page, select
EC2 Console.
- Connect the Web Admin console with Proficy Historian for AWS.